![]() Estimating Edge’s team of experienced construction professionals and software engineers have developed the industry’s smartest takeoff and estimating software solutions for competitive estimates.
Estimating Edge’s team of experienced construction professionals and software engineers have developed the industry’s smartest takeoff and estimating software solutions for competitive estimates.
Don’t just estimate faster. Estimate better.®
- /
- /
- /
- /
How to use the Background Image Manager
This video covers the bid image manager in v12.
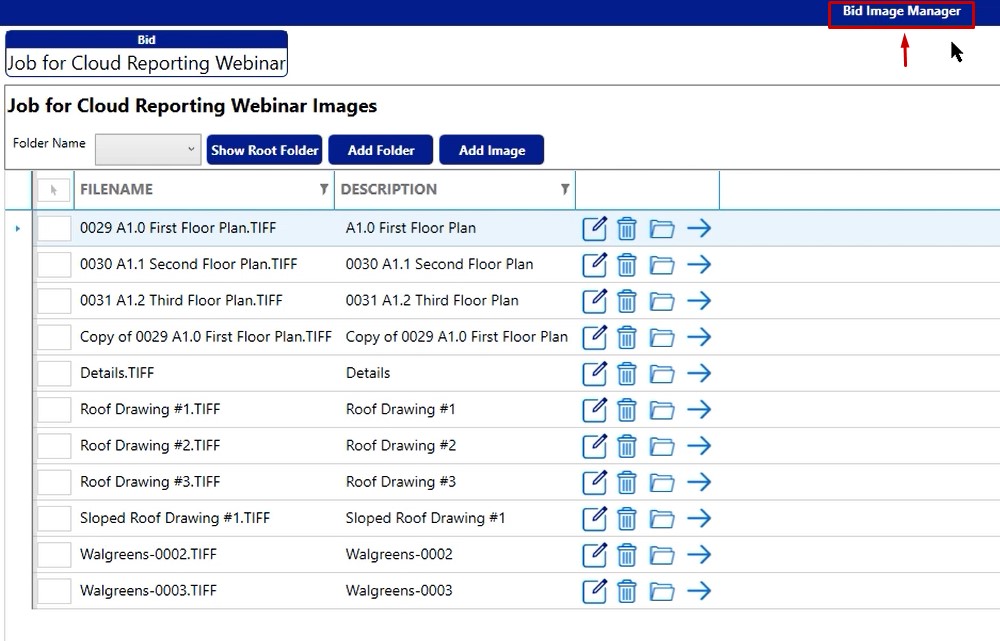
Manage Images
You can access the bid image manager from the scenarios, the sections or the pages breadcrumb.
Click on the manage images icon
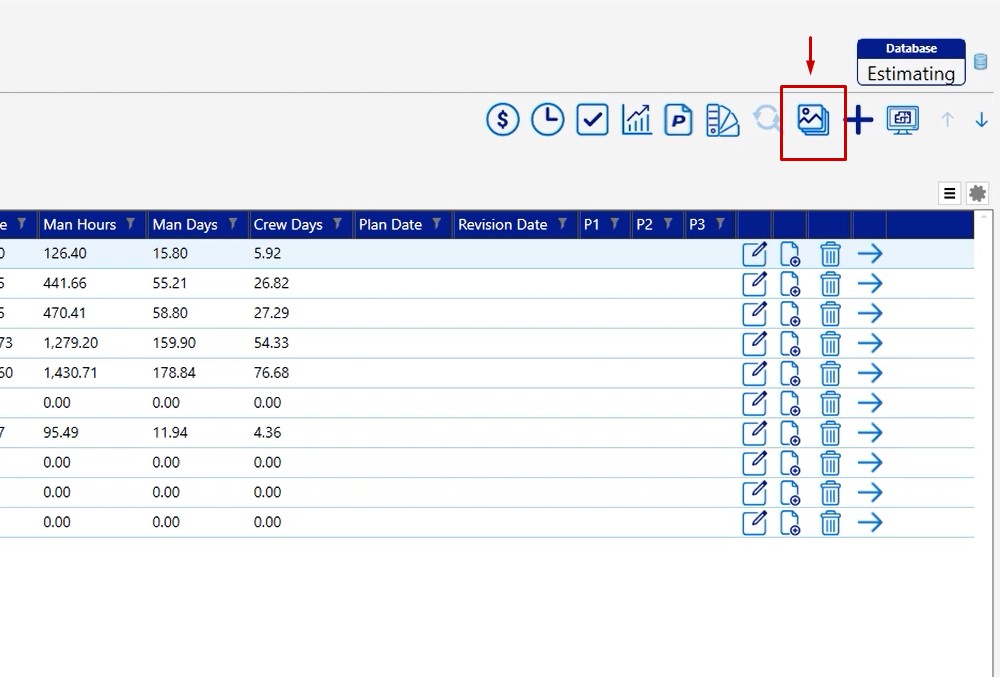
The bid images manager window opens to the home screen
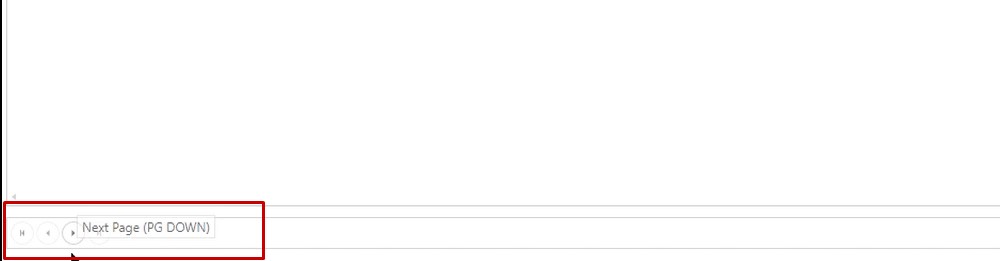
On the home screen, as you start to build a list of images, you will hit a page maximum. To thumb through the pages, there are arrows at the bottom, left-hand corner of the window.
Add Folder
Also on this screen, you have the capability to create a folder.
To add a folder and assign images to that folder:
- Click the add folder button

- Type in a name
- Add a description
- Click save
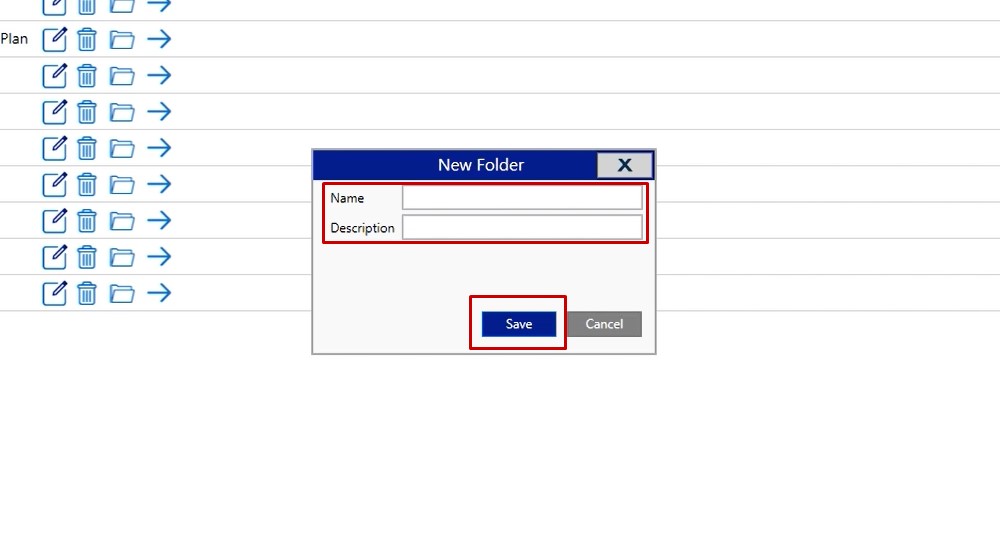
Once you click save, that folder will be available for you to assign images to.
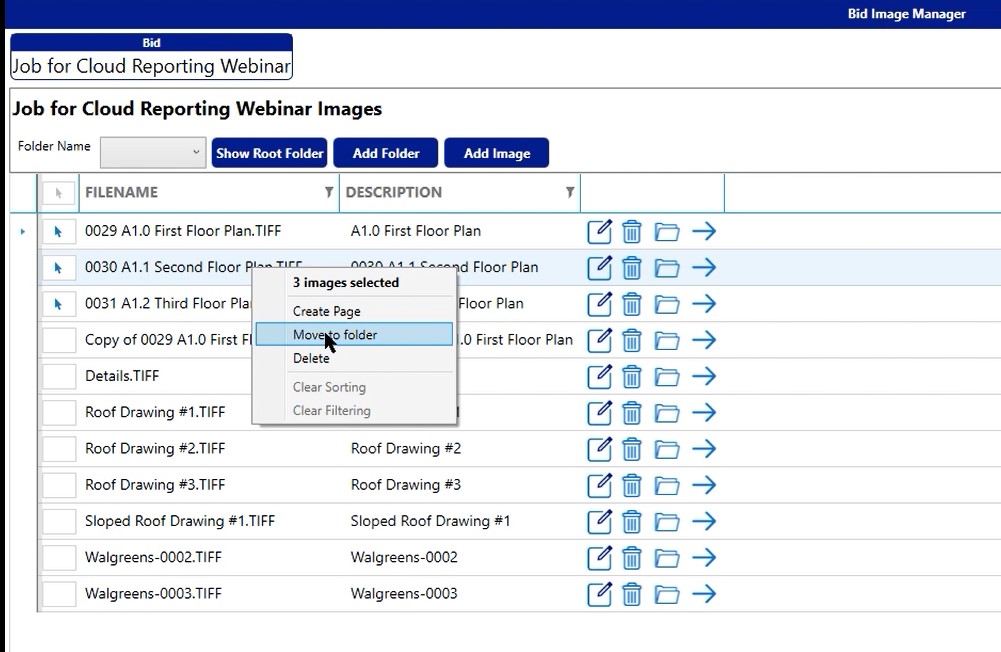
Move to Folder
To assign the images:
- Click inside the white box next to each image
- Right click on the mouse
- Select Move to folder
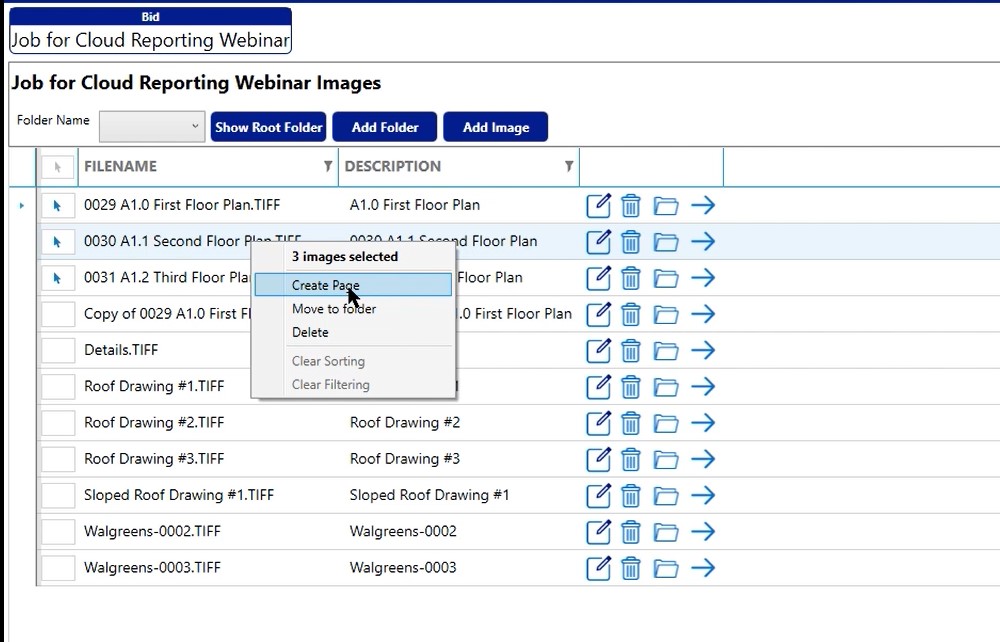
Create Page
You’ll also notice that there’s a create page option here. This is going to allow you to create a page out of all three of these images simultaneously.
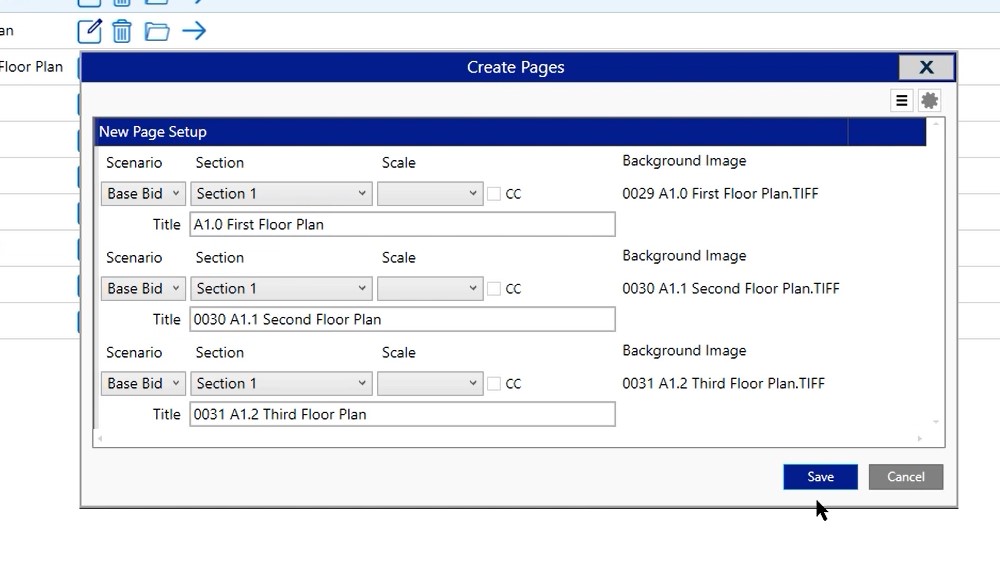
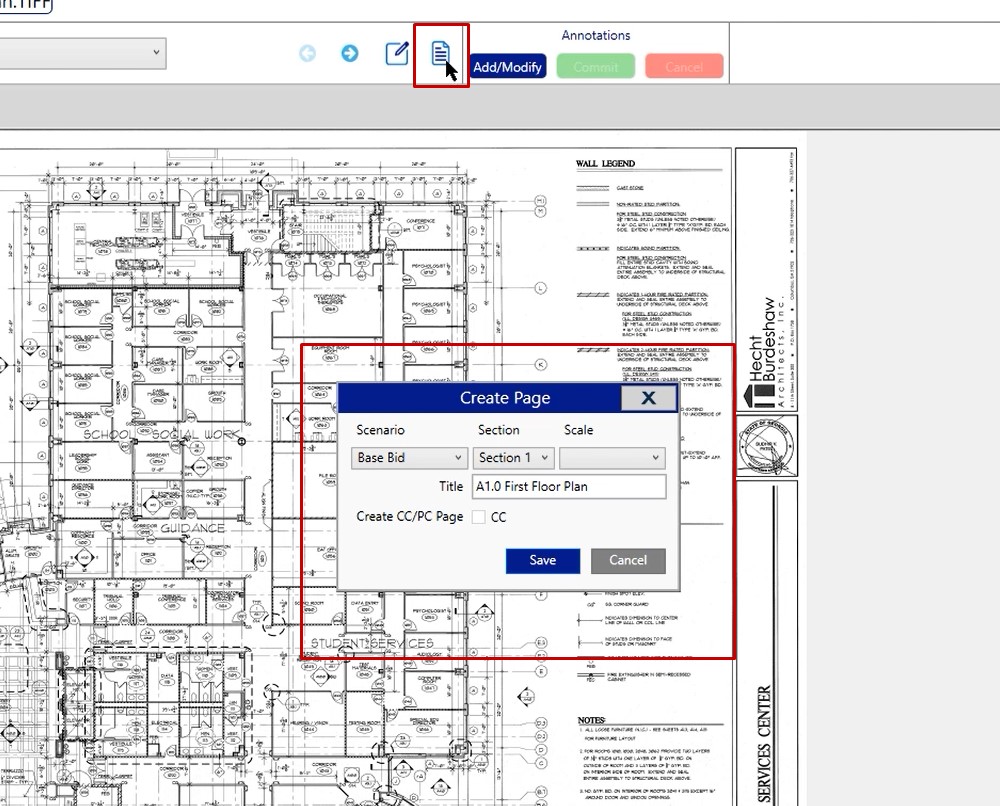
Once you click the create page option, you’ll be presented with a dialog box. You are allowed to change the scenario and the section and if you would like, you can also put in a scaling. Although we do recommend that you calculate the scale based off of a known dimension on a background image. You also have the capability to change the page name. Once you are finished making those modifications, click Save.
These images will now be created as pages inside of your project that you can go do take off on.
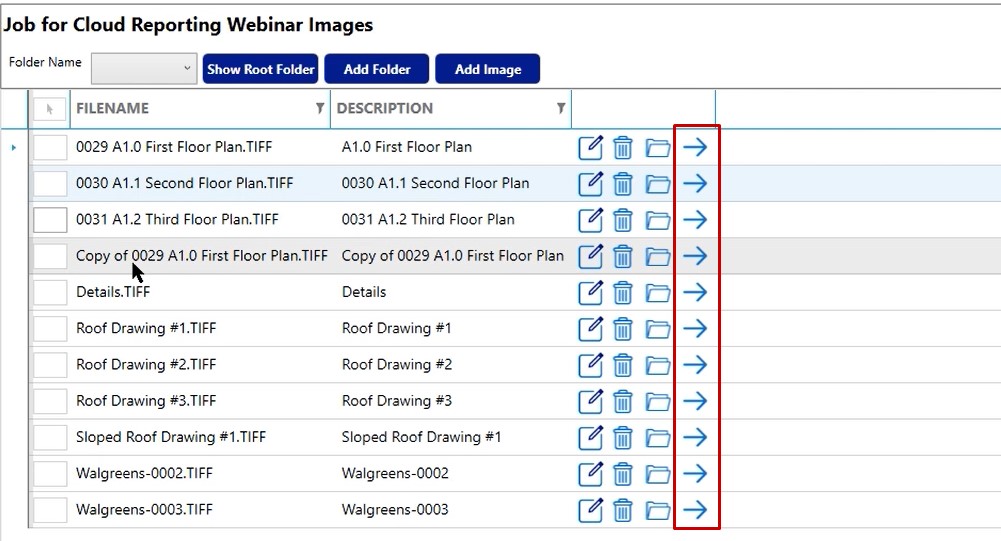
PDF Viewer
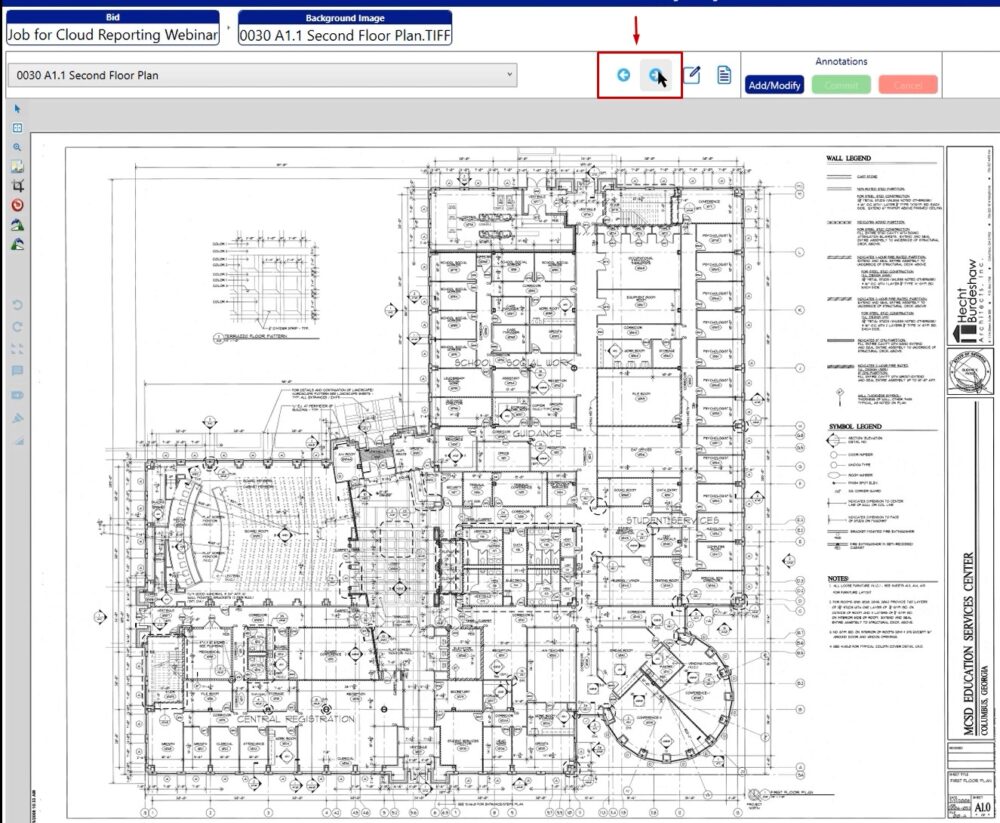
By clicking the arrow button on the right side of any page, you will be taken into that image and give you another view.
View Images Buttons
In this view there are a couple of options. At the top of the window are arrows (view images buttons). These arrows allow you to thumb through the images that you have loaded into your project.
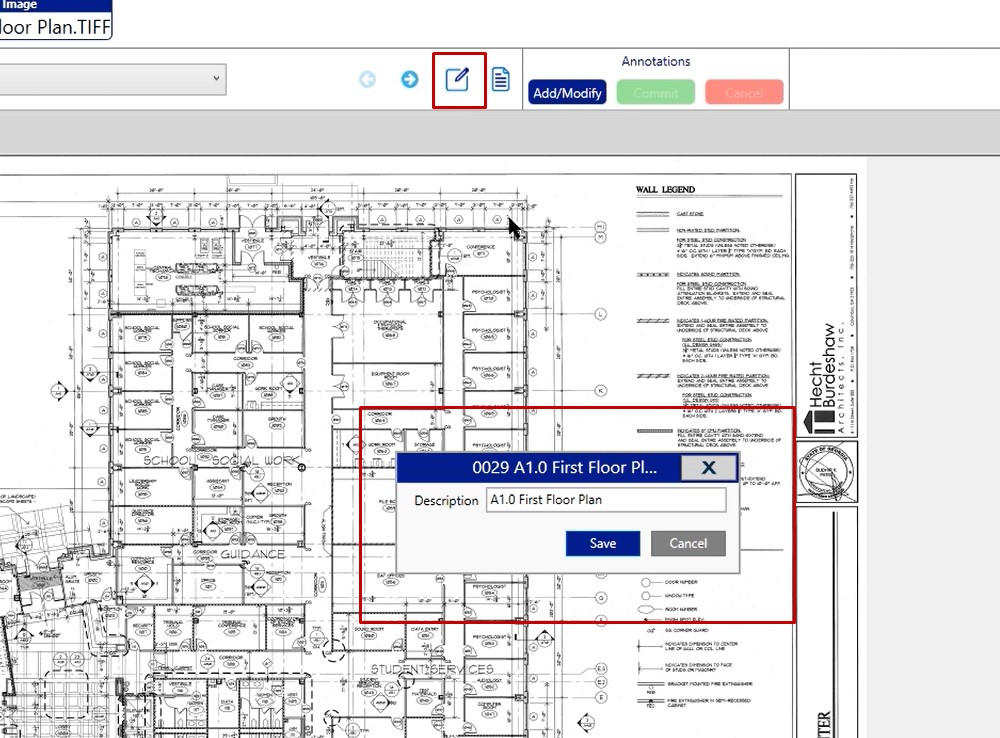
Edit Button
The edit button allows you to change the description of this image itself.
Create Page Icon
You also have another icon, which is the create a page icon. This is going to allow you to take one image and create it as a page inside of your project. This way you can go do take off it.
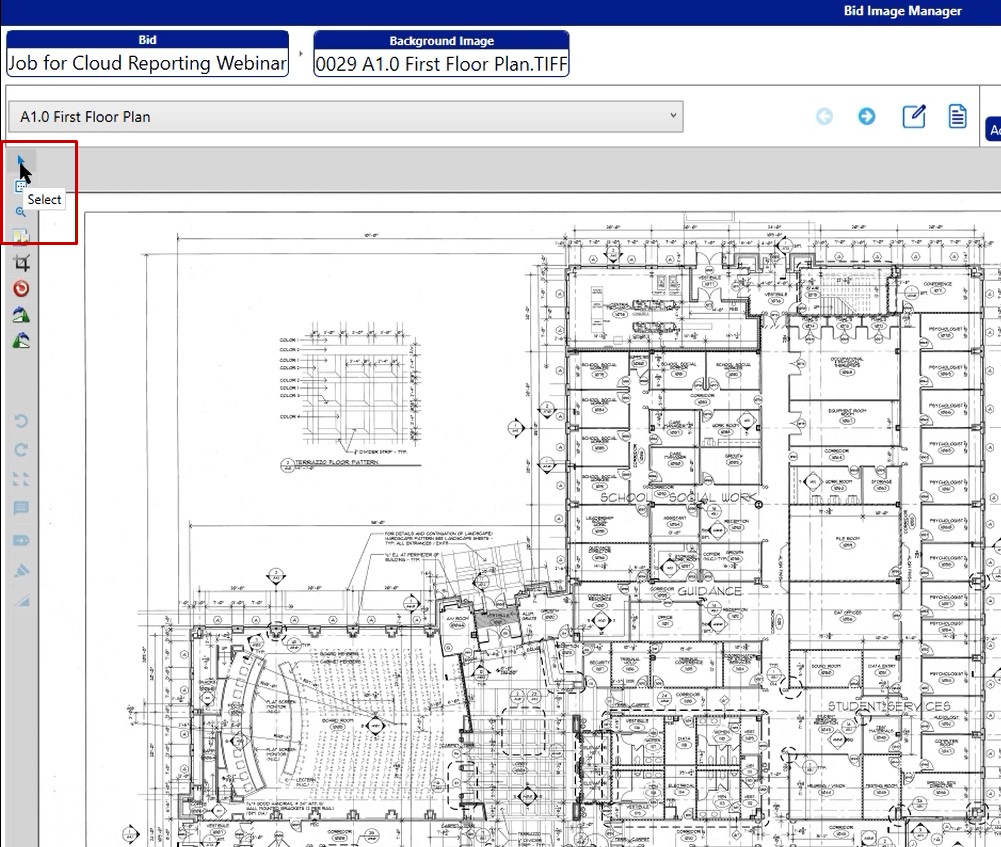
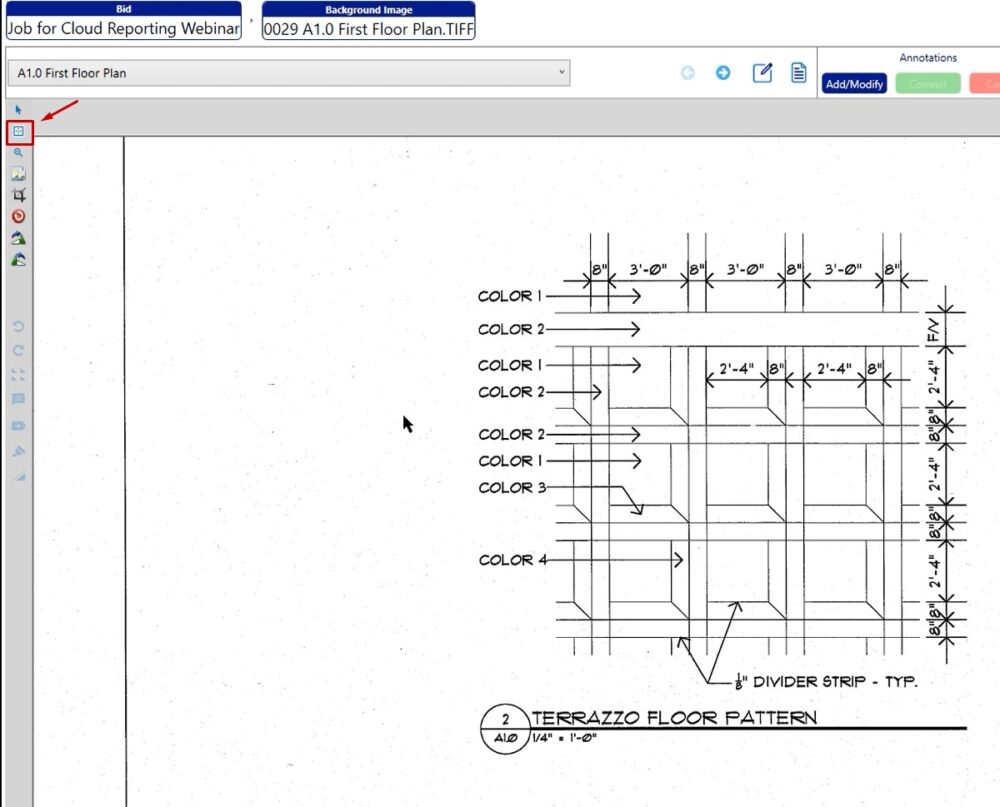
Select Button
On the left hand side, you have the select button that allows you to select and zoom in and out. It would also take you out of a draw mode if you went into draw mode.
Zoom to Fit Screen & Zoom to Select Area
Zoom to fit screen will zoom you all the way out to fit the entire image in the screen. Zoom to a select area will zoom you in on a specific area that you select by clicking and dragging.
Zoom In & Out with Mouse Wheel
You also have the ability to use the mouse wheel so you can just scroll towards your body to zoom out, and scroll away from your body to zoom in with the mouse wheel. (see video)
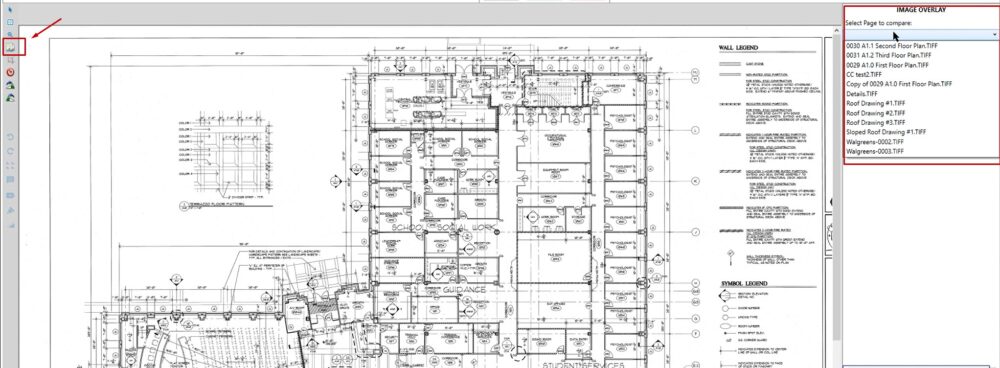
Overlay/Compare
Overlay/Compare would be used if you had two images that you wanted to overlay.
To overlay images:
- Click on the overlay tool
- Click the dropdown
- Select your image
- Click Compare
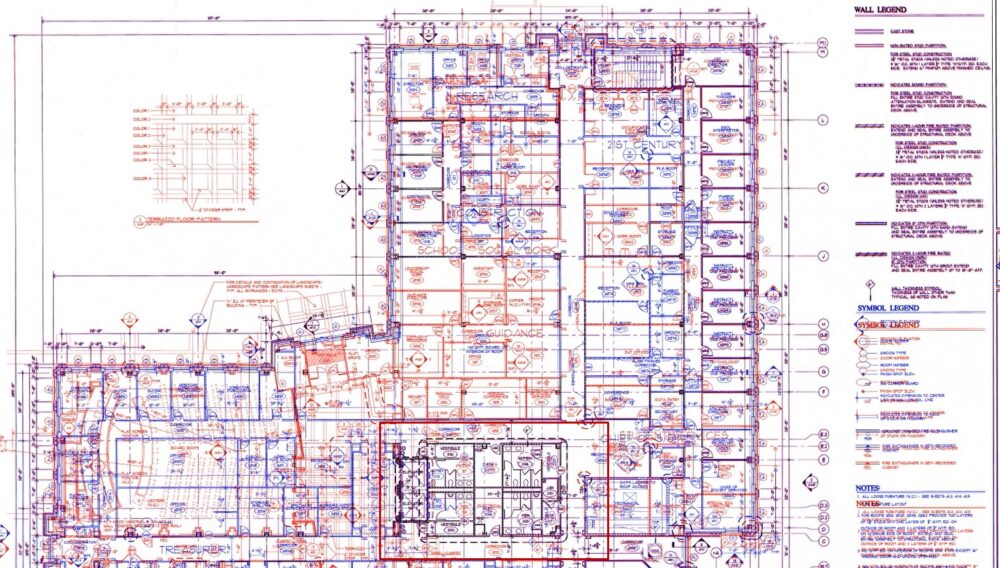
Once you click compare you will be presented with two different colored sets of floorplans. The original floorplan is displayed in red, and the new floorplan, the one that you’re overlaying the original with, is displayed in blue.
You’ll notice that we have some areas that highlight in black. Those are perfectly overlaid, and there’s no change there.
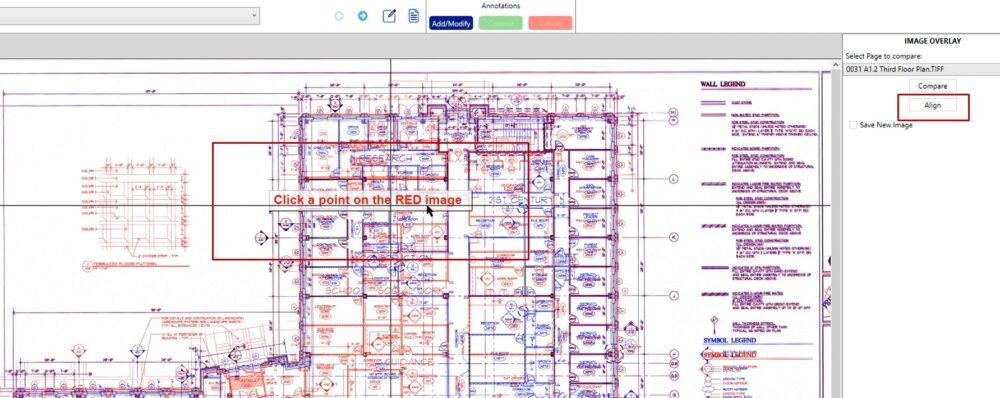
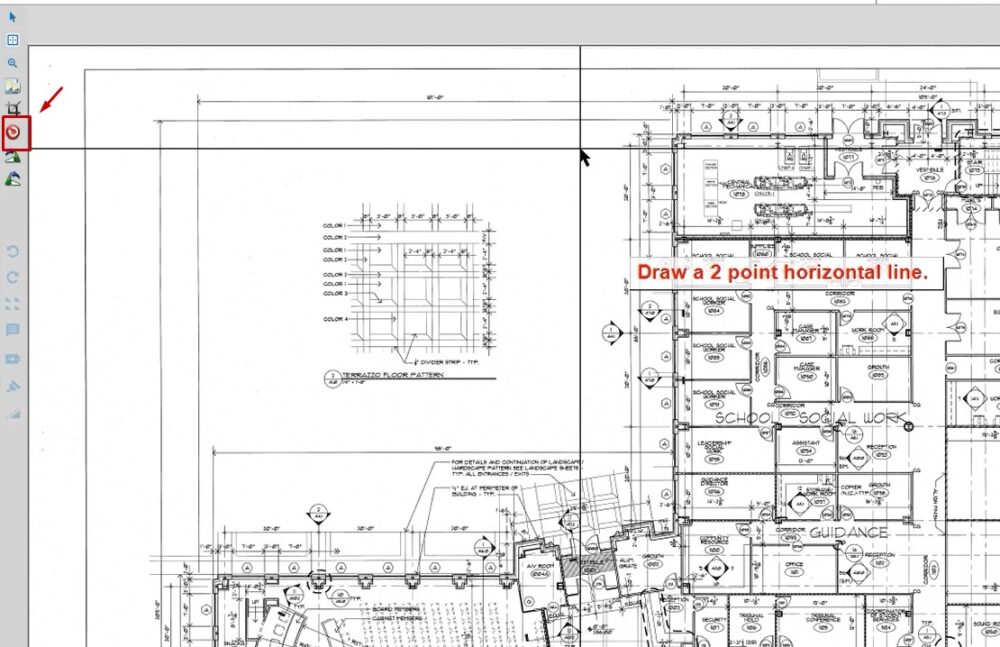
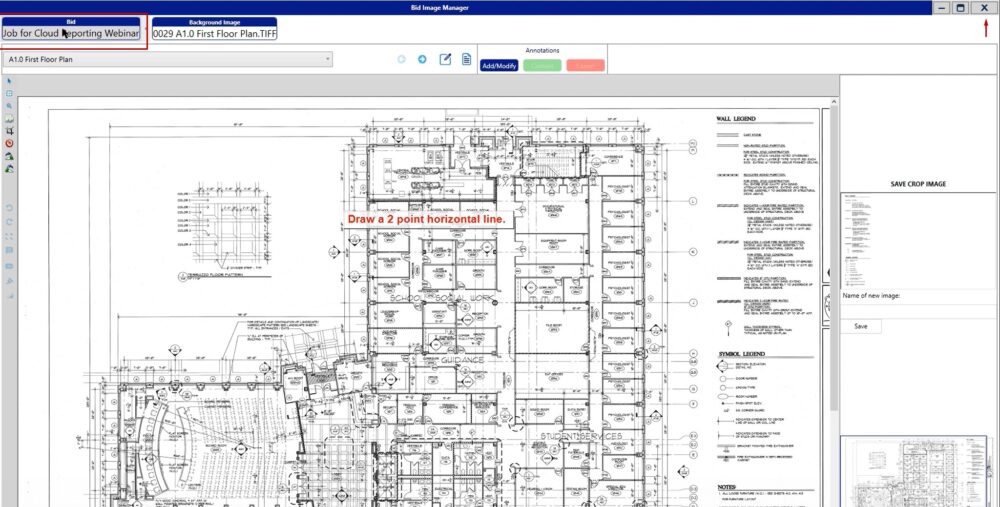
Align Tool
If for any reason, the two images that you overlaid were not perfectly aligned, you do have the capability to align them. On the right hand side, click the align tool and then follow the onscreen commands.
Once you follow the on onscreen commands, it will allow you to realign those images.
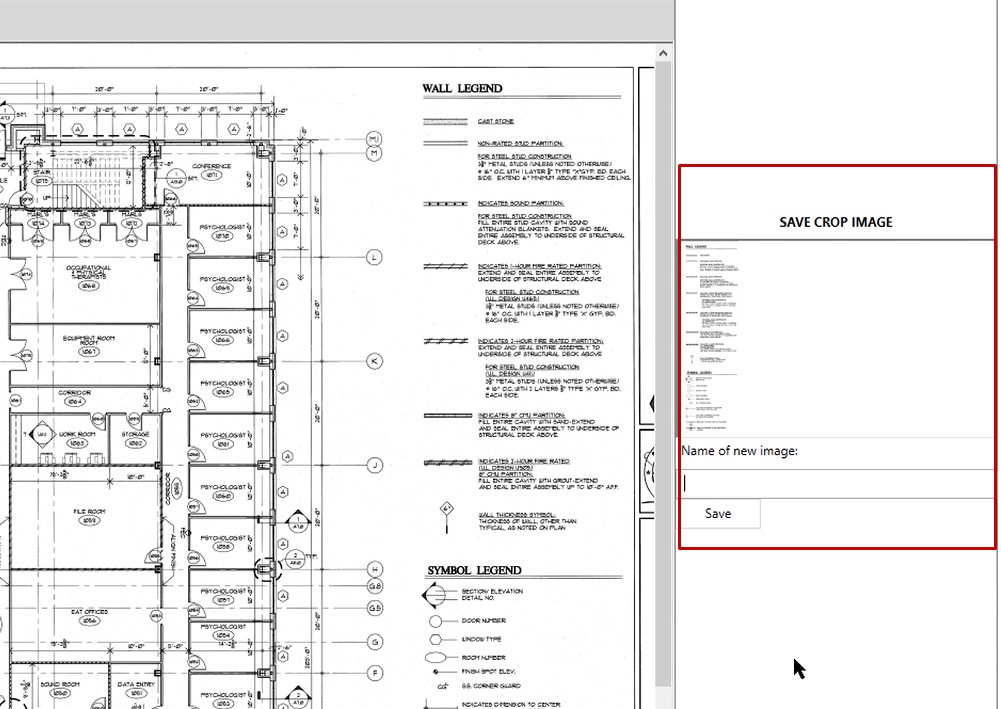
Cropping Tool
The cropping tool allows you to crop the image. In this example, if I wanted to crop these details out, we can click the crop tool. Left click on the points to select your crop section. (see video)

Then, if you wanted to, you could save that as a new image by typing the image name in and clicking save.
Rotate
And you also have a rotate clockwise and rotate counterclockwise. If you have an image that was not upright and you wanted it to be upright, you could use the rotate clockwise or counterclockwise to allow you to get that image in the format that you would like to see it.
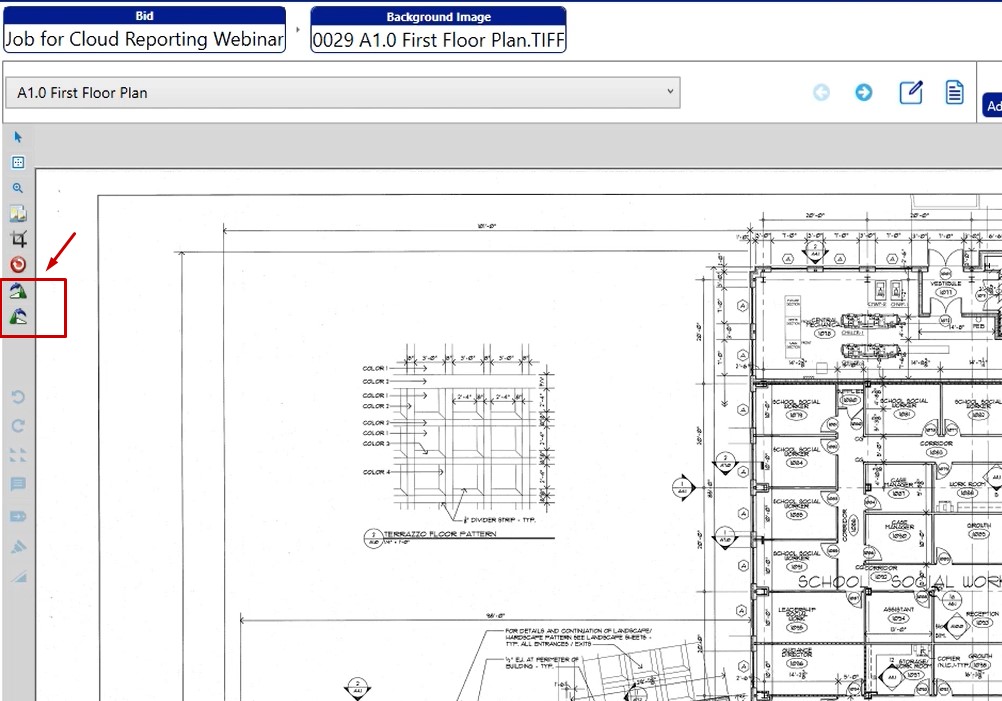
Deskew
If you took a satellite image, Google Earth image, drone image, etc, and the image wasn’t perfectly aligned, you can fix that with the deskew tool. To make these changes, follow the steps in the video that guide you in selecting where you would like to make the changes.
Once you complete those steps, it will straighten the image for you and it will be ready to use in take off.
Exiting the Bid Image Manager
To leave the bid image manager, there are a couple of different ways. The easiest way is to click on the exit button (X) in the upper, right-hand corner.
You can also click bid name and close out from this main window just by clicking the exit button.
Note: The bid image manager is a separate window, so if you’re working in multiple monitors, you can grab that there at the top, drag that to a separate monitor and have that open at all times. (see video)
If you would like to if you have any additional questions or if you’re working in the image manager and you run into any issues, please feel free to reach out to our tech team. They’d be happy to assist you in any way they can.