![]() Estimating Edge’s team of experienced construction professionals and software engineers have developed the industry’s smartest takeoff and estimating software solutions for competitive estimates.
Estimating Edge’s team of experienced construction professionals and software engineers have developed the industry’s smartest takeoff and estimating software solutions for competitive estimates.
Don’t just estimate faster. Estimate better.®
- /
- /
- /
Setting up Digimouse in The EDGE (Version 10 and above)
- Go to Drawing screen. (You must be in the drawing screen to set the digimouse area)
- Verify that digitizer is digitizing points. Press Enter to close the measuring.
- While on drawing screen, click Tools | User Options | Digitizer
- Click the “Set Digitizer Mouse Area” button. Digitize the Upper Left corner of the digimouse menu area. (You should see coordinates appear)
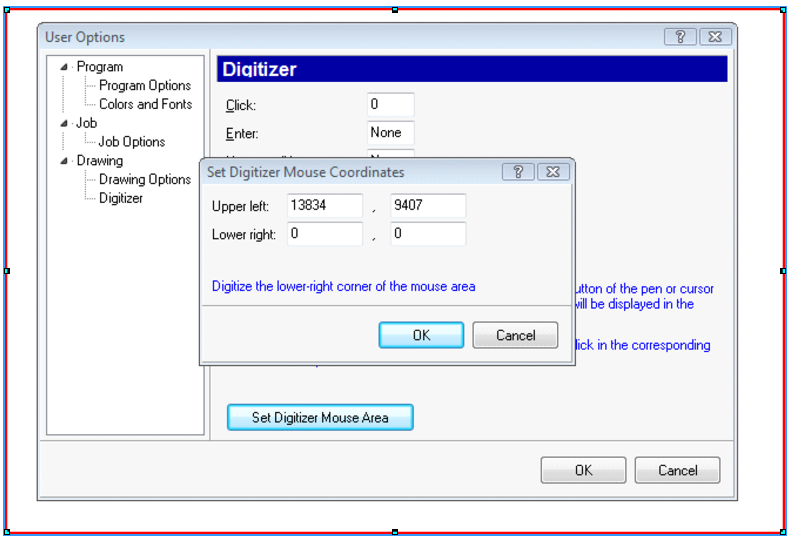
Hint: When digitizing digimouse corners, make sure the coordinates you intend to pick are in the active area of the digitizer.
- Digitize the Lower Right corner of the digimouse menu area. The coordinates box will disappear
- Click OK.
- Close out of The EDGE (you must do this for the next step).
- Open Tabletworks Control Panel. Along with our default settings, you need to also check the “Mouse” box.
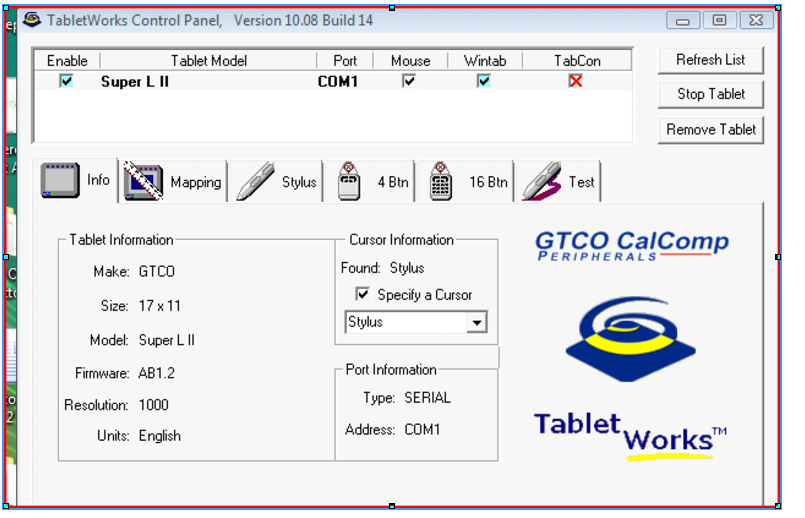
- Click the “Mapping” tab. It normally looks like this
- Click “Apply” and “OK’.
- You should now be able to go back into The EDGE. When the pen is in the digimouse area, it will act like a mouse.
- When it is not, it will act like a digitizer.
Troubleshooting:
Problem – How do I Clear out the Digimouse Coordinates?
Solution – When on the “Set Digitizer Mouse Area” screen, clear out any current settings by mousing to each coordinate and blanking out. This will result in the 4 coordinates with Zero in them
Click OK. Then click the “Set Digitizer Mouse Area” button again. Coordinates are now zero.
Problem – The pen acts like a mouse over the entire digitizer board, but not just in the mouse area.
Solution – You probably have not set the mapping properly. Redo the mapping tab instructions.