![]() Estimating Edge’s team of experienced construction professionals and software engineers have developed the industry’s smartest takeoff and estimating software solutions for competitive estimates.
Estimating Edge’s team of experienced construction professionals and software engineers have developed the industry’s smartest takeoff and estimating software solutions for competitive estimates.
Don’t just estimate faster. Estimate better.®
- /
- /
- /
- /
Roofing Tapered Module Condition Properties – All Tabs
This video covers the tapered condition modules condition properties in v12.
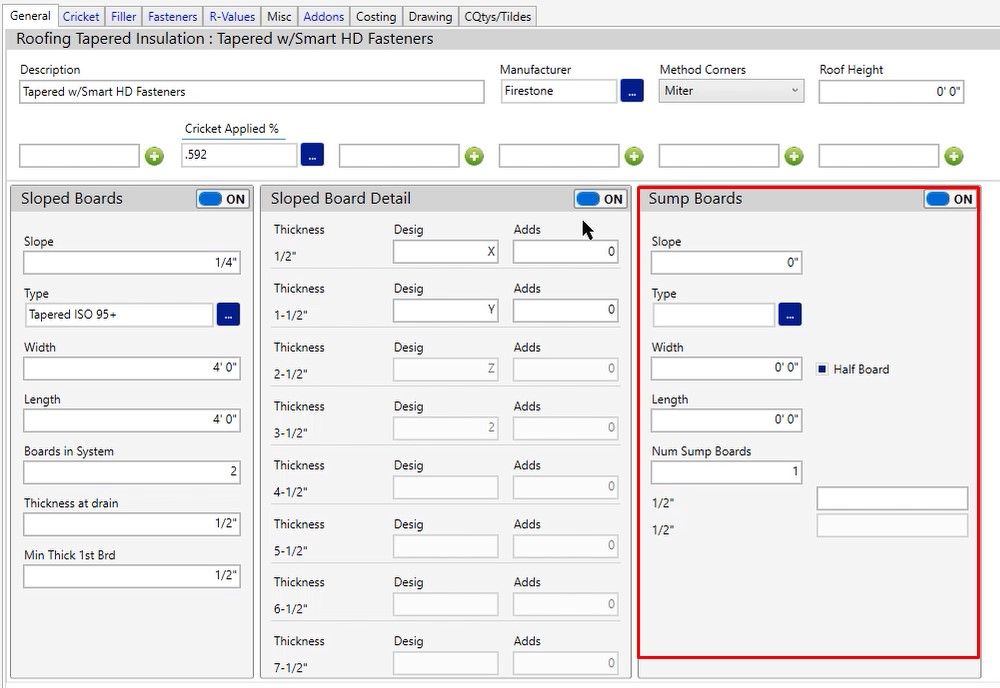
General Tab
- Description – You can fill this out to be whatever you would like
- Manufacturer – This is going to be applied to your sloped boards or your general tab boards. This would be for a fully tapered system.
- Method Corners – The method for your corners so you can choose whether you’re going to miter these in the field, whether you’re going to buy them precut or if you’re going to stagger the corners rather than mitering them.
- Roof Height – Information only tab to be a general reference point for you to know how tall the roof is.

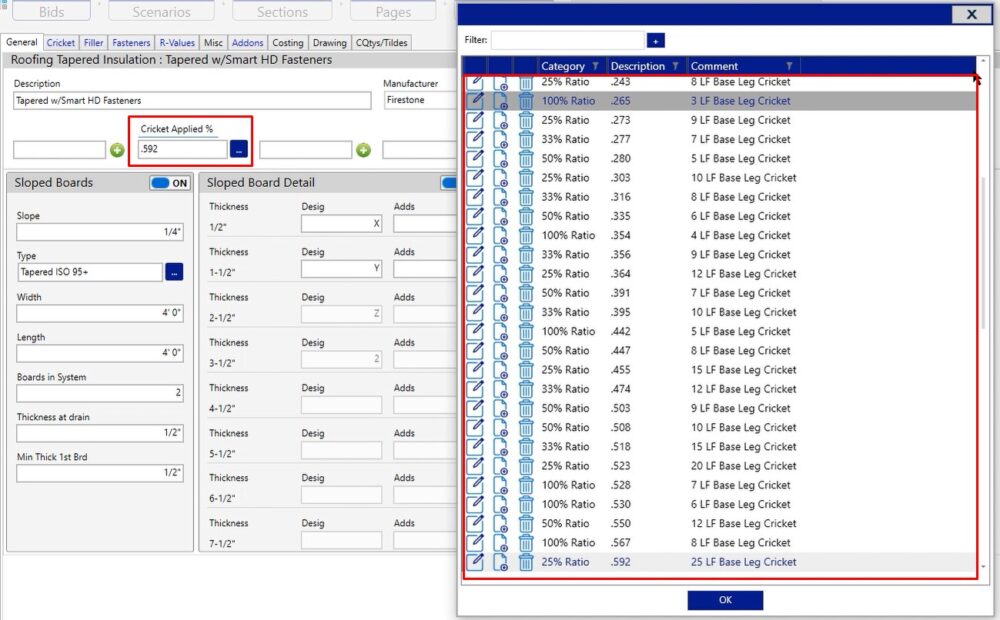
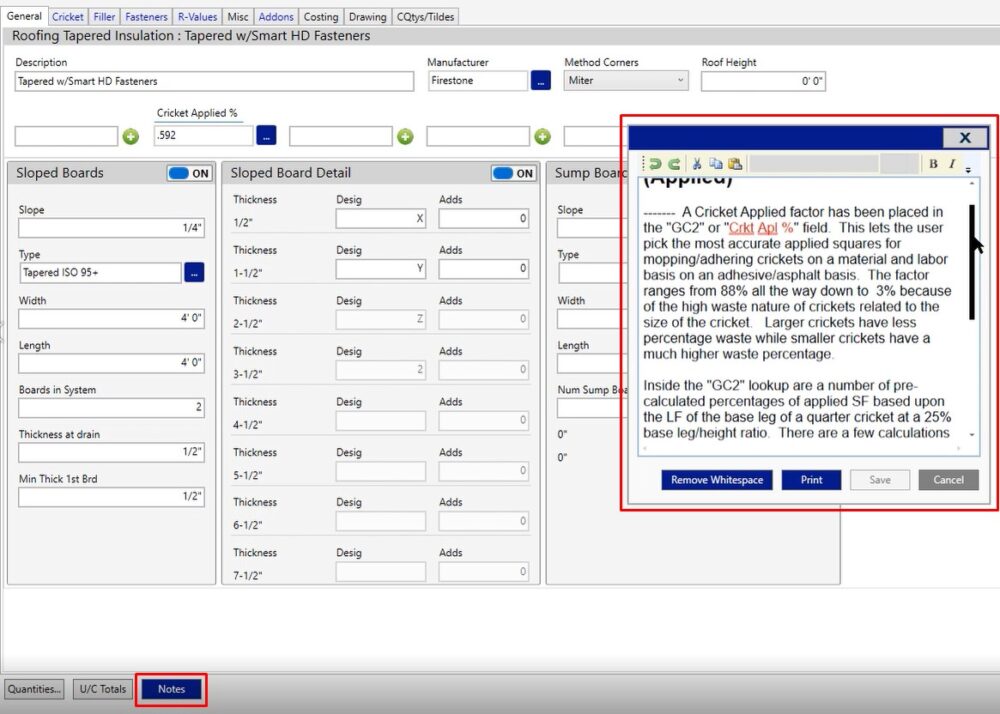
- Cricket Applied % – This has to do with the adhesive if you’re going to be using it adhesive on your cricket’s rather than fasteners. Click the three dotted button and choose your option.
Click on the notes option at the bottom of the screen. Here, you can read through the paragraphs that walk you through how to fill this information out.
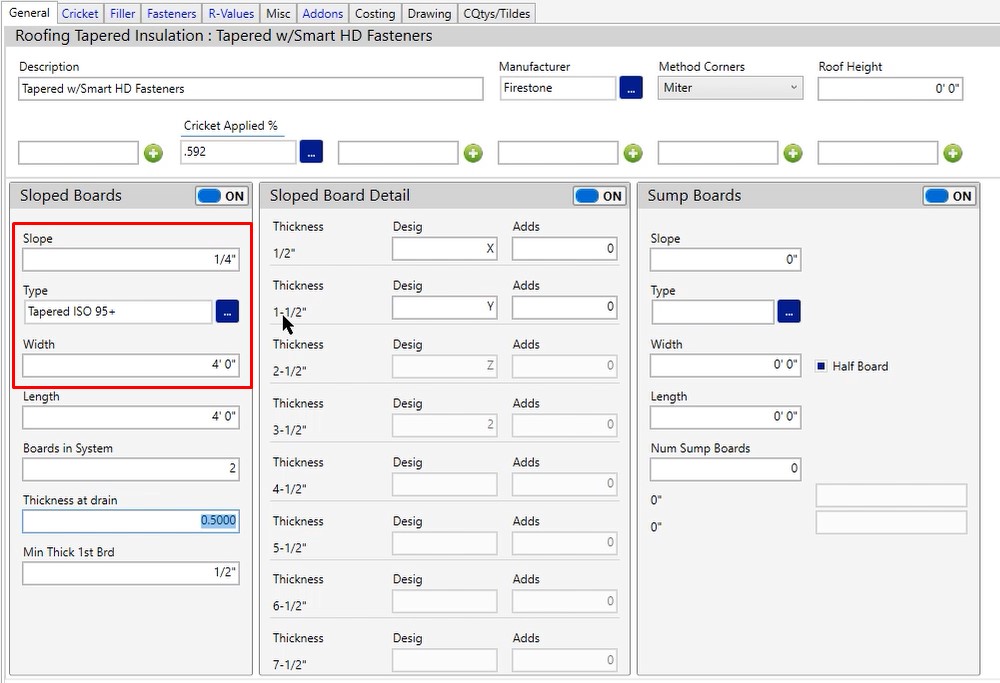
Sloped Boards
- Slope – If you want to change this, click in that field and you can either type in the fractions or the decimals that will get you to the slope that you need per foot.
- Type – Type of insulation being used. Click the three dotted button and choose the insulation product you’re going to need.
- Width & Length – Size of the insulation board that you would be producing.
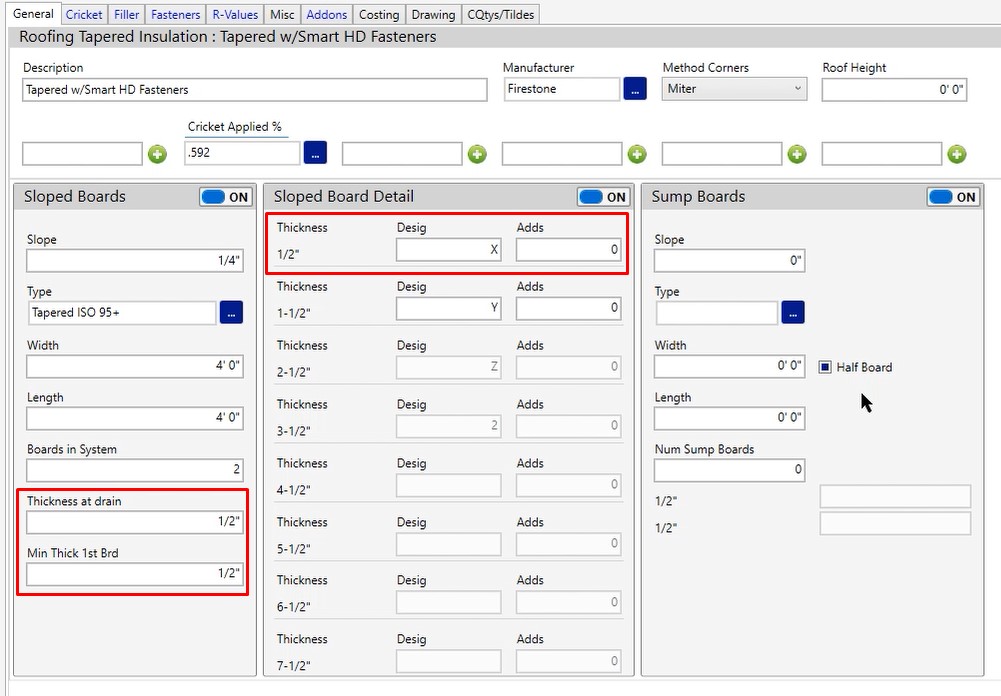
- Boards in System – The number of boards in system is the middle column (Sloped Board Detail), and you can change this number and it will allow a different number of fields to become available. As you change your slope, you will need to change the design for the board that’s being used in the system based on that slope per foot you’re using in the manufacturer.

- Thickness at drain – In this case, you’re starting with a half inch thick board. If you wanted to start instead with your Y board, then you would change the thickness of drain to match whatever the Y boards detail is.
- Min Thick 1st Brd – Minimum thickness of your first sloped board detail.
- Adds column – The adds column is adding whatever number you type in. Most of the time this column is zero and you’re going to catch that with waste percentage on the pricing screen.
Sump Boards
If you’re going to be producing sumps on your tapered project, this is where you would turn your sump boards on.
- Slope – Slope per foot that you need for your sumps
- Type – Type of insulation
- Width & Length – The width and the length of the sump board you’re providing.
- Half Board – If you choose half board, we’re actually going to be cutting the number of (8) 4×4 four pieces down into (4) 4X4 pieces.
- Num Sump Boards – The number of Q panels you are are using digitizing that sump.
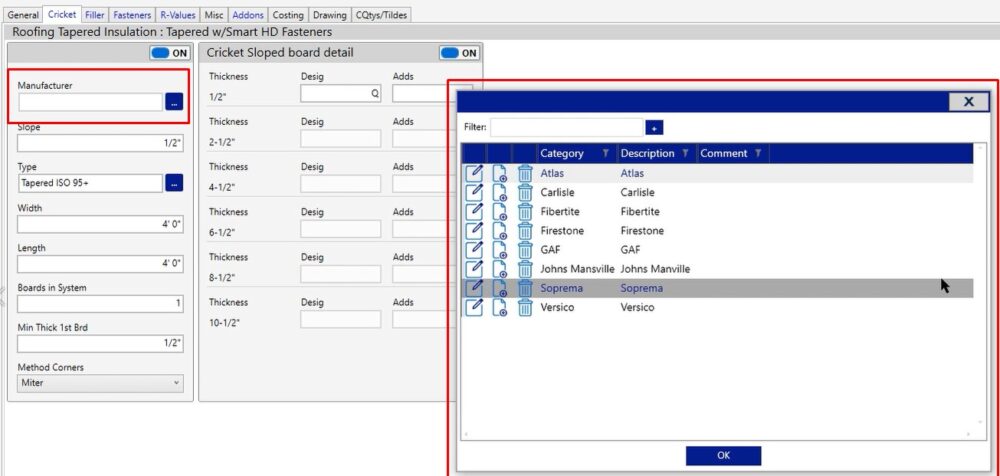
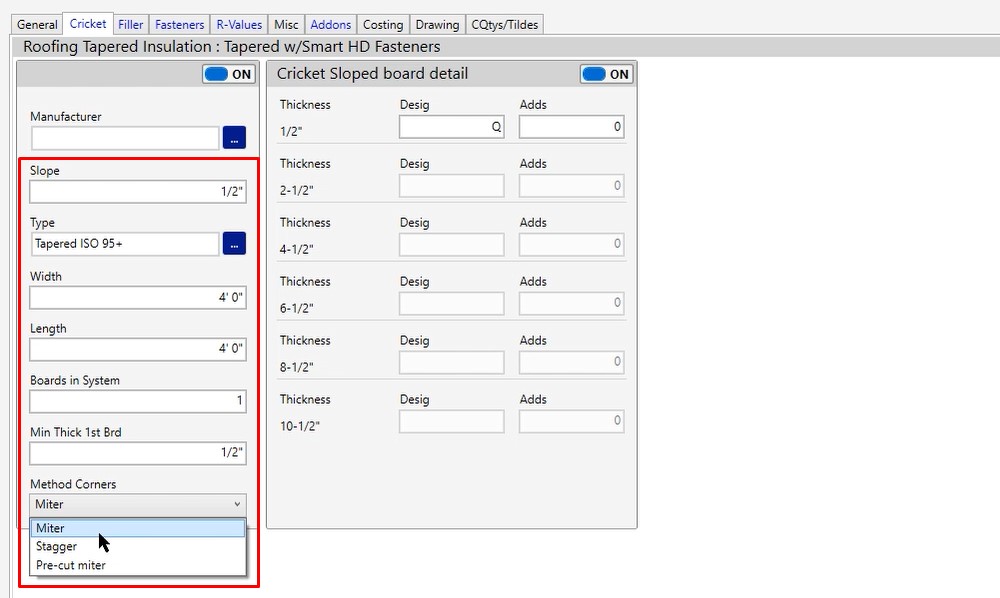
Cricket Tab
You’re going to see a lot of the same information, except in this case, it would be only for any crickets you need.
- Manufacturer – Click on the three dotted button to choose a different manufacturer if needed
- Slope – In this case, it is a greater slope per foot
- Type – Click the three dotted button to change the type
- Width & Length – Dimensions of the board
- Boards in System, Min Thick 1st Brd & Method Corners – Same as described in previous step
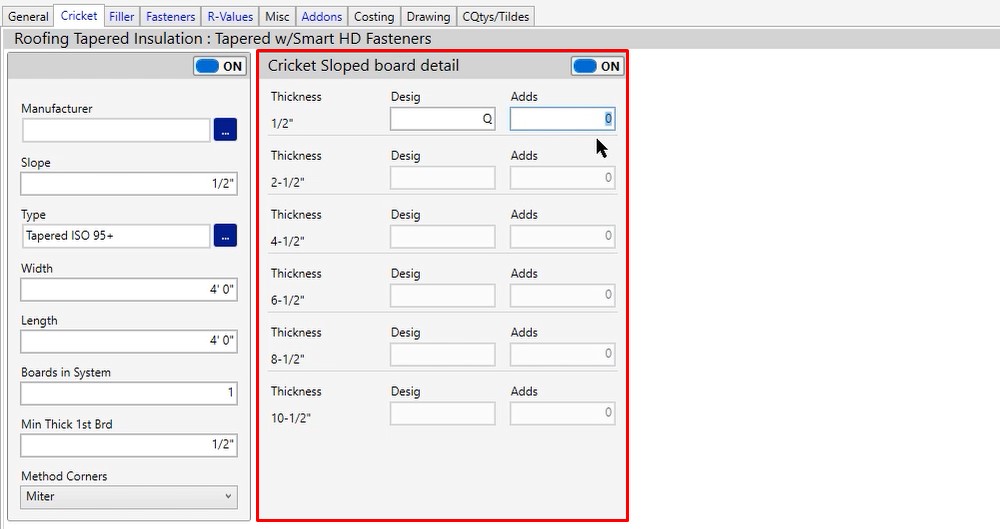
Cricket Sloped board detail
You can change the design and if you want to add additional boards, you can type in the number. We recommend doing that on the pricing screen using the waste percentage rather than typing in a specific number of extra boards.
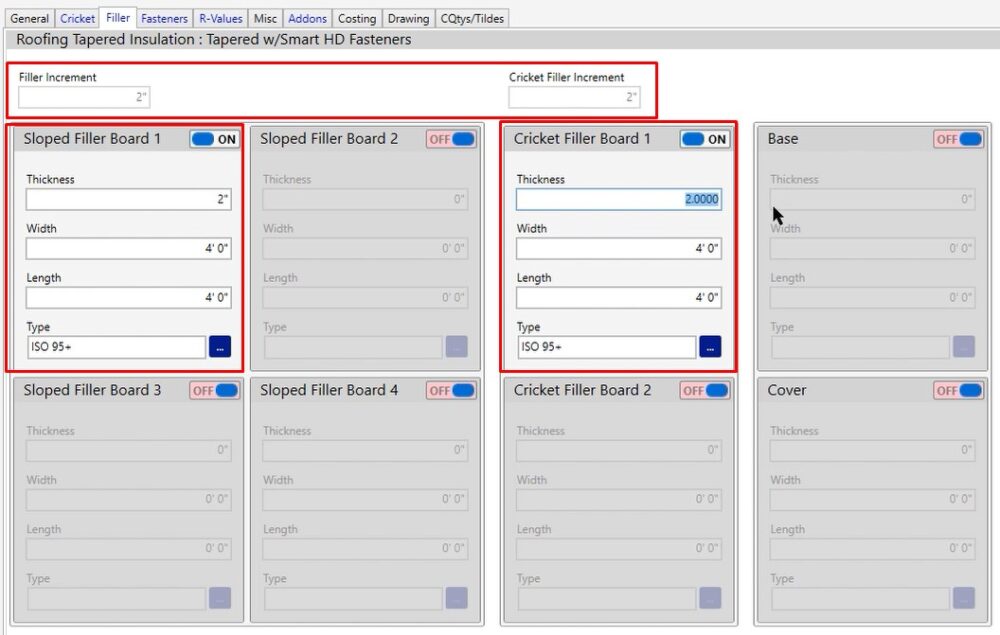
Filler Tab
Filler Increment & Cricket Filler Increment
These will always have a number displayed in them. These are displaying the correct filler inch increment that you’re going to need for you to get a nice, perfectly sloped tapered system. You need to make sure that whatever this number is displaying is populated in your sloped filler board number 1 and your cricket filler board number 1. If you had something that didn’t match, you will not get a perfectly tapered system.
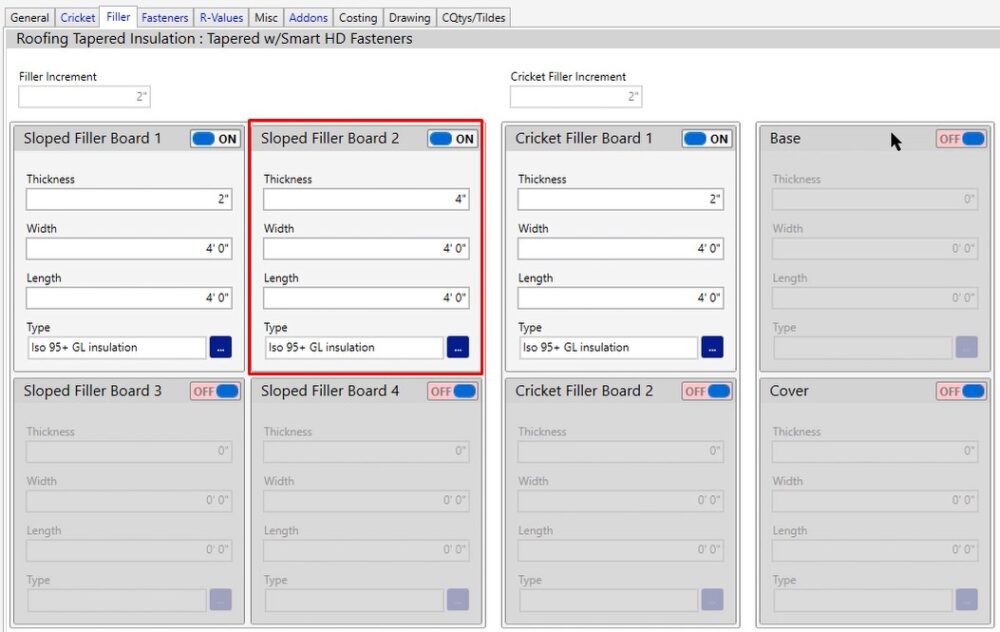
Sloped Filler Board 2
Let’s say that instead of laying down two layers of 2″, you want to lay down one layer of 4″.
- Toggle on slope filler board 2
- Input thickness of 4″
- Input width & length of the board
- Choose the type of insulation you’re using
The program is smart enough to know that when you are placing two layers of 2″, it will replace those two layers of 2″ with a layer of 4″ if you need it.
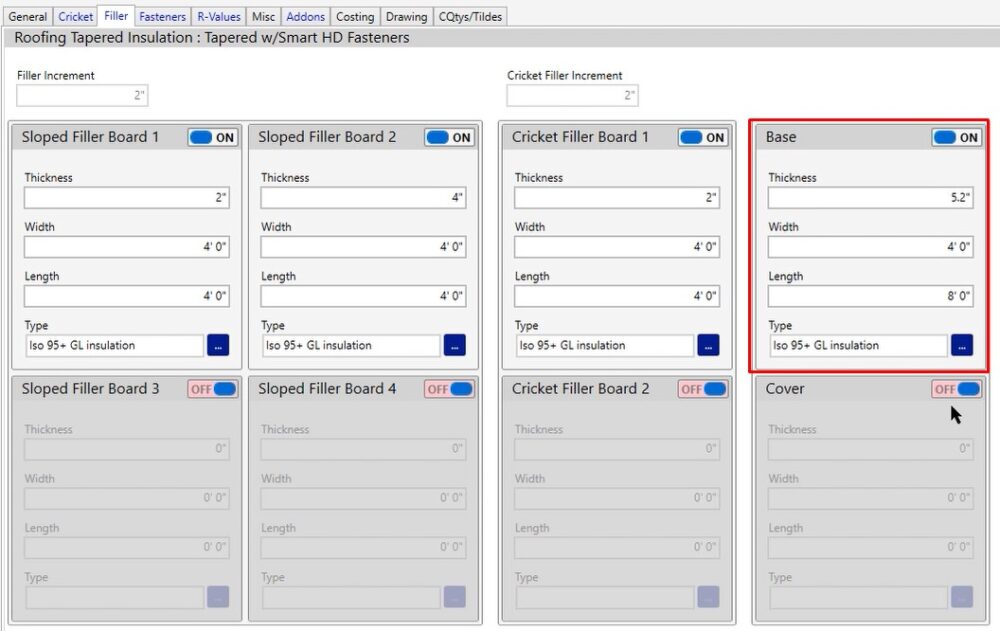
Base
Under the base option, you’ll notice we only have one field. The reason we only have one field is we don’t have a second one out there available for you at this point in time. So how do we handle multiple layers of base? We handle multiple layers of base by changing the overall thickness.
- Thickness – If we were going to be laying two layers of 2.6, we would actually put this at 5.2″, 2.6 and 2.6 added together.
- Width & Length – The width & length of the board we’re going to be ordering
- Type – Choose your insulation type
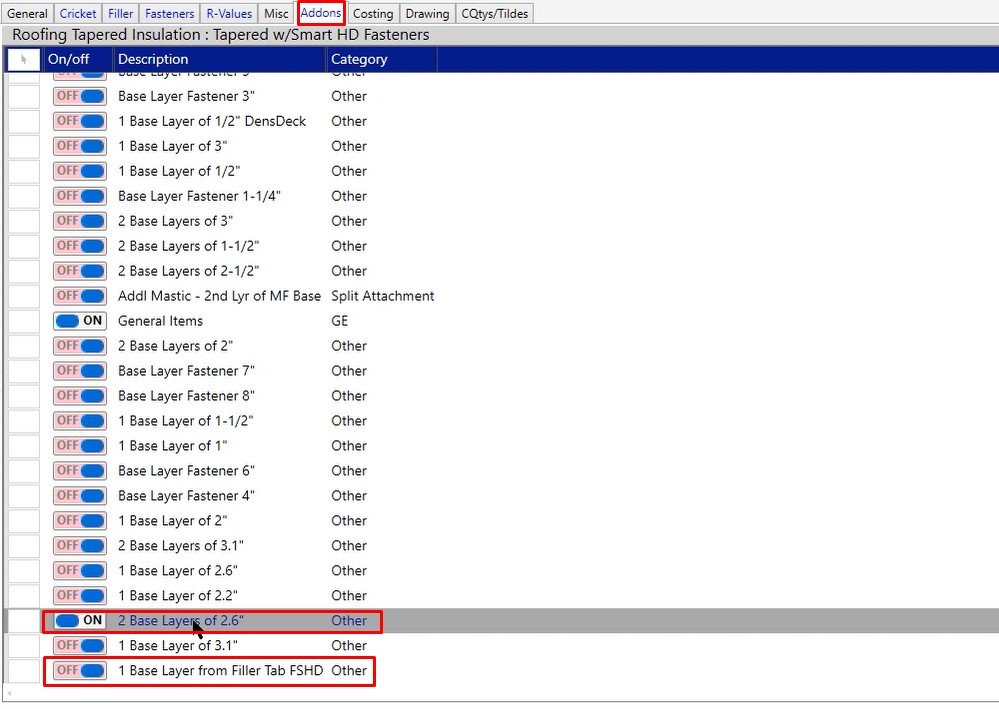
Addons Tab
We are changing the thickness to 5.2″ so that the fasteners are able to calculate the correct length based on the minimum and maximum protrusion you put in. However, because this is only one field, right now the program would produce a 5.2 thick piece of insulation for you on the pricing screen.
The way that you avoid that is by using the addons tab. (please see video for instructions)
Cover
If you need cover board, toggle on the cover board and fill out the information. We will apply that cover board as you do the takeoff on your drawing screen.
Fasteners Tab
There are a couple of different ways that you can set this up.
If you’re going to be working with adhesive:
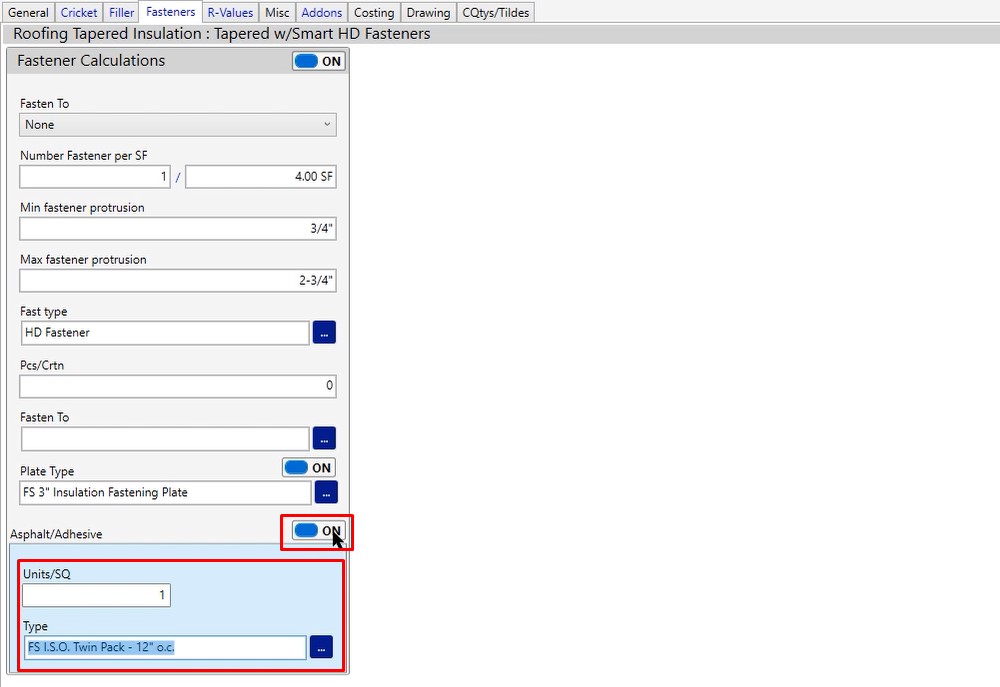
- Fasten To – Change to none
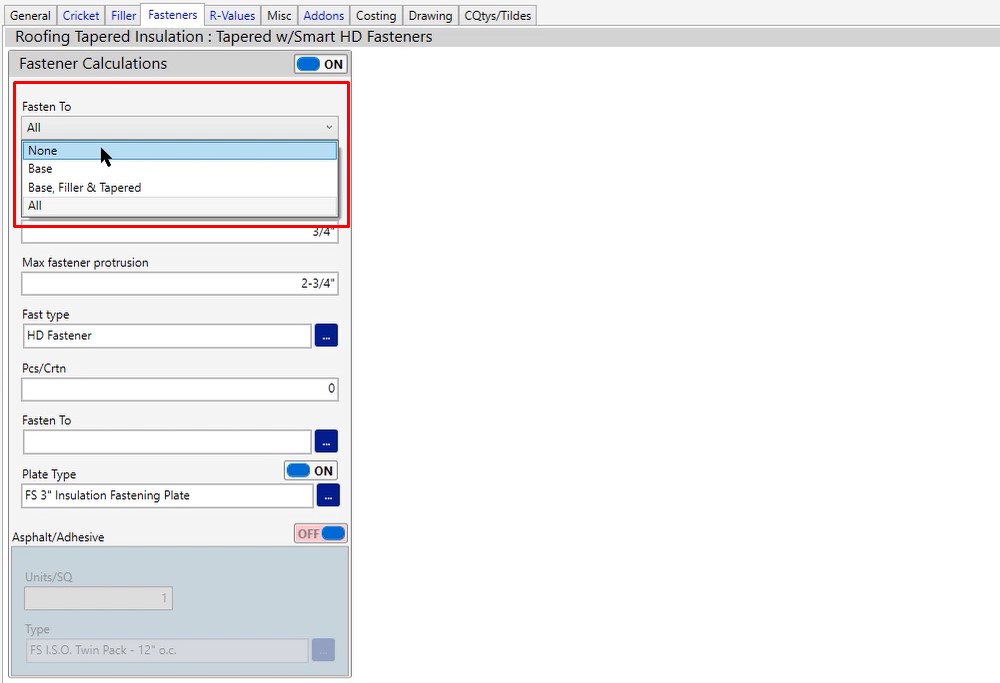
- Asphalt/Adhesive – Toggle it to ON
- Units/SQ – Units per square will always be 1 if you’re using a spray foam adhesive
- Type – Choose the correct spray foam adhesive with the correct on center spray pattern
If you’re not using adhesive:
- Fasten To – In most cases it’s going to be ALL because you want to fasten through all of your layers of insulation.
- Number Fastener per SF – The number of fasteners needed per square foot
- Min fastener protrusion – The minimum amount that the fastener has to go into the deck for you to be able to meet your AFM ratings
- Max fastener protrusion – The maximum amount the fastener can go into the deck. If it goes in further, it runs the risk of hitting something
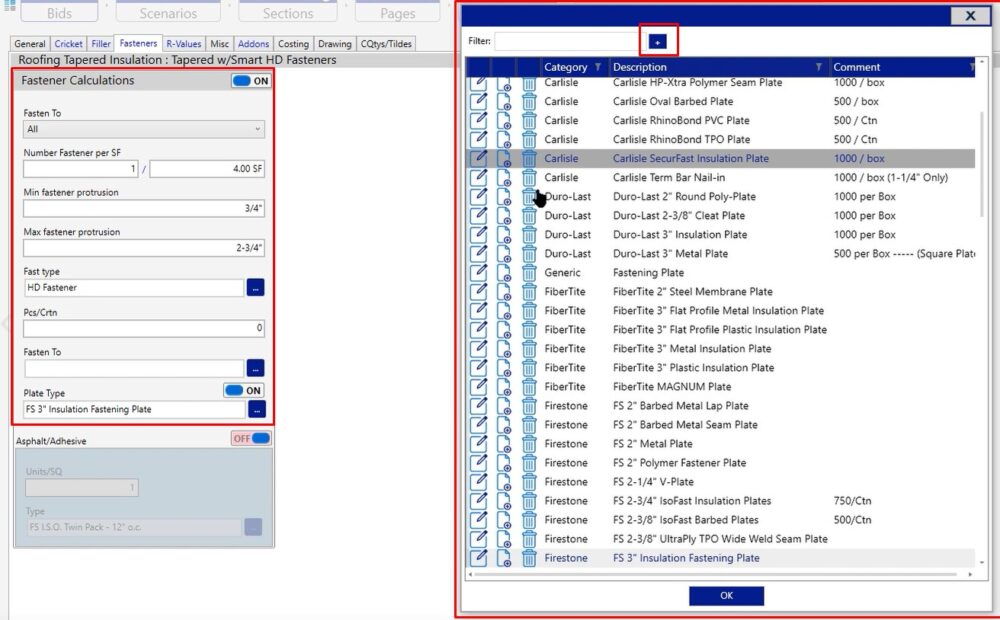
- Fast type – Type of fastener you are using. Click the three dotted button and choose from the list
- Pcs/Crtn – In the tapered module, we recommend that you leave this zero because your fastener lengths are going to vary in size. Based on the size of the fastener will dictate the amount that are going to come in that box. So if you leave this zero, we’re going to give you the per piece break out of all of the fasteners that you would need to use inside of your project.
- Fasten To – Information only
- Plate Type – The plates that you’re going to be calculating for those fasteners on this project. If you need to change the type, click the three dotted button and choose from the list. If you need to create a new option, click the blue plus and you can create your new item.
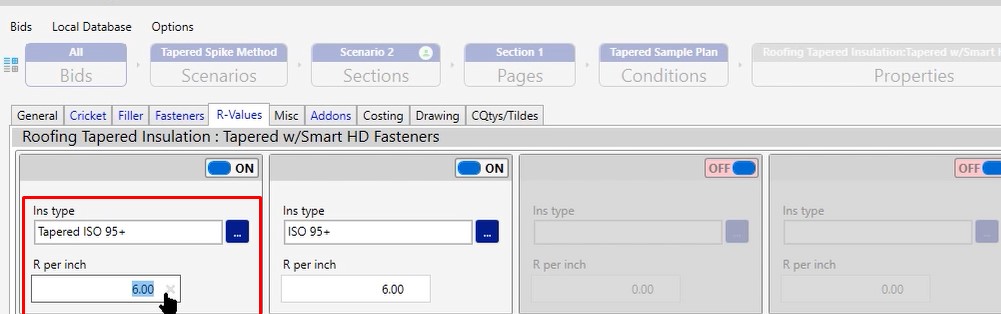
R-Values Tab
If you choose the installation and you put the correct R per inch in, we will calculate the average R-Value, CQty and tilde code that you can use.
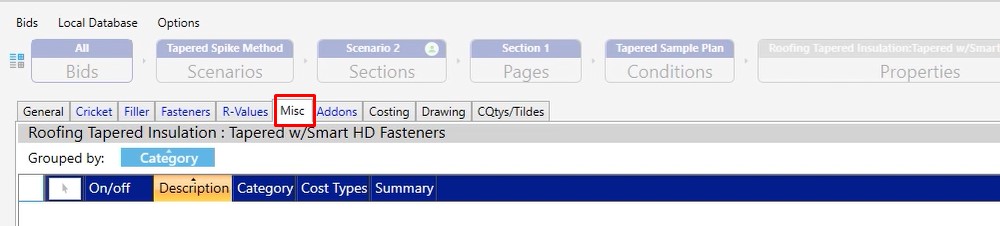
Misc Tab
There for you if you need to add any miscellaneous items, but in most cases you don’t need to.
If you have any questions on how to use the tapered on the drawing screen, please feel free to reference that video or you can reach out to our tech line and they’d be happy to answer any additional questions or any issues that you run into while working on the condition properties or or in the takeoff screen.