![]() Estimating Edge’s team of experienced construction professionals and software engineers have developed the industry’s smartest takeoff and estimating software solutions for competitive estimates.
Estimating Edge’s team of experienced construction professionals and software engineers have developed the industry’s smartest takeoff and estimating software solutions for competitive estimates.
Don’t just estimate faster. Estimate better.®
- /
- /
- /
- /
Roofing Standing Seam Module – Drawing Tools
This video covers the standing seam modules take off screen in v12.
Standing Seam Module Drawing Tools
There’s a couple of unique things to keep in mind when you’re using the standing seam module for printing your cut list for the standing seam panels.
You are going to need to hi low each one of these shapes, so as you are building for a different slope area, you’re going to need to make sure that these are their own separate areas.
The way to do this is to start at the ridge and go through and take your measurements off. Once you do that, you can click enter. You’re going to draw each slope area as its own shape.
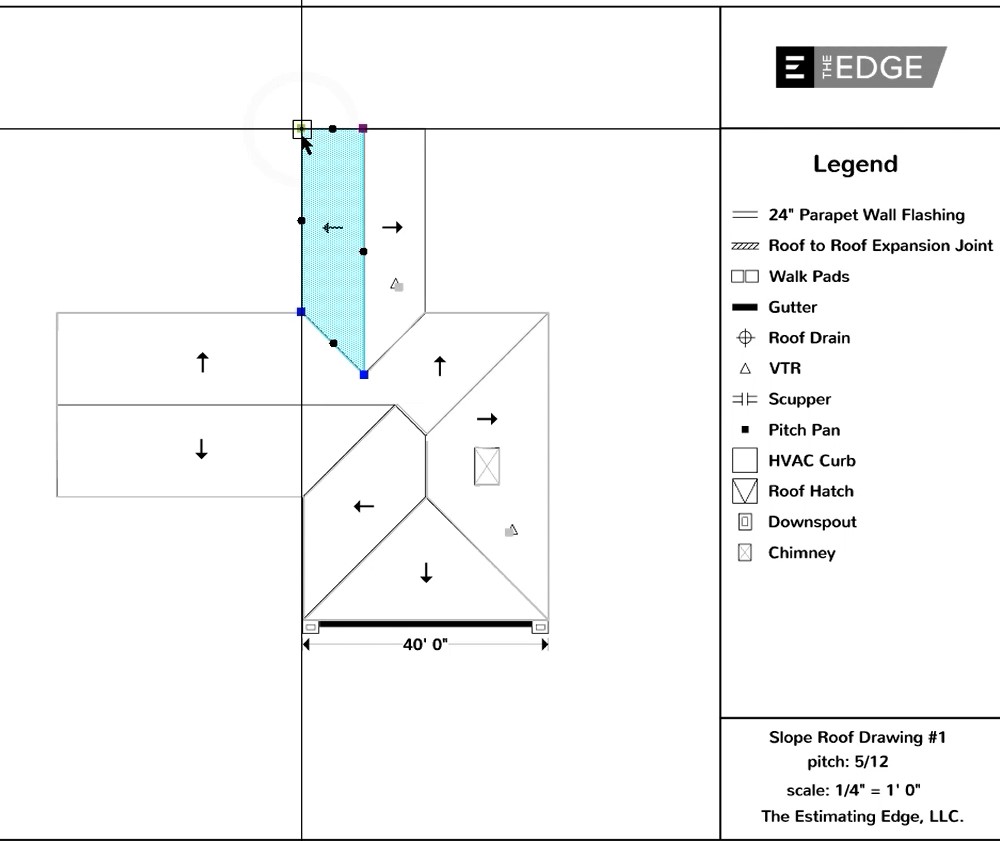
It’s important with the standing seam module that you start in the same location. When we hi low our standing seam panels and we start the layout, we want to start from the same location. That way at the ridge, those panels are going to match up.

In this case, if we were to go in and draw the standing seam panel, we started in the upper left hand corner. If we were to draw this panel and start in the upper right hand corner instead, the panels aren’t going to match up.
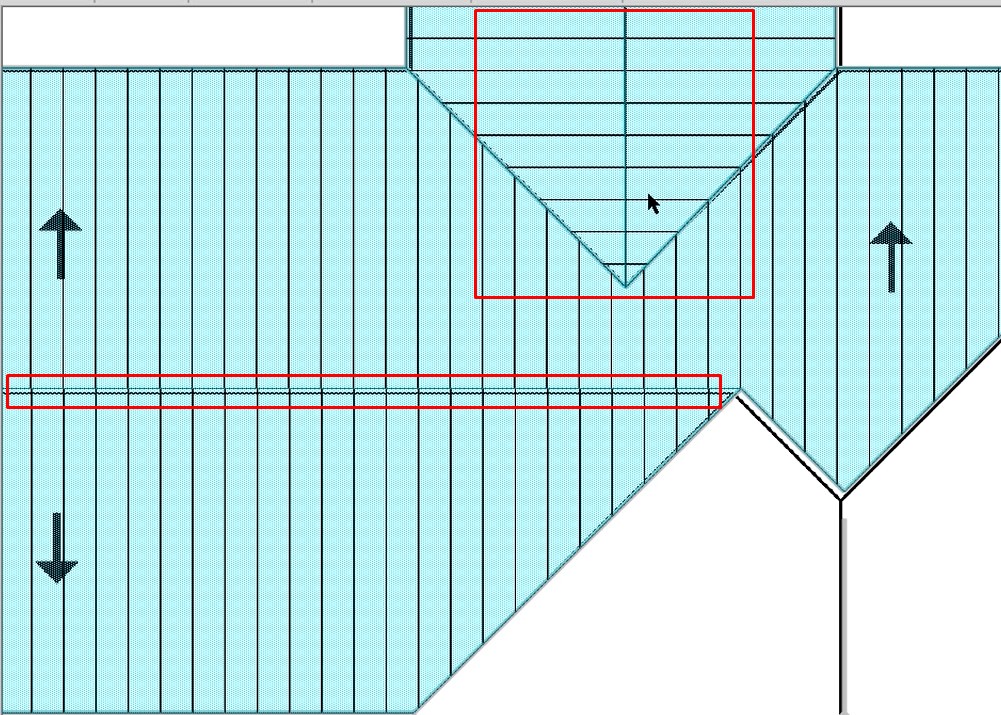
As we are going through and drawing the hi lows, you’ll see the black lines at the ridge aren’t going to line up as nice as we would like them to.

Versus this area here where we started in the same location.

If we zoom in, you can see what we are talking about. You’ll notice that these panels aren’t necessarily lining up perfectly like the panels on the other side. This is due to the way that they were drawn. We didn’t start this area in the left hand corner like we did when we drew the first shape.
If you had a different pitch, let’s say that these three pitch areas on the roof were going to be a different pitch than what you had drawn. You will need to copy and insert this condition and create your second roof area condition. This way you can apply a different pitch to it.

Report
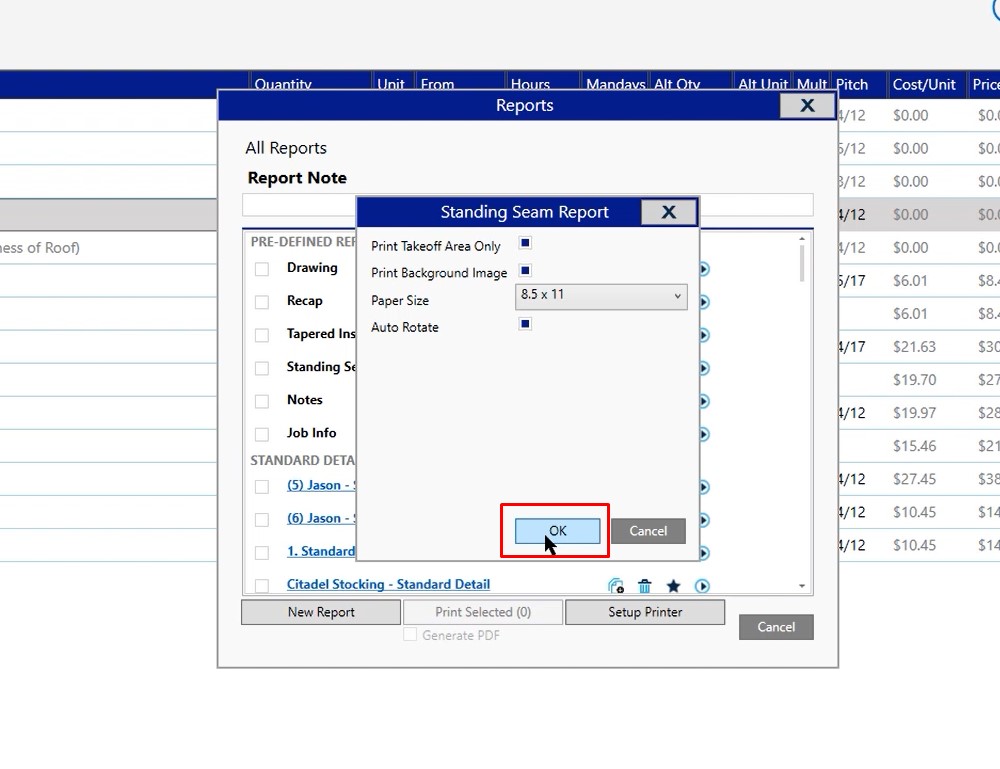
To create a report:
- Click Bid Grid
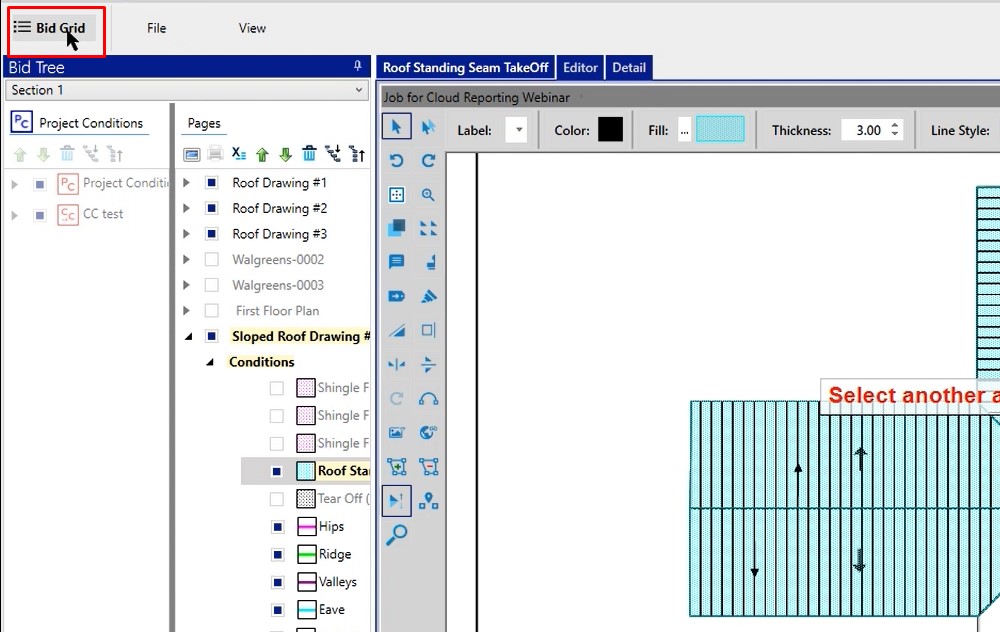
- Select your item for the report
- Click the Reports icon
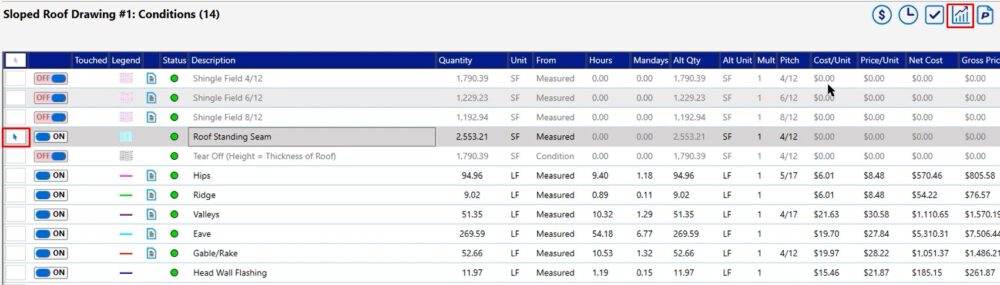
- Click the play button on the right hand side

Leave all of the options selected, then click OK
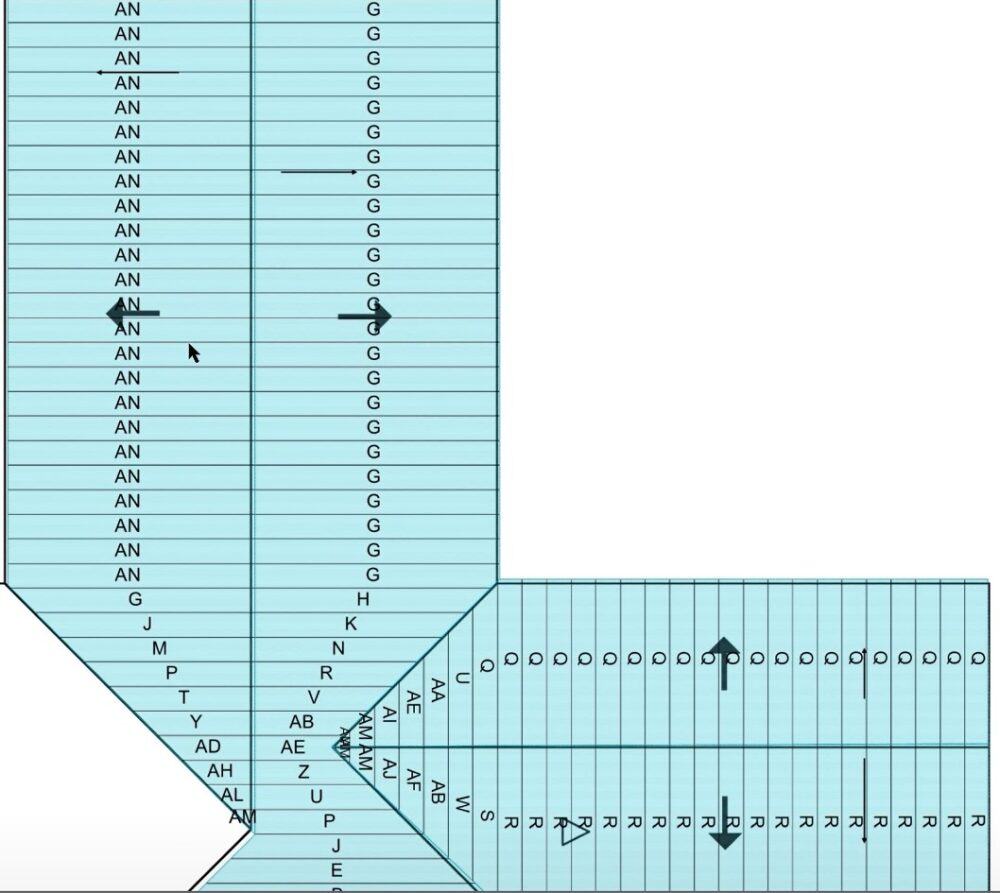
As we zoom in on the report, you’ll notice there are different lettered combinations and those are the names of the panels that you’re working with, in an overhead view.
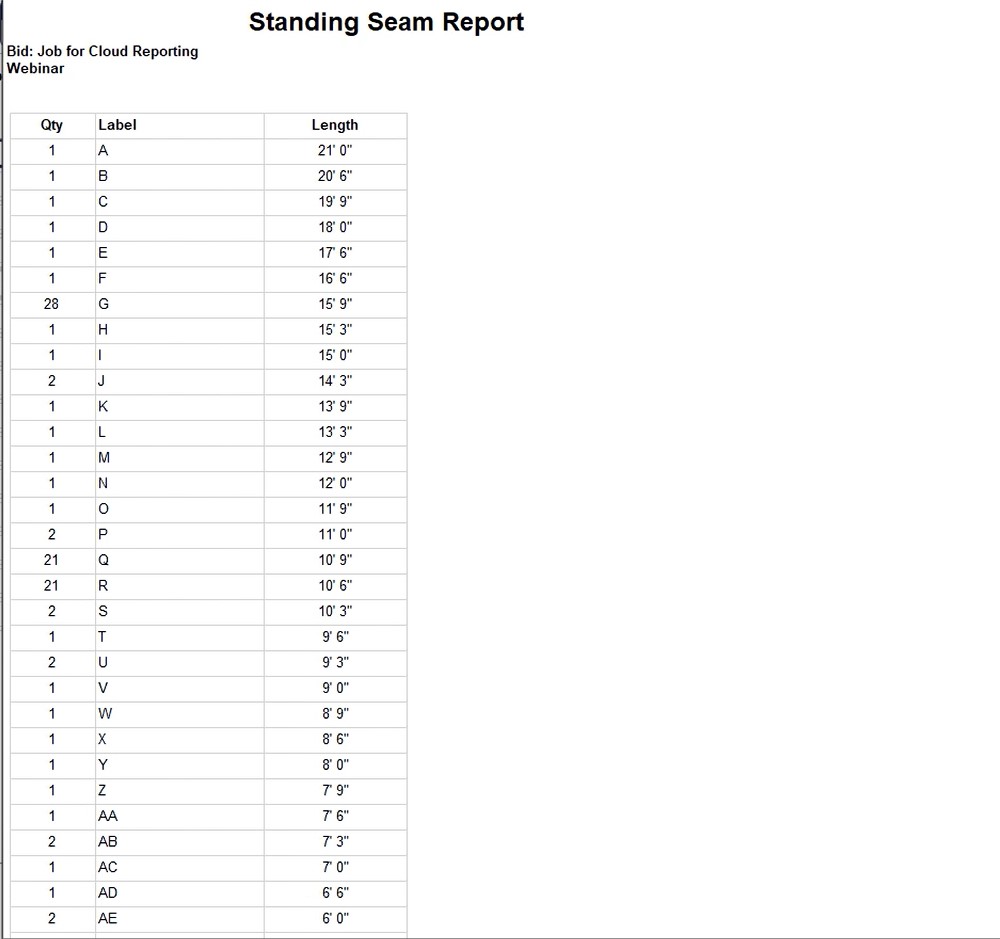
When you close out of this report, it’s going to open a second report, which is your panel cut list. These are the different panels you have and the number that you’re going to need presented on your project.
If you have any additional questions as it pertains to the standing seam module, please feel free to reach out to our tech team and they would be happy to assist you in any way they can.