![]() Estimating Edge’s team of experienced construction professionals and software engineers have developed the industry’s smartest takeoff and estimating software solutions for competitive estimates.
Estimating Edge’s team of experienced construction professionals and software engineers have developed the industry’s smartest takeoff and estimating software solutions for competitive estimates.
Don’t just estimate faster. Estimate better.®
- /
- /
- /
- /
Roofing SP Length Condition Properties – General Tab
This video covers the general tab of a roofing single plywood length condition in v12.
Description
In the upper left is the description. This is a user definable field for you to type in the name of the condition.
Labor Method
On the labor method you can choose per lineal foot, per square or none

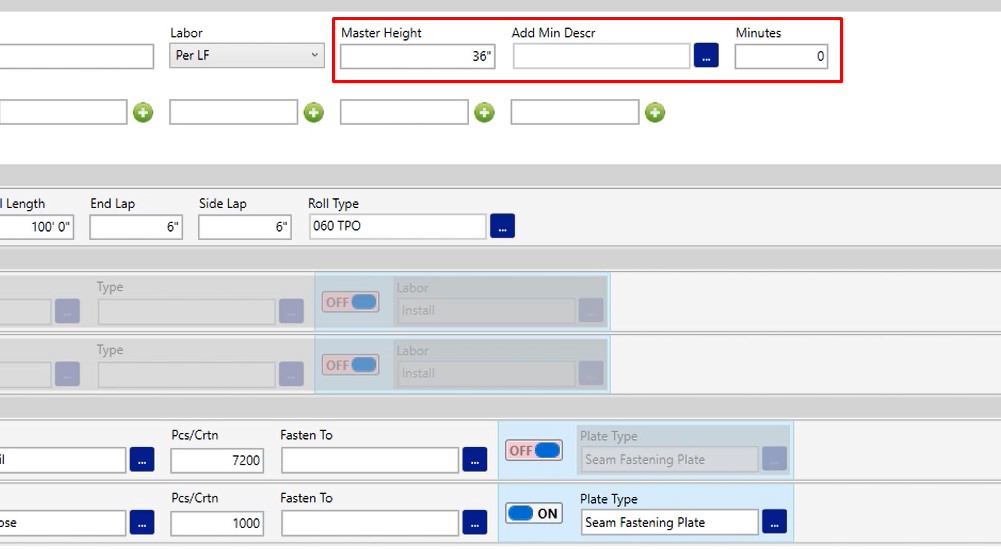
Master Height
The master height is most commonly used for calculating the membrane height that you’re going to need for your parapet flashing.
Additional Minute Description & Minutes
These fields are used for a smart labor capability inside of the program and it is not commonly used.
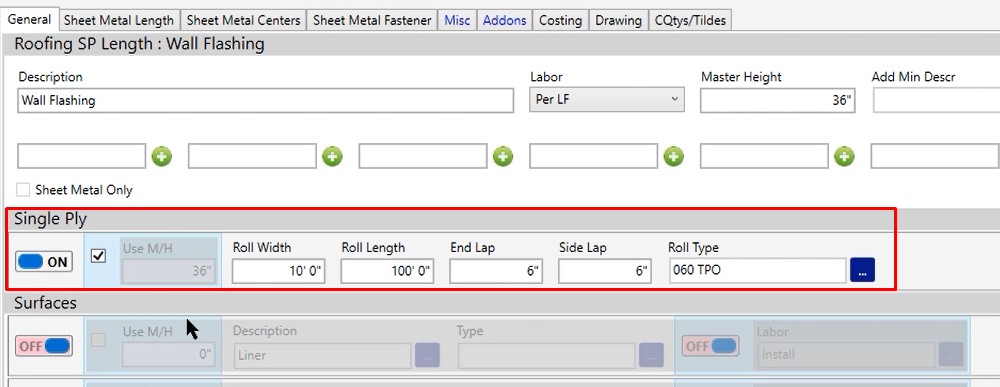
Single Ply
Single ply is used to calculate the membrane that you’re going to be using for your wall. The check box is indicating to use the master height as the height of membrane, or if you would like, you can uncheck that and type in a specific inch increment for the membrane that you’re going to need.
Roll Width & Roll Length
This is for ordering method, so when you go out to the pricing screen, this is where it’s going to be applying that membrane.
End Lap & Side Lap
These are used as calculation methods.
Roll Type
This will be the membrane that you’re going to be using.
Surfaces
Surfaces can be used in a couple of different ways when dealing with a length condition. You can use it to calculate the vapor barrier, or if you needed to put some sort of vapor barrier along the wall, you can use it for calculating insulation. Any of those options are available by turning the field on.
Master Height
You can choose to check that or keep that unchecked. You’re going to type in the inch increment.
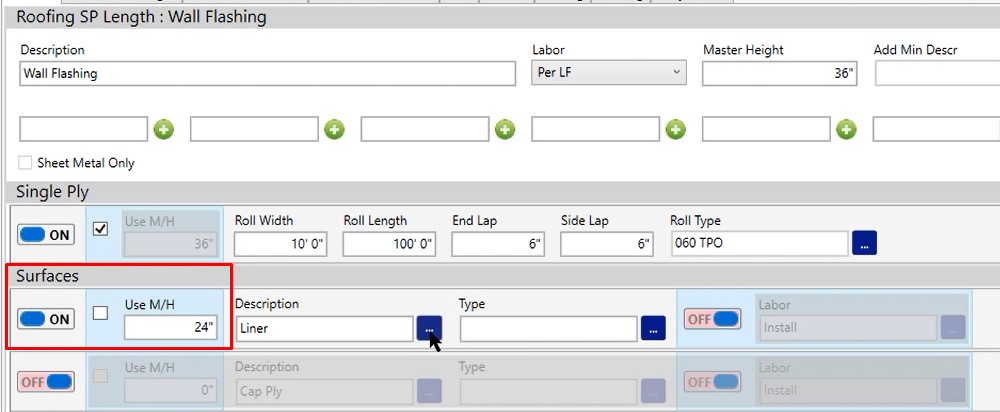
Description
In the description, click the three dotted button and change this to whatever you would be using it for, whether it’s a vapor barrier, insulation, etc.
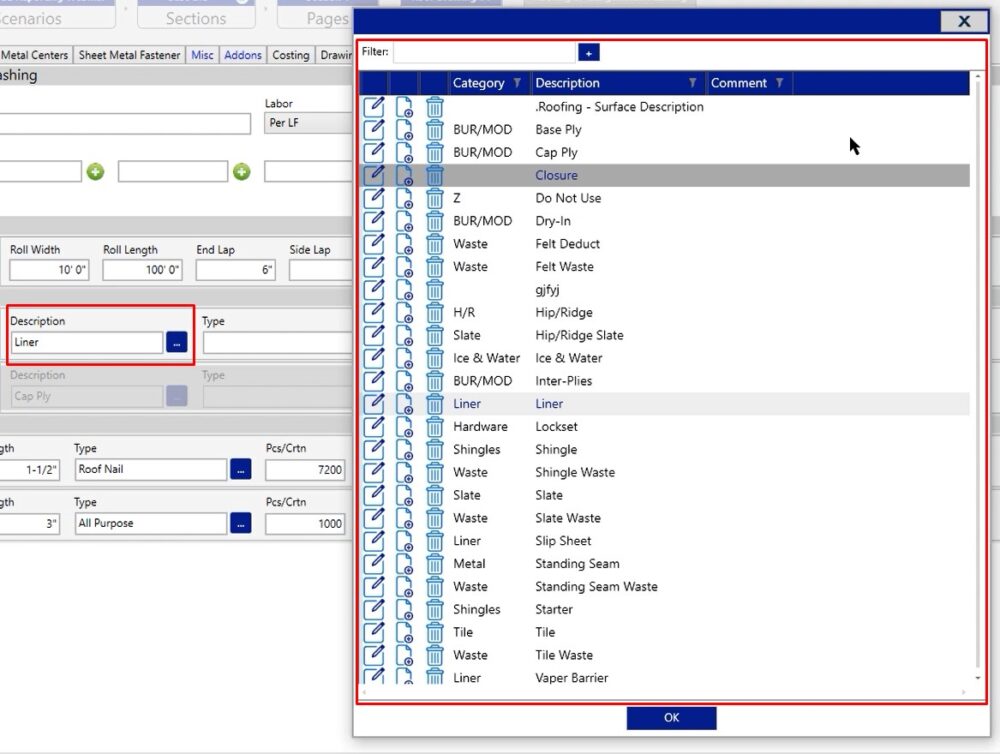
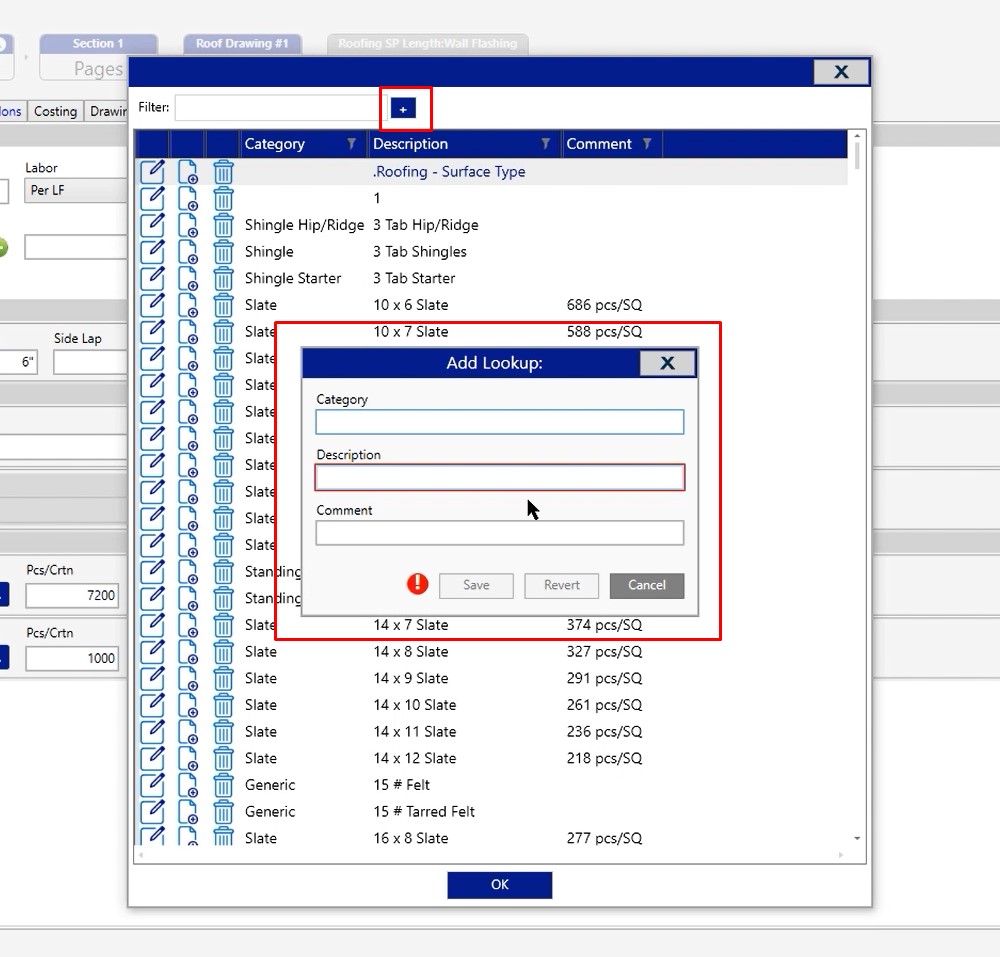
Type
Click the three dotted button to choose your type. If you don’t see your product, click the plus sign button at the top to add in your new product.
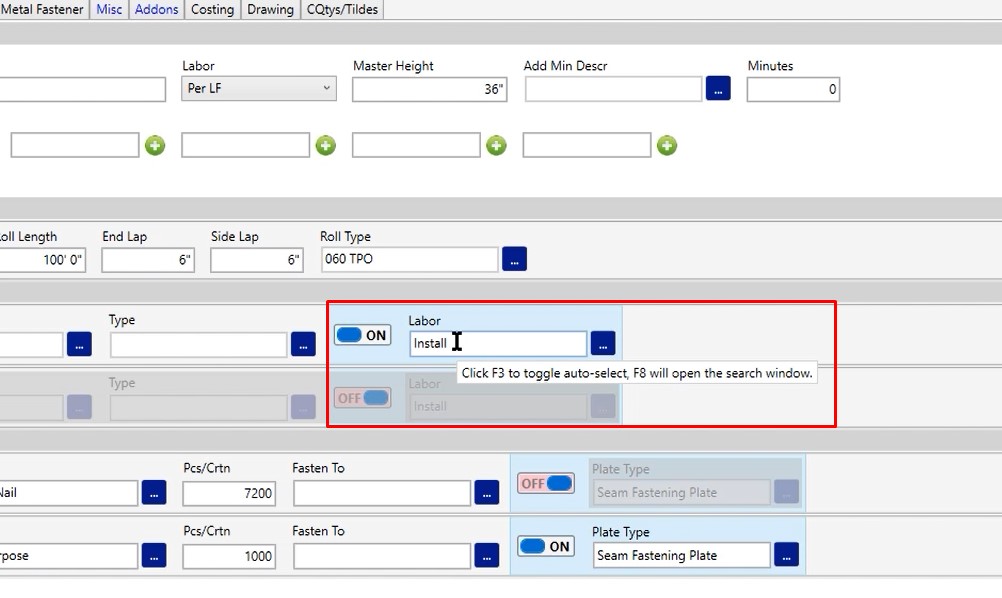
Labor Line
If you want to apply an additional labor line, you can turn the labor line on and give it a method of labor.
Fasteners
The first fastener is a roof nail and is most commonly used as a temporary hold down for the wall flashing membrane. If that’s not something you do, feel free to change that fastener out to something you would use.
The second fastener is the regular all purpose fastener. If you want to change the type of fastener, click the three dotted button and choose from the list. If your option is not there, you can either copy and insert one that is, or you can click the plus at the top to create a new one.
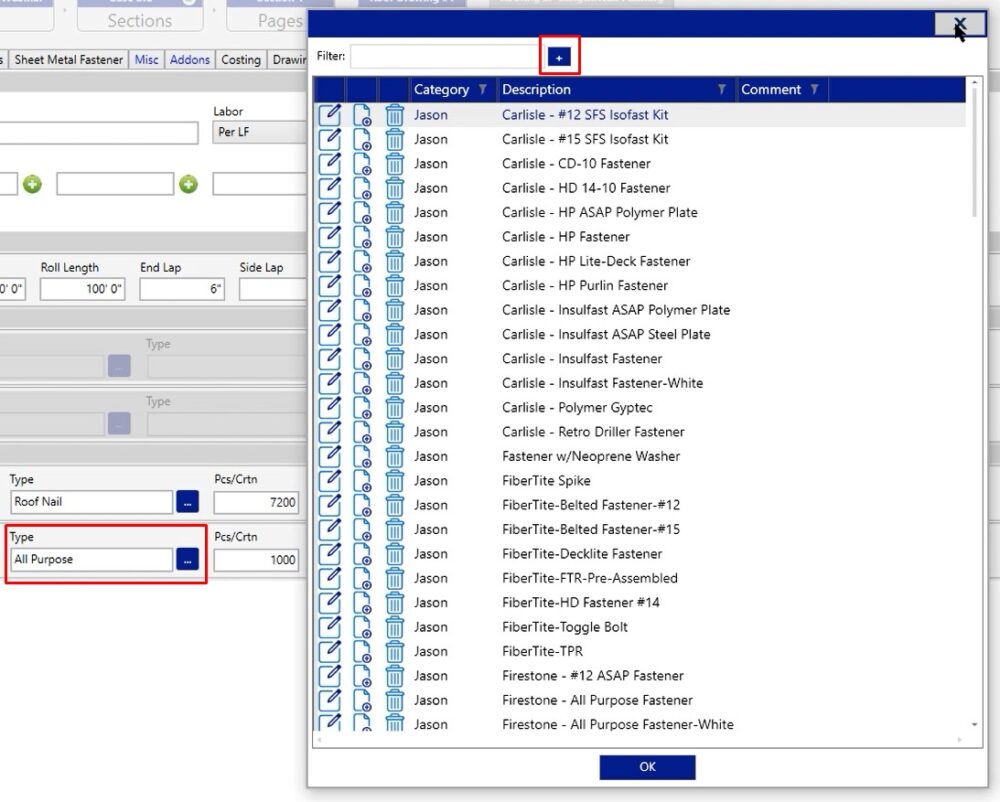
Pieces Per Carton
Pcs/Crtn gives the box count. If you put in the correct pieces per box in this field, then on the pricing screen you’re going to see the material presented to you in a box format. If you leave the pieces per carton zero, we’re going to give you a per piece count. So instead of pricing a box of fasteners, you would actually be pricing the individual fastener themselves.
Fasten To
The fasten to fields are purely information, so if you’re reviewing this job down the road, you have a quick reference of what you’re working with.

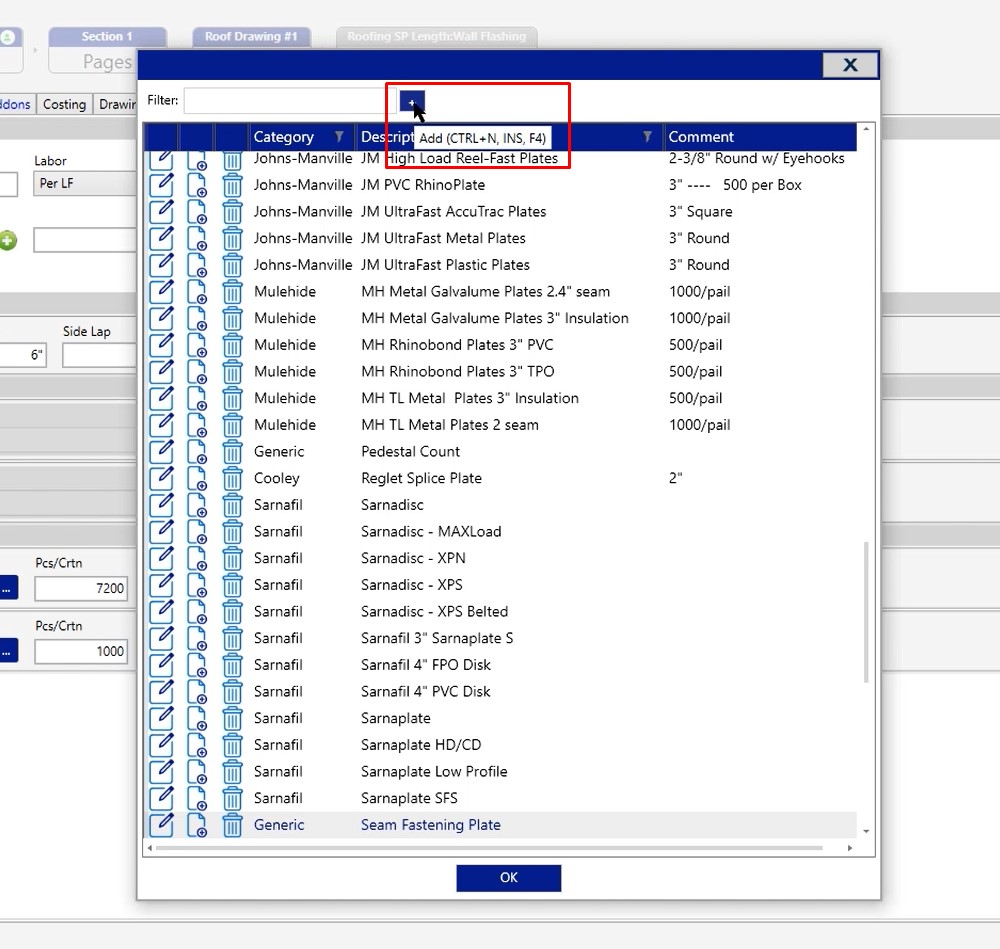
Plate Type
Click the three dotted button and choose from the list that we have available to you. If it’s not out there, you can either copy and insert one that’s similar or you can click the plus sign at the top and create a new product.
If you have any additional questions or you need any assistance, please reach out to our tech and training department and they’d be happy to assist you in any way they can.