![]() Estimating Edge’s team of experienced construction professionals and software engineers have developed the industry’s smartest takeoff and estimating software solutions for competitive estimates.
Estimating Edge’s team of experienced construction professionals and software engineers have developed the industry’s smartest takeoff and estimating software solutions for competitive estimates.
Don’t just estimate faster. Estimate better.®
- /
- /
- /
Rectangle
How To Use Rectangle (Detail Screen)
Rectangle:
![]()
You may find the need to draw a rectangle while creating or modifying a detail. There are two ways rectangles may be drawn.
Freehand
Begin by clicking you mouse on the inverted arrowhead on the Rectangle icon.
This will open the Rectangle menu,![]()
select the top choice Rectangle.
This in turn will open the Shape Properties dialog:
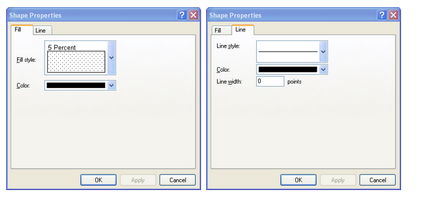
The first window (left graphic) allows you to select a fill style from totally clear to totally black. You can also select a color for the fill for the rectangle. The second window (right graphic) allows you to select a line style (solid, dashes, dots), the color of the line (it can be different than the fill) and finally the width of the line (border). After making your selections click OK.
The dialog closes, you are returned to the Detail Drawing screen. You start drawing your rectangle by clicking and holding down the mouse button while simultaneously dragging out your rectangle to the height and width you want. Let go of the mouse button when the rectangle is the size you want.
Sized Rectangle:
Begin by clicking you mouse on the inverted arrowhead on the Rectangle icon . This will open the Rectangle menu, select the top choice Rectangle. This in turn will open the Shape Properties dialog:
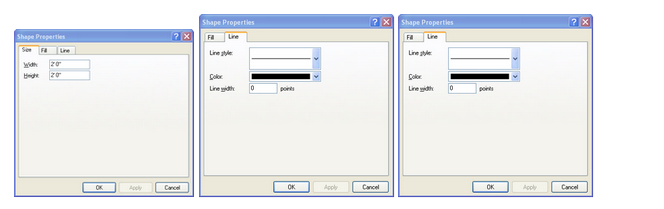
The middle and right graphics are the same as in the Freehand method. The big difference is the first (Left) screen, instead of drawing the rectangle freehand you will enter the dimensions of the rectangle here. You can do this in feet and inches or decimal feet. After setting up, click OK the window will close. The dialog closes, you are returned to the Detail Drawing screen. Move your mouse and place the crosshairs in the center of where you want your rectangle, when ready left click one time. The rectangle will be placed. This feature is like Copy it will stay turned on until you select another feature/operation.