![]() Estimating Edge’s team of experienced construction professionals and software engineers have developed the industry’s smartest takeoff and estimating software solutions for competitive estimates.
Estimating Edge’s team of experienced construction professionals and software engineers have developed the industry’s smartest takeoff and estimating software solutions for competitive estimates.
Don’t just estimate faster. Estimate better.®
- /
- /
- /
- /
How to view Change Order Reports
This video shows you how to use the Change Order Reporting function that is accessible through Cloud Reporting in v12.
Ultimately, you will start inside of version 12, but here we will show you a couple of the prerequisites that you need to have done before you can pull the change order reports.
So the first thing is you need to make sure that you have a scenario in change order state. Then, open the scenario that’s in change order state by clicking the change orders button.
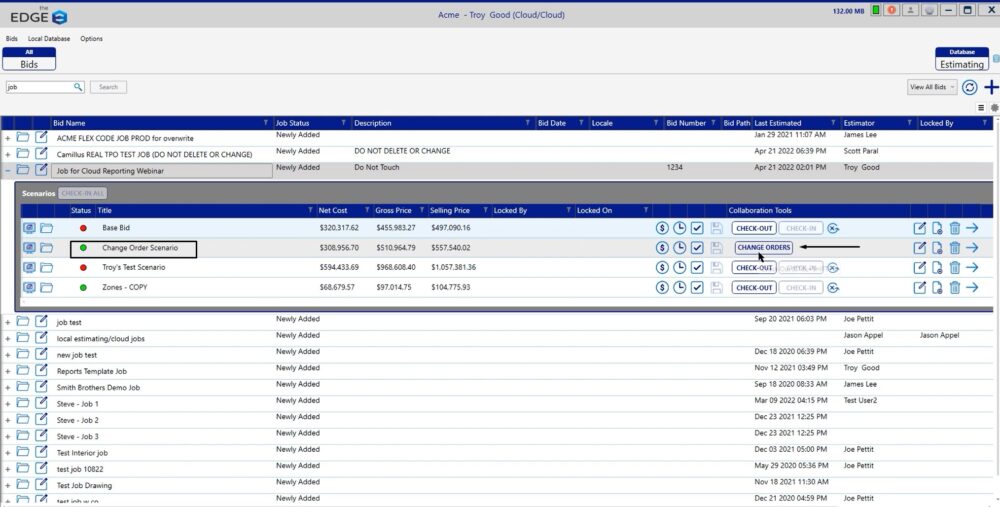
Change Orders
Here, you will notice that you have all of your change orders available. You do need to make sure that with these change orders, if you want to report the most current information and it’s a change order that has not been accepted, you do want to make sure that that change order is checked in.
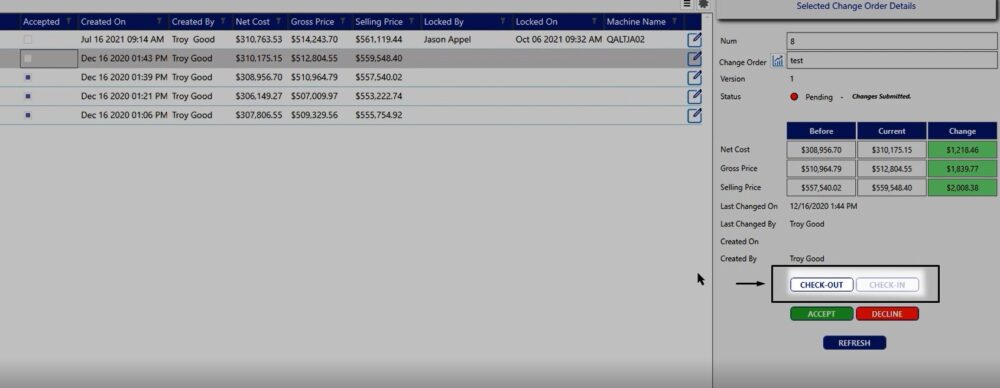
With cloud reporting, all of the information that we pull is based on the most recent checked in version of that job. So in this case, if you have your change orders checked in and or accepted, now you’re ready to go out to the portal and take a look at the reports that you have the ability to use.
Administration Portal
You can quickly access the portal by clicking the gear wheel in the upper, right hand corner of the window
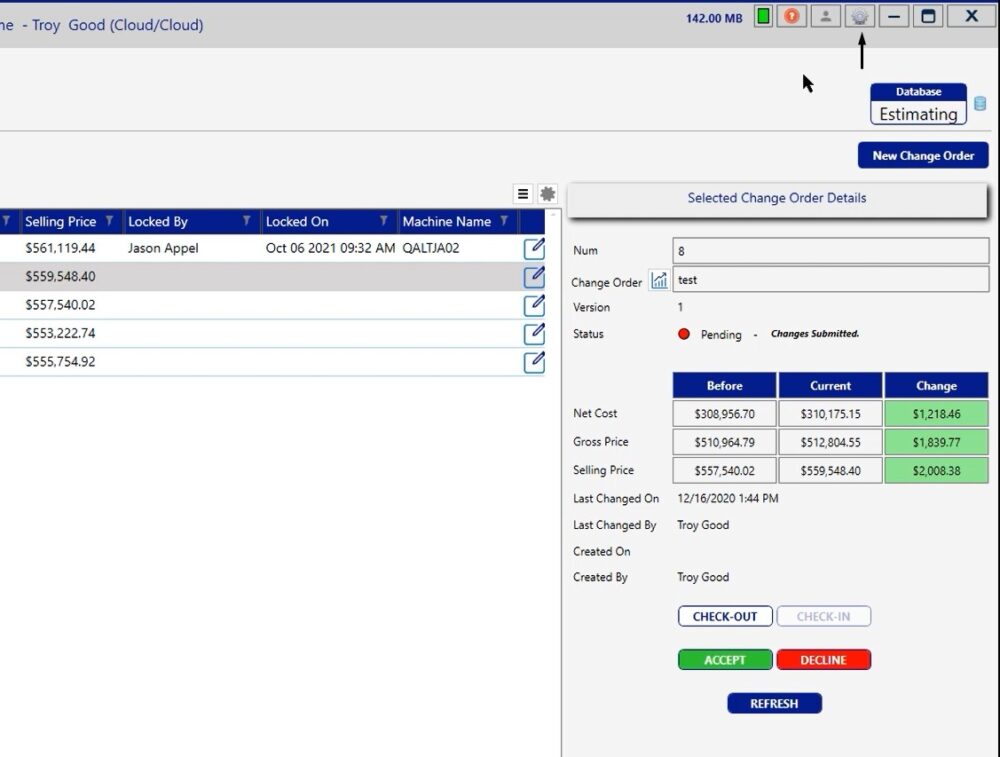
Once you do that, it’s going to take you right out to the administration portal on the specific job you’re looking at.
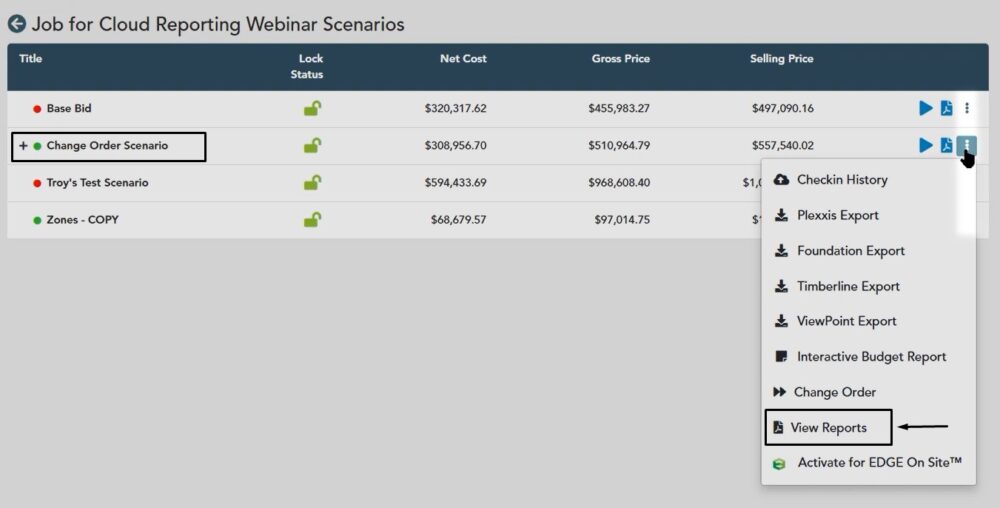
In this example, you’ll notice that we have our change order scenario. Click the three dot button, then choose view reports.
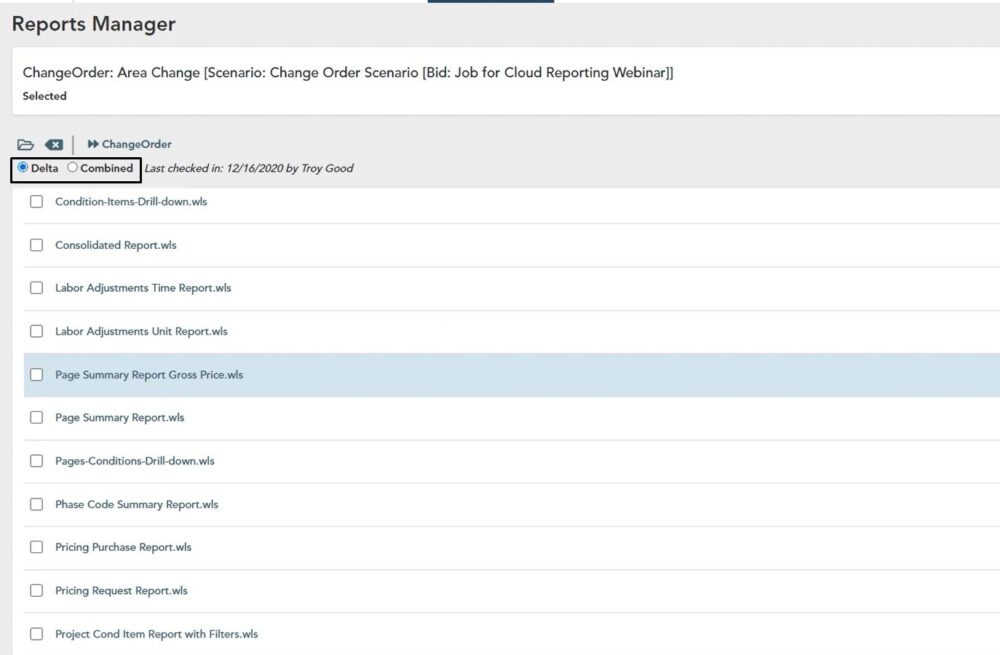
Reports Manager
Once you click view reports, the reports manager window will open. Click select job
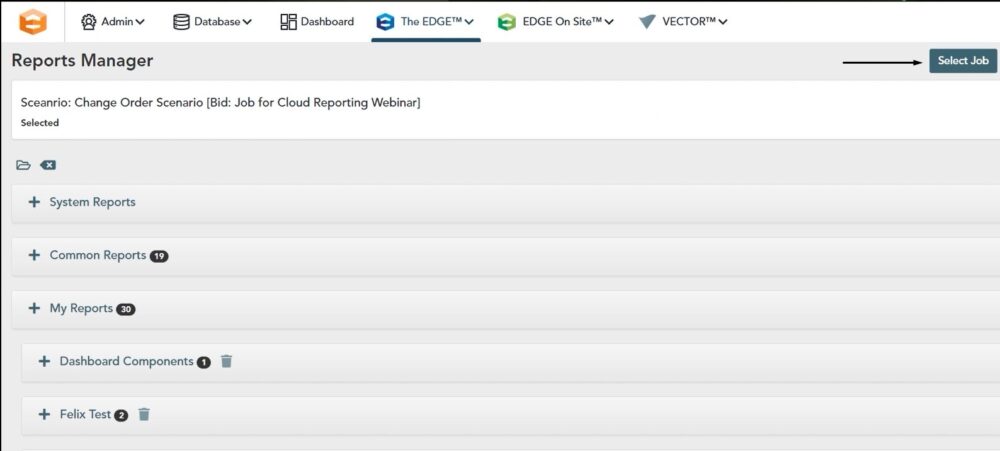
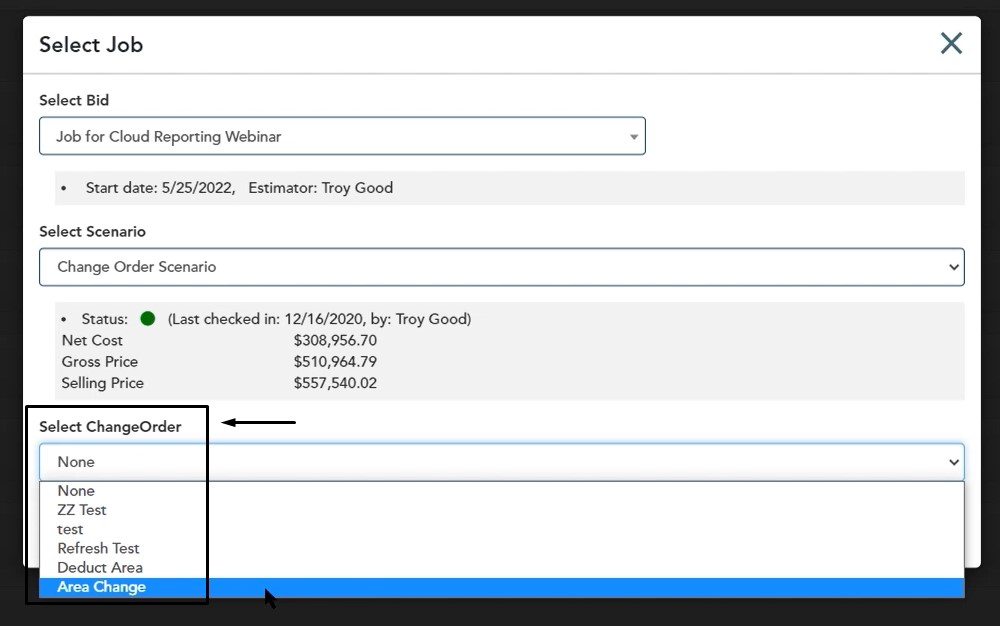
Select Job
When the select job window opens, you can choose the change order by click the drop down arrow under selectchange order.
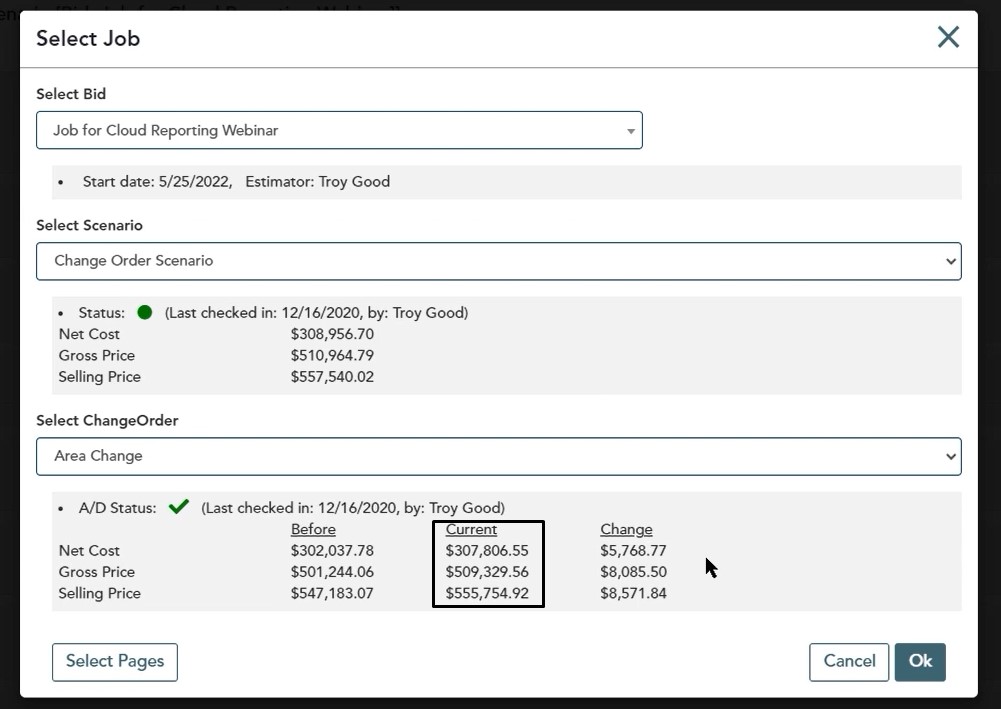
For this example we will select area change
Note: You’ll notice that this window is very similar to what you have in the change order view when looking at version 12.
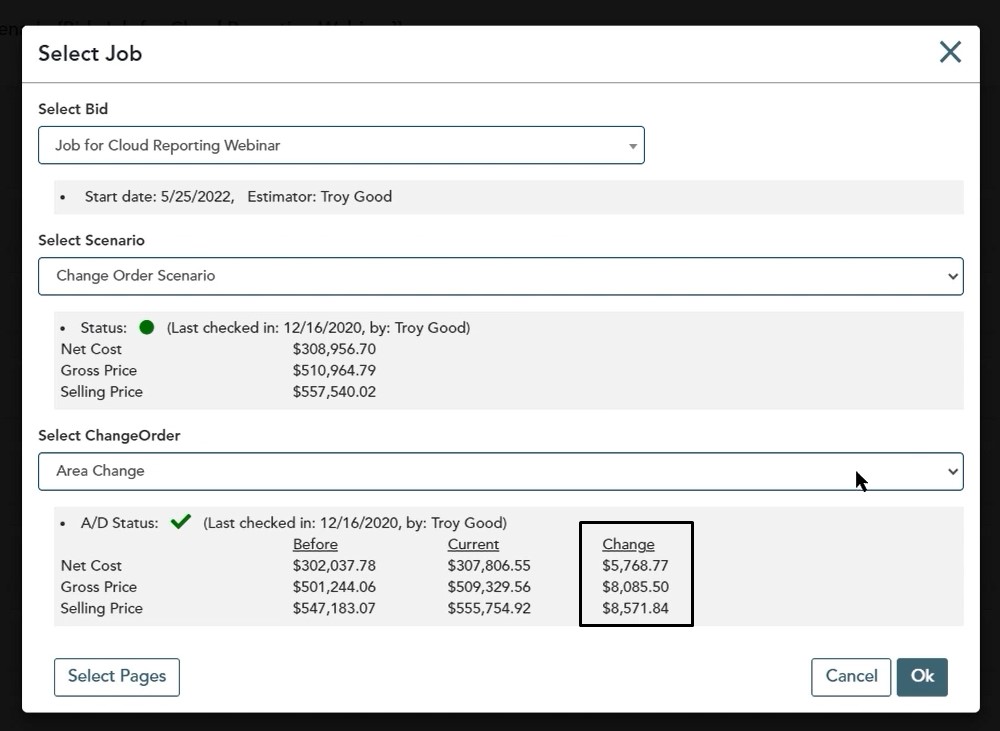
Click Ok
Once you click OK, you’ll notice that you have a Delta and a Combined option here for your reporting needs.
Combined: Will be your change order changes plus the base scenario that you already had in there. So this would be the total amount for the change order.
Delta: Will only include the change amount.
Click on the white circle and that will define what choice you are reporting on. In this example, you can click any of the reports, any of the custom reports that you’ve built for your team internally, Or you can use the common reports that are already built in.
Ultimately, based on the selection you have when you choose the report, it’s going to print the data that is going to correspond with your selection.
Again, delta is the specific change amount that’s happening in that change order, and combined would be the total project change plus the base.
If you have any additional questions or you need any assistance as you’re walking through the change order reporting, please reach out to our technical team and they’d be happy to assist you in any way they can.