![]() Estimating Edge’s team of experienced construction professionals and software engineers have developed the industry’s smartest takeoff and estimating software solutions for competitive estimates.
Estimating Edge’s team of experienced construction professionals and software engineers have developed the industry’s smartest takeoff and estimating software solutions for competitive estimates.
Don’t just estimate faster. Estimate better.®
- /
- /
- /
How to Use The EDGE On Time application
Note: In order to use EDGE On Time, the company must be an EDGE On Site customer. There will be a setting added to the users tenant to activate EDGE On Time.
Step 5: How to Use The EDGE On Time application
Note: If the device settings are changed to Spanish EDGE On Time will comply.
- Open the EDGE On Time application on the device.

- Log in to the application.

- The Project Screen will appear allowing users to:
- Only see the projects they are assigned to.
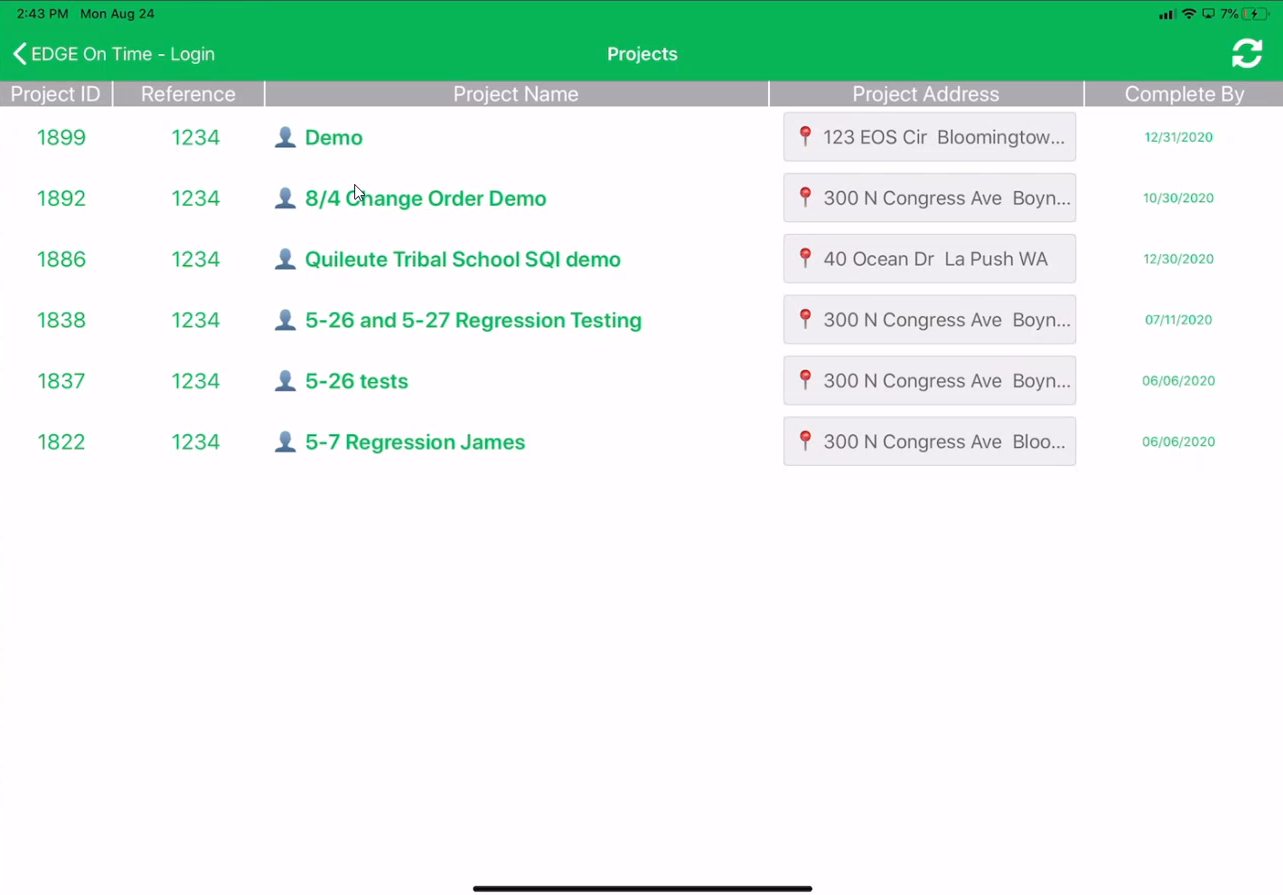
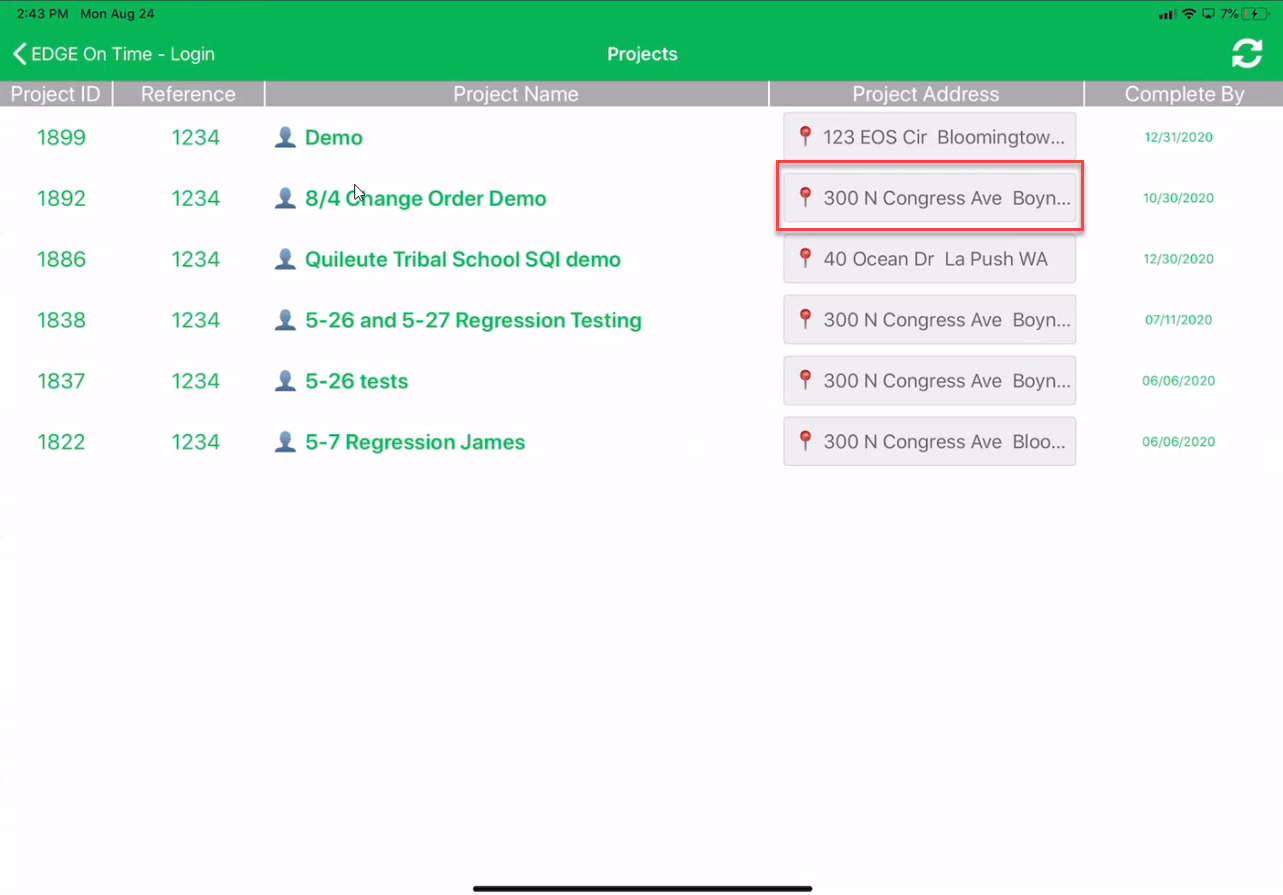
- View project addresses, only in landscape mode, if selected directions will open. This is handy for employees who have not been to the site before.
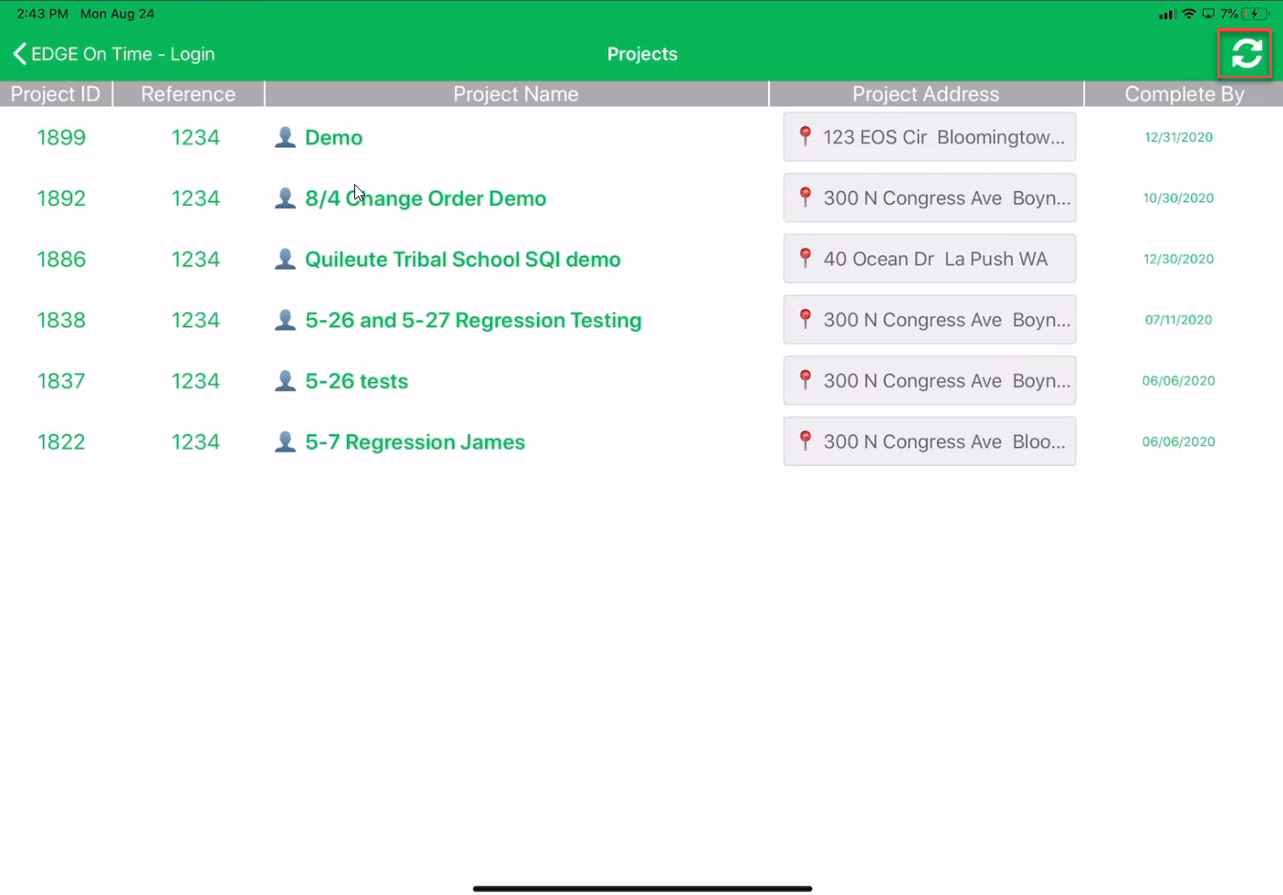
- Refresh to see if the user has been added to additional projects.
- Only see the projects they are assigned to.
- Click on the project name.

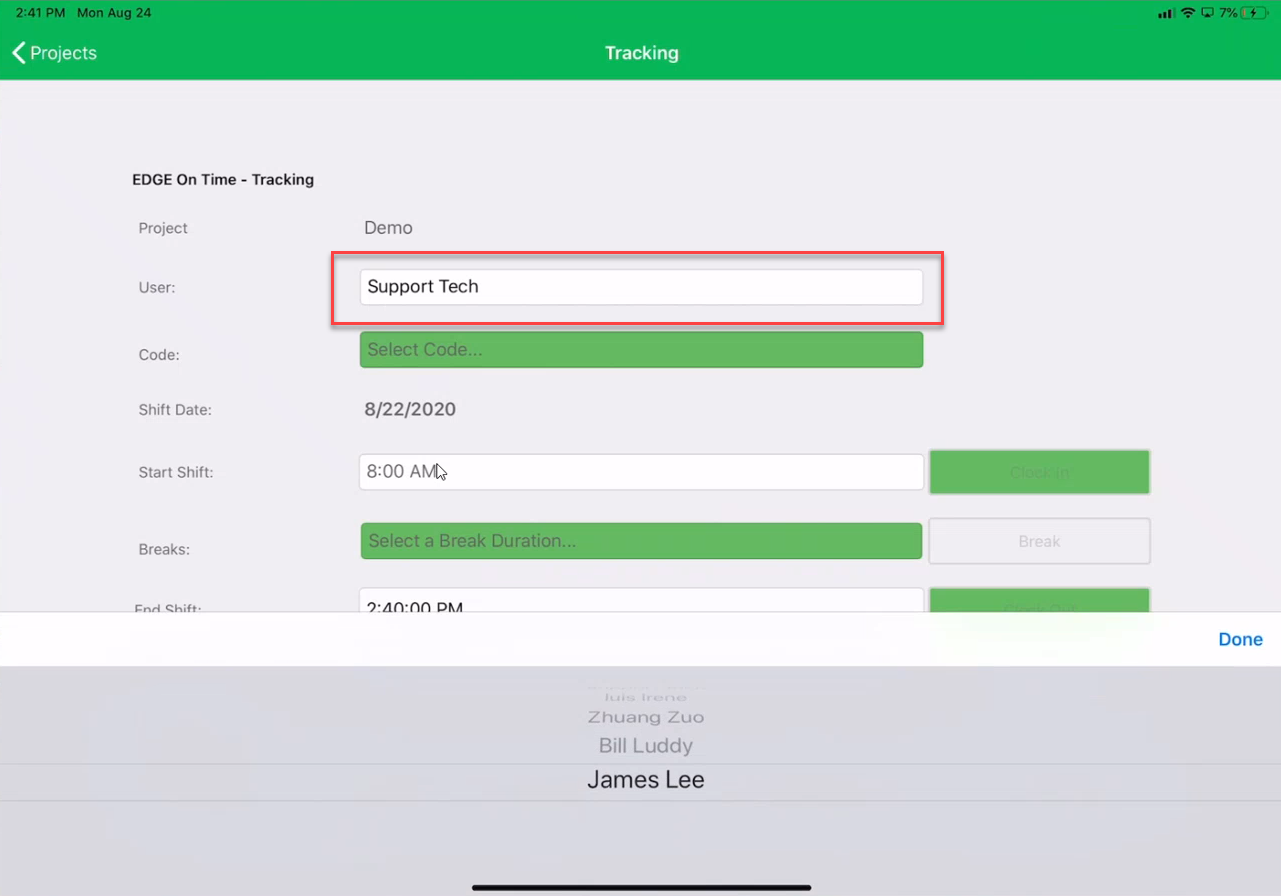
- Tracking Screen will open.

- If the user has the role EDGE On Time Manager, the user will be able to select the user. If the user does not have this role the user will be themselves.
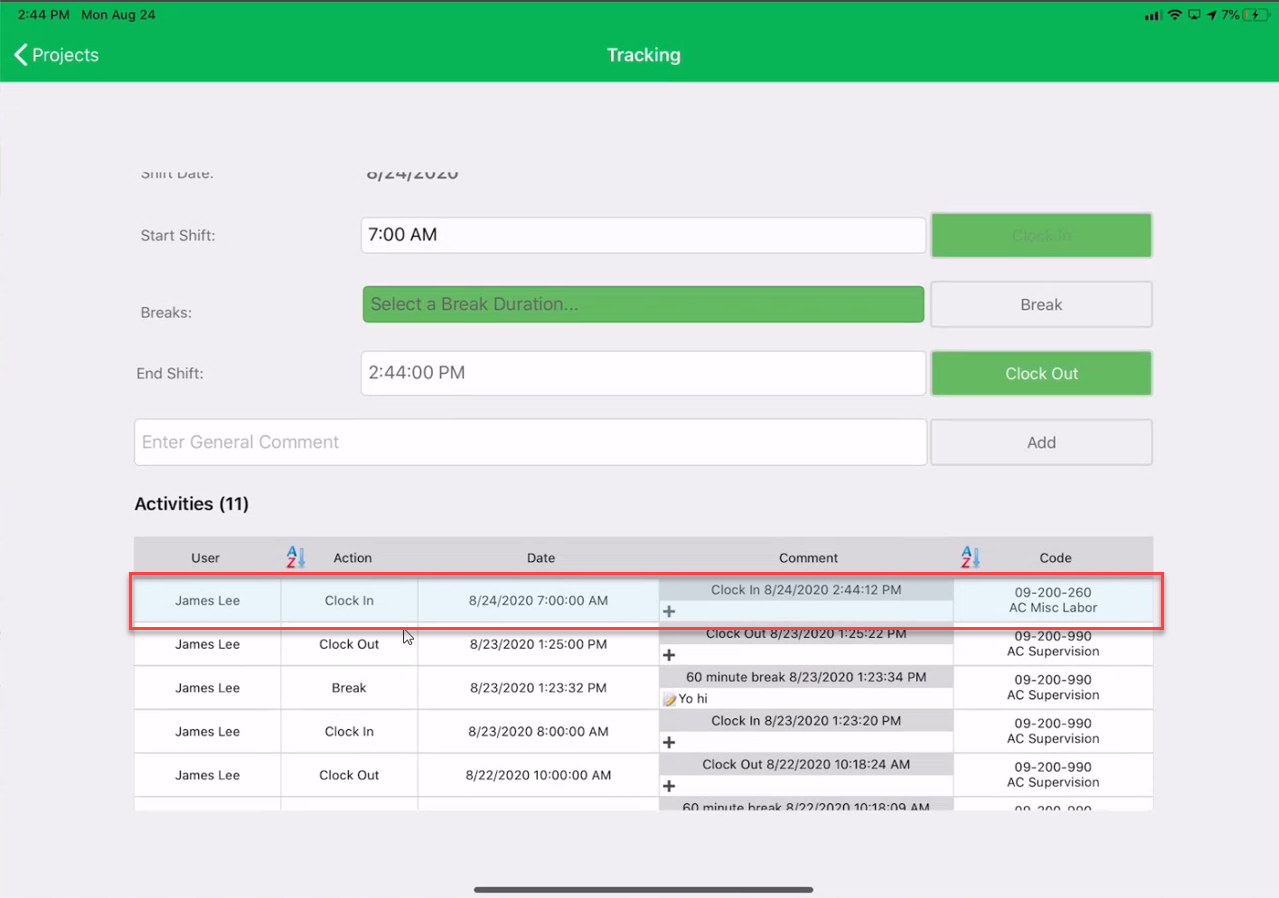
Note: The Activities list at the bottom on the screen will update based on the user selected.
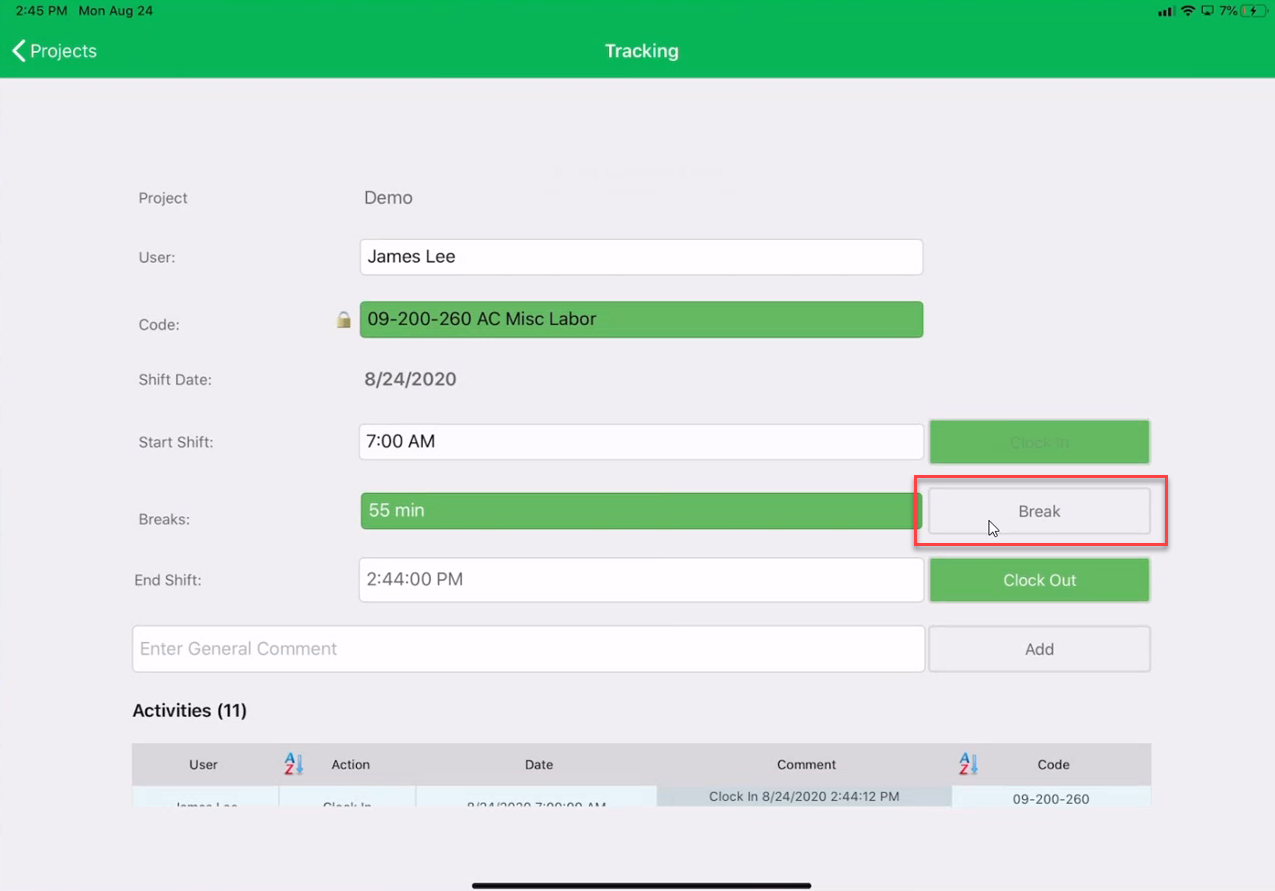
- Select Code.

Note: The Shift Date is today’s date.
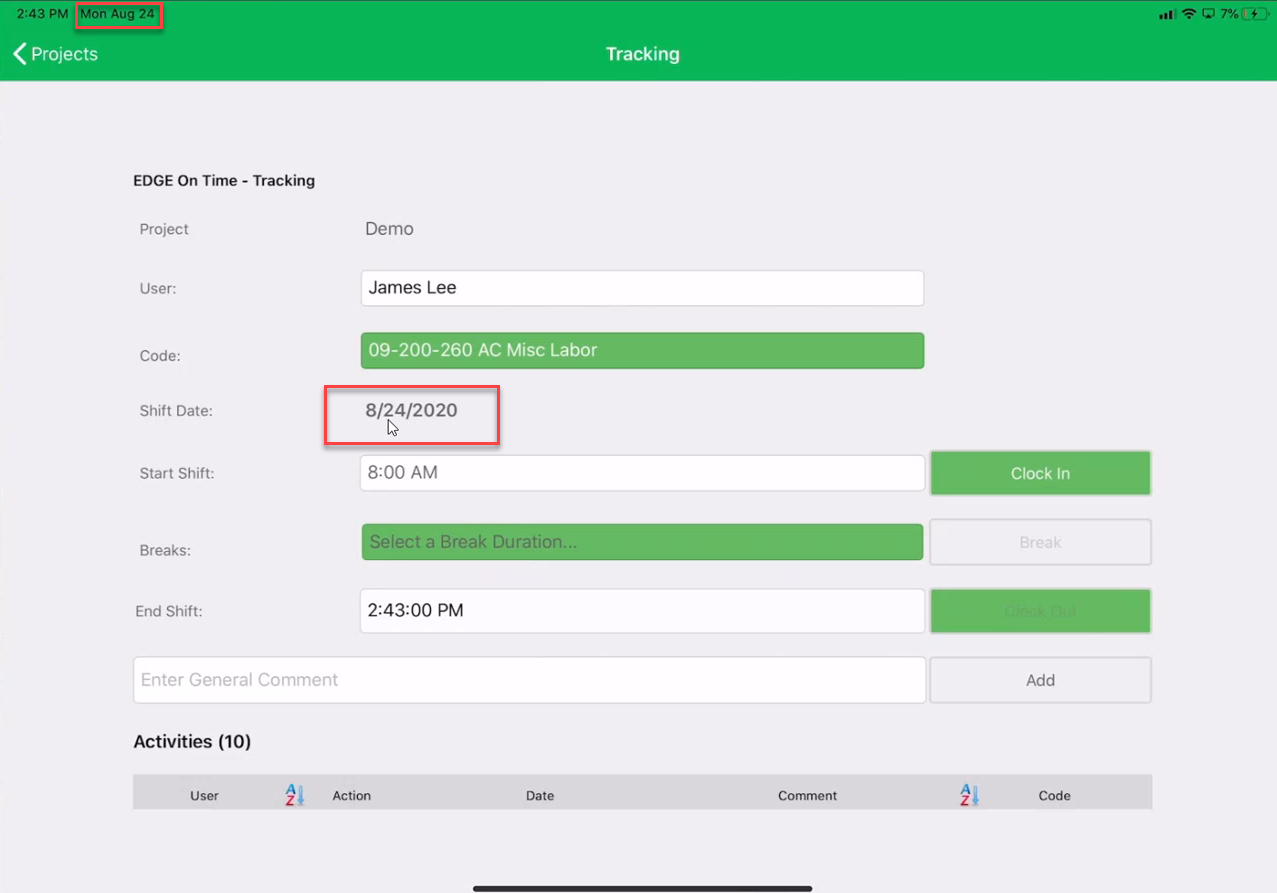
- Enter Start Shift Time.

- Click Clock In.
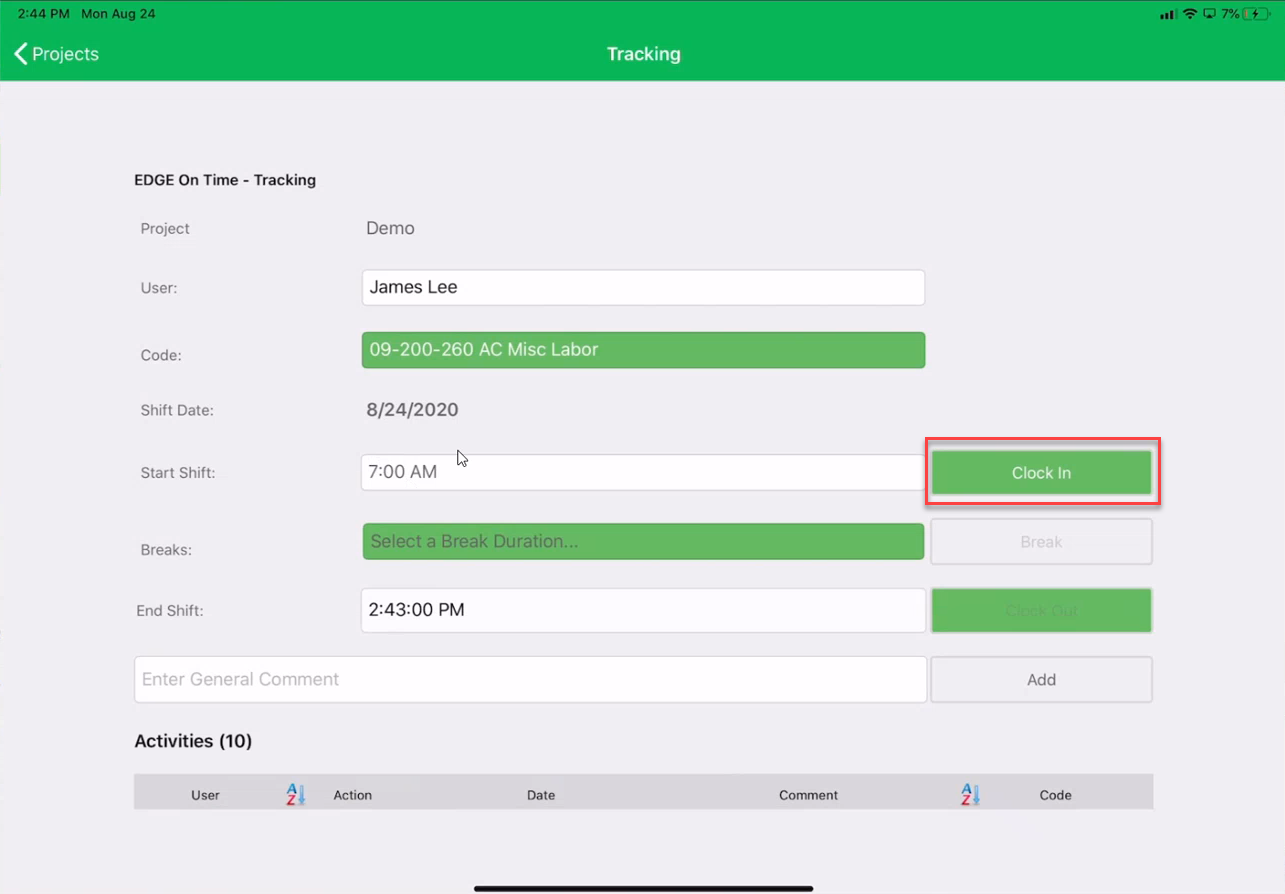
Note: Activates at the bottom will log the click in, the system shows the date as time manually entered and comment as the system time (actual time).
- Select Break Duration
Note: If the user clicks other a pop-up will appear for the user to type in the minutes. Click Enter.
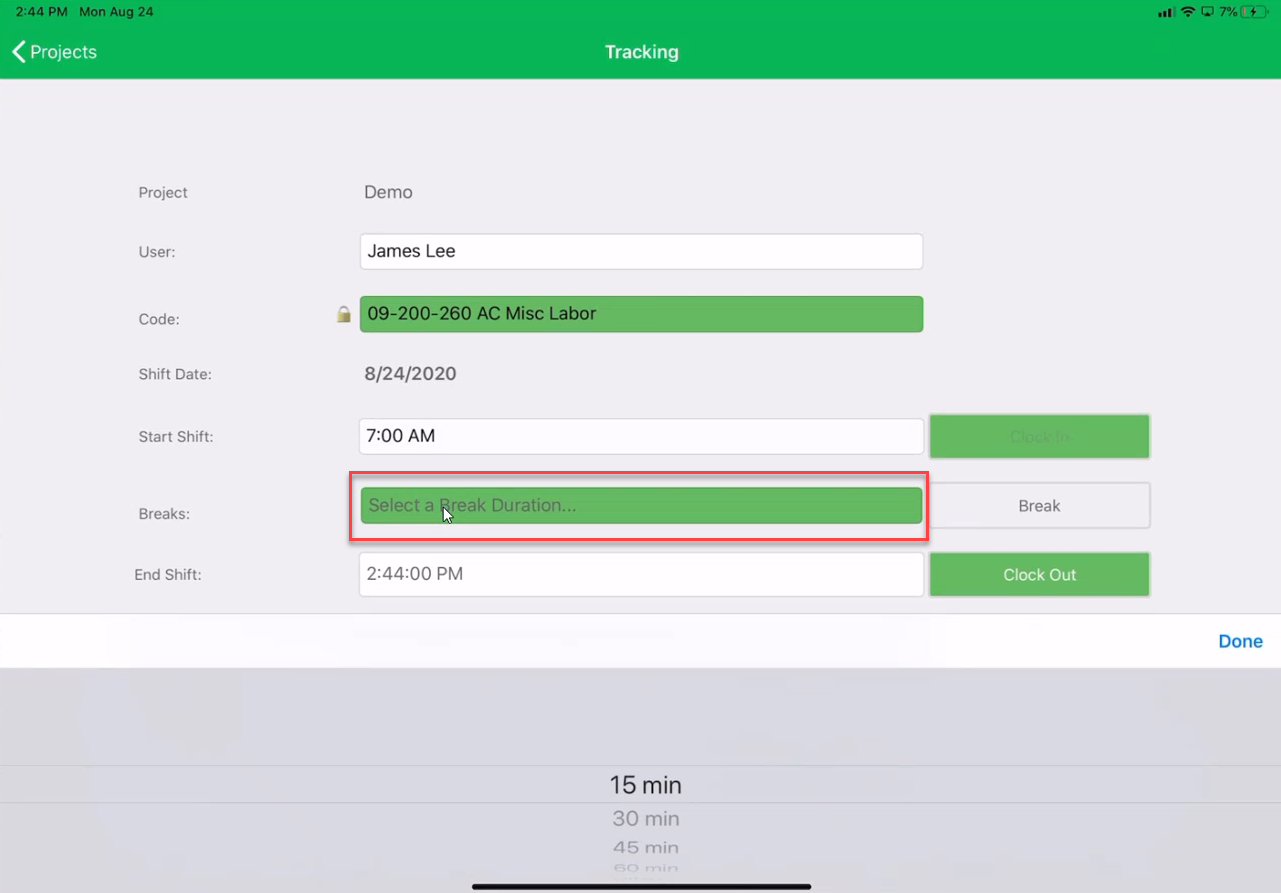
- Click Break.
Note: Breaks are only required if your company pays by the minute. Any time entered as a break will be subtracted from the total time for the shift.
Note: Activities at the bottom of the screen will add the break.
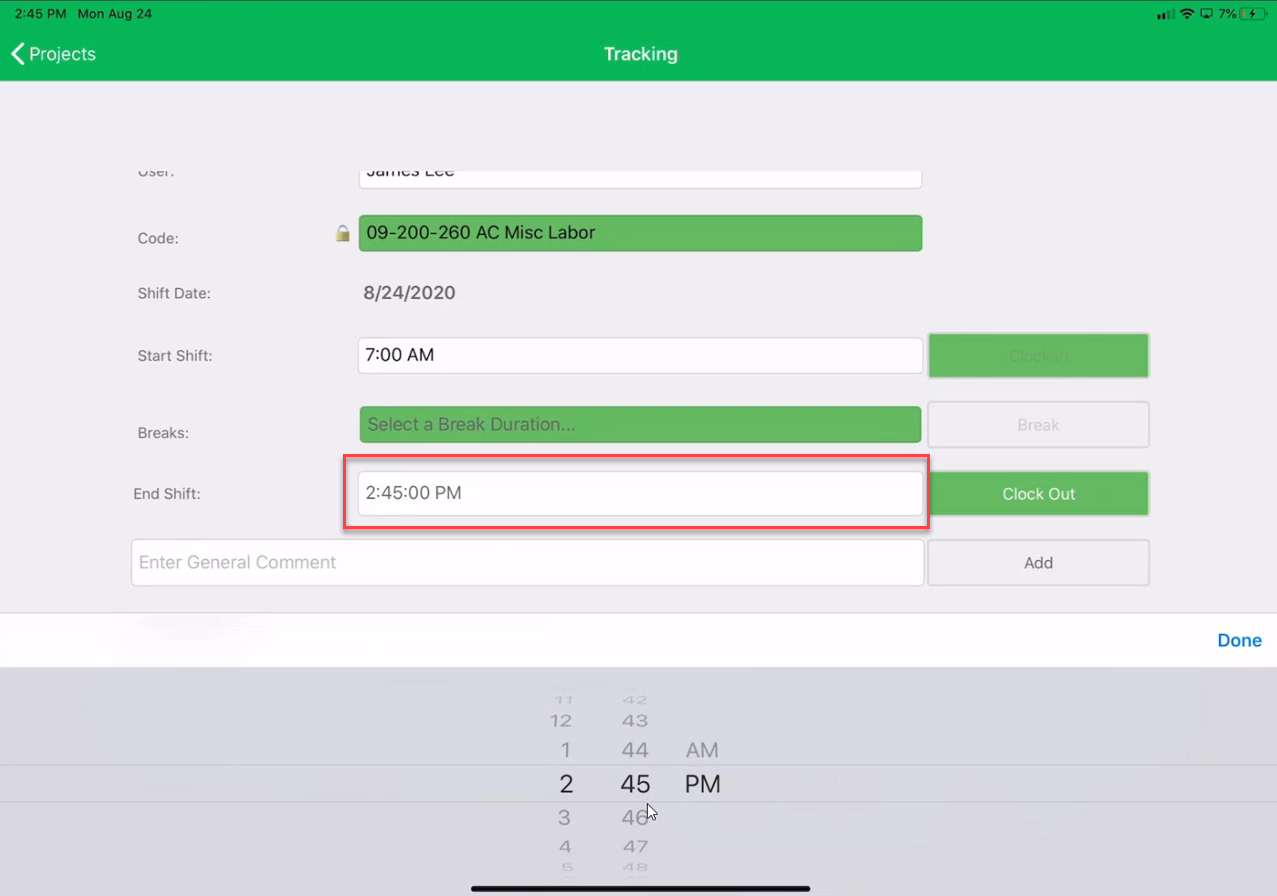
- Select End Shift Time.
Note: The user cannot select a time in the future or a time that is not greater than the start shift.
Note: Activates at the bottom will log the click in, the system shows the date as time manually entered and comment as the system time (actual time). There is a plus icon under the comments for this activity which allows the user to leave a comment. This feature is important for those employees in unions if they do not clock out to the minute then they have to be able to explain why there is a difference in the time (Actual date to Entered Date).
- Click Clock Out.
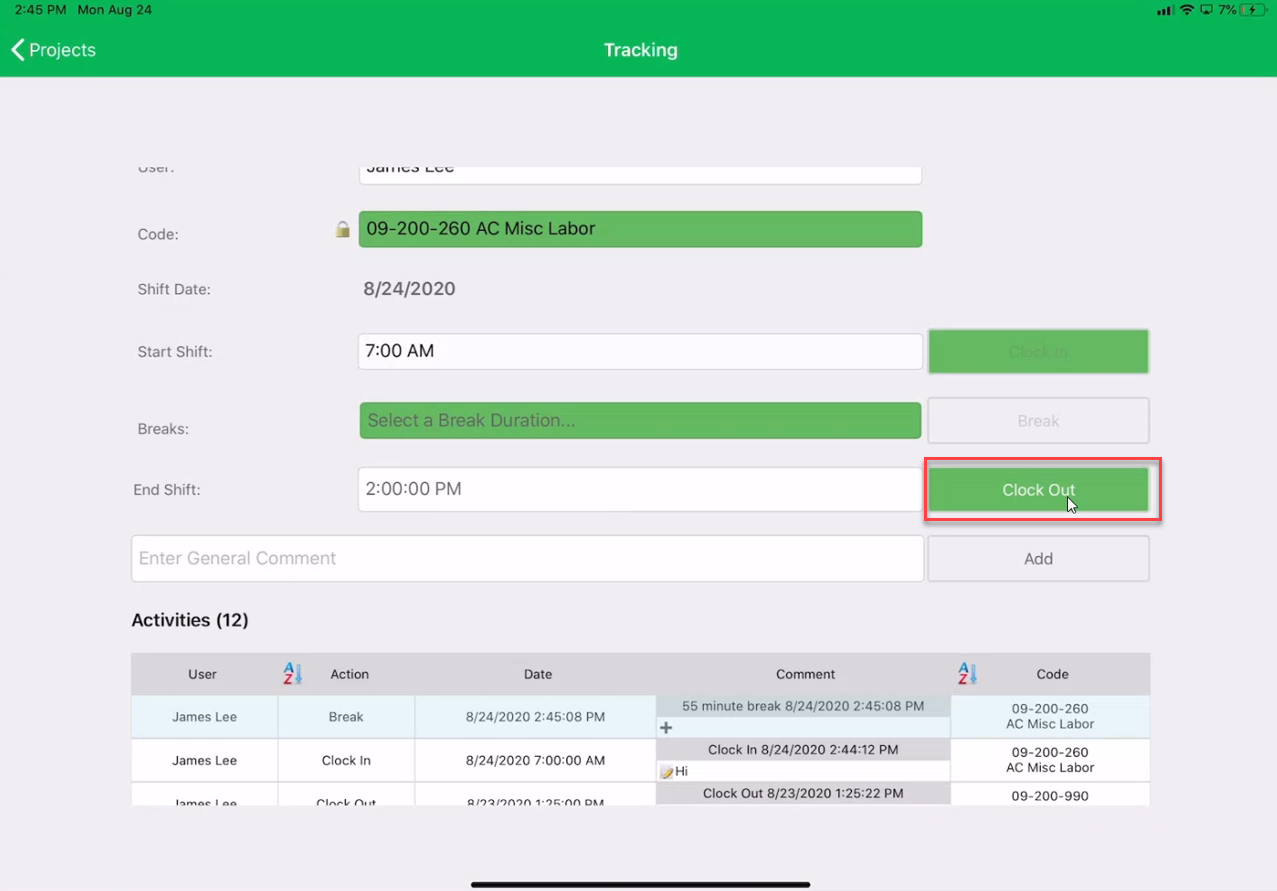
- A pop-up will appear asking if there were any injuries.
- If there was not, click Continue Clock Out.

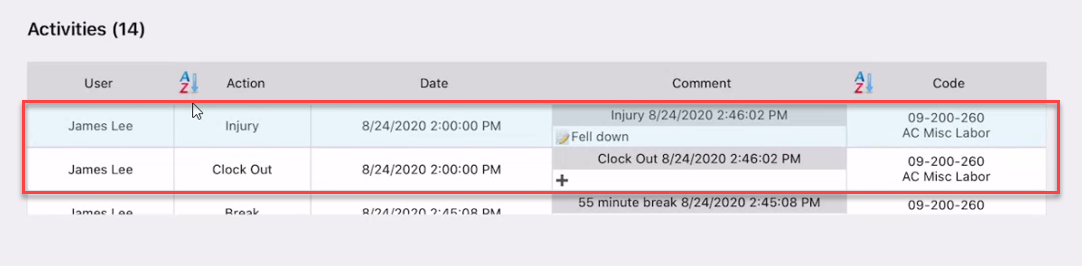
- If there was, click the toggle to Yes. A textbox will appear requesting an explanation of the injury. Click Continue Clock Out.

Note: There will be two activities logged for clocking out with an injury. One for the clock out and one for the injury.
- If there was not, click Continue Clock Out.
- Type a General Comment. An example, some companies do not track breaks in terms of payroll. They cloud use to General Comment to just note that there was a break.
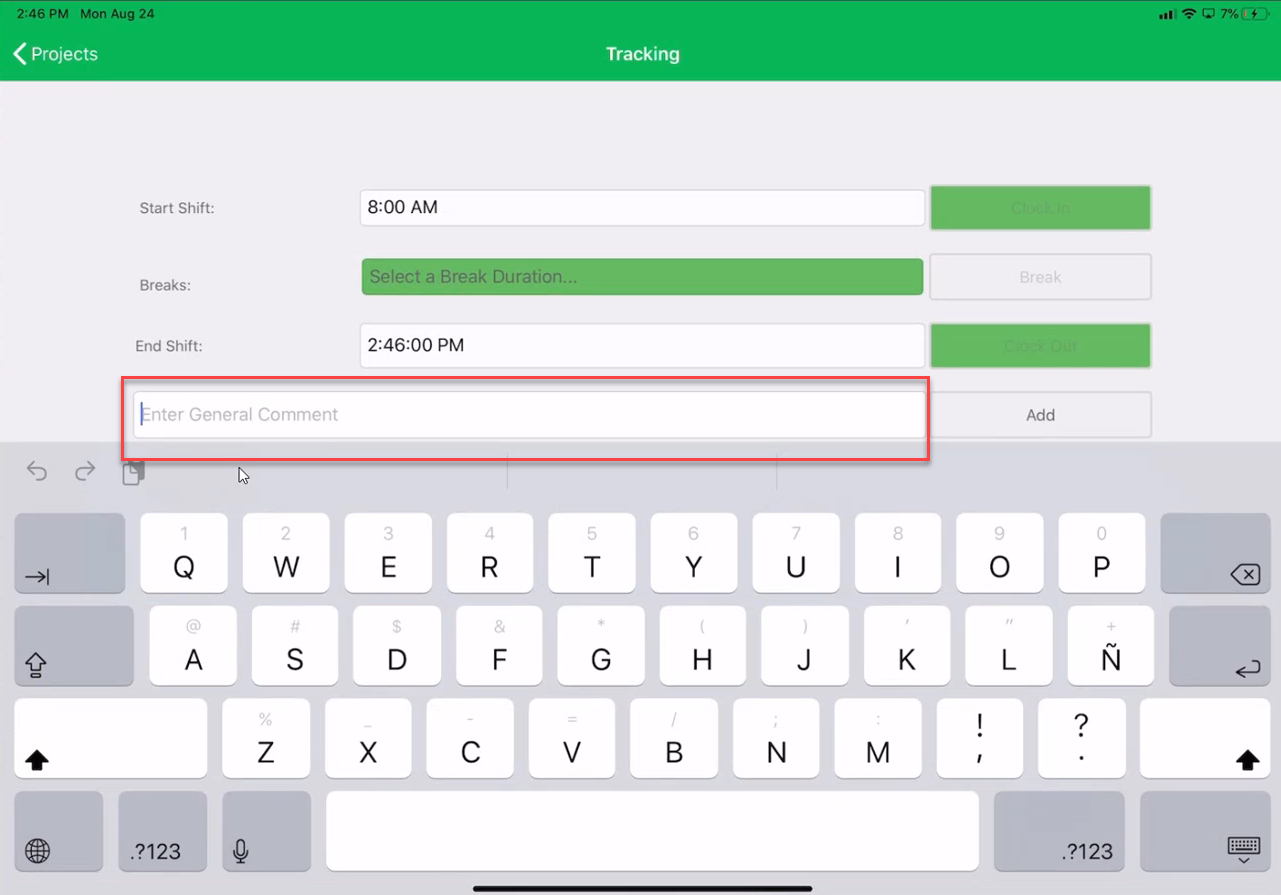
- Click Add.
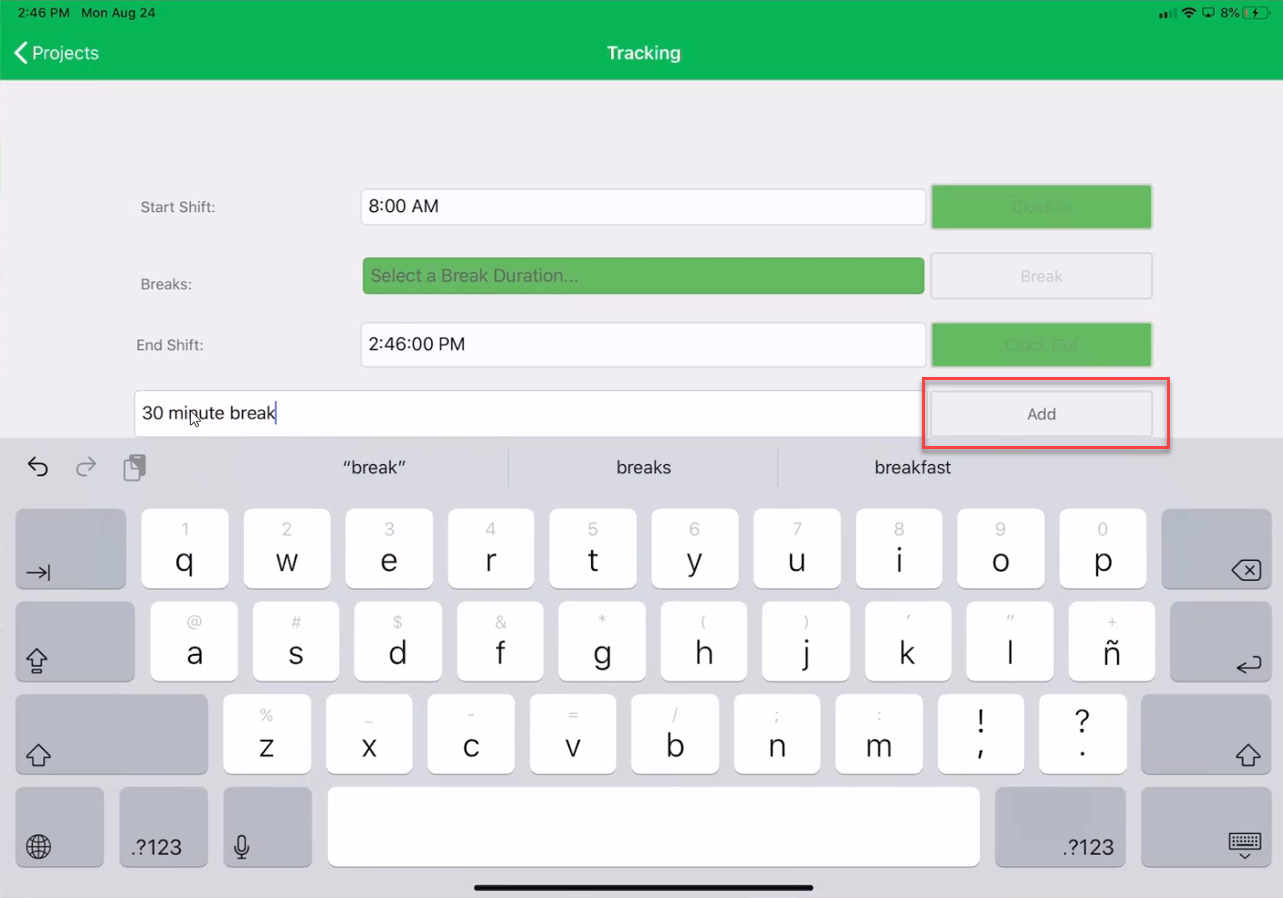
Note: Activities at the bottom will log the General Comments.
