![]() Estimating Edge’s team of experienced construction professionals and software engineers have developed the industry’s smartest takeoff and estimating software solutions for competitive estimates.
Estimating Edge’s team of experienced construction professionals and software engineers have developed the industry’s smartest takeoff and estimating software solutions for competitive estimates.
Don’t just estimate faster. Estimate better.®
- /
- /
- /
- /
How to use the Drawing Properties
This video shows you how to use the Drawing Properties through v12.
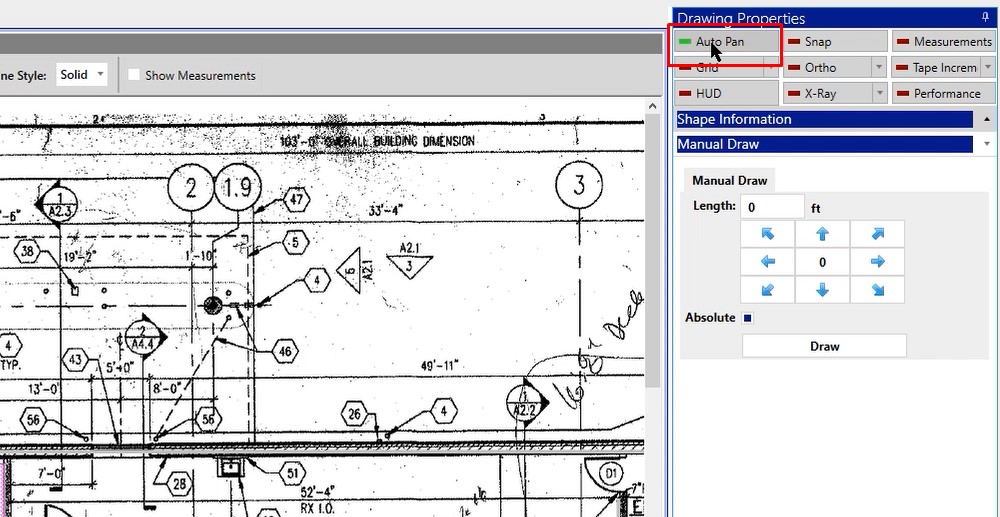
Auto Pan
When auto pan is turned off, if you zoom into your image, you will notice that the screen will not move. However, if you are drawing, that image will pan for you.
If you want auto pan to work when you’re not drawing, you can turn it on by clicking on the Auto Pan button in the top, right of your screen.
Grid
If you want to use grid:
- Click the arrow drop down
- Click display
- Type in inch increment for the grid paper that you’re wanting to create

- Click on the grid color and make your selections
- Click OK
You can now use this for measuring if you did not have a set of plans to measure off of.

HUD
The HUD stands for heads up display. When you turn the HUD on you’ll notice that around your crosshair you’re going to have a big box shown. This big box is showing because that’s what the HUD is and it’s letting me know a little bit of information about what you’re working on.

If you click on a drawing tool, you’ll notice here that the HUD is displaying the image that you’re drawing with in the upper left hand corner, and it’s also letting you know the condition that you’re drawing with in the bottom of the HUD.
In the upper right hand corner of the HUD it shows you the style, so in this case, it’s an area. It’s also going to give you a tape measure and if you were measuring at an angle, it would also give you the degree of angle that you’re working.

Snap
Once you turn snap on, if you have drawn any shapes on your image already, as your mouse gets close to any of those points that you have already digitized, you’ll start to get a little square. You’ll also notice that the mouse is snapping to those points. That’s the functionality of snap. We’re allowing you to snap to any previous point that you have digitized on your takeoff.

Ortho
With ortho, there is a drop down arrow and this allows you to choose either the default view or a custom angle. With the custom angle, you can type in whatever degree you want it to be measured by.

Once we turn ortho on and start to draw, if we move the mouse pointer the crosshairs aren’t really following it. The reason is because we’re not hitting that 45 degree angle yet. As we start to get closer to that 45 degree angle, the line will begin to shift.

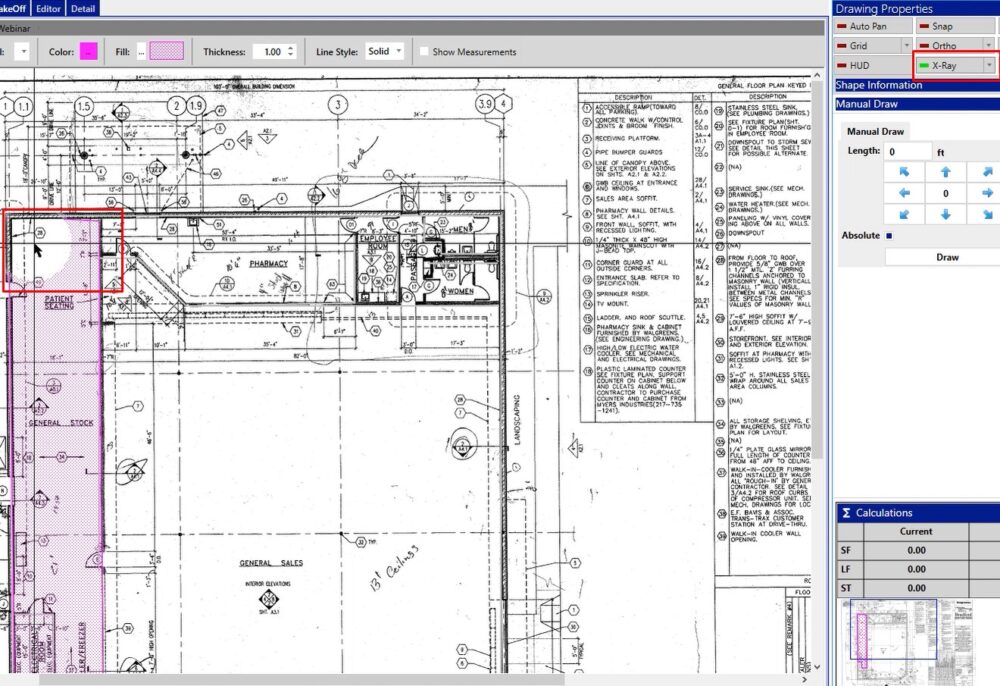
X-Ray
X-Ray has two levels. The first level of X-Ray with the single left click is going to allow you to visually see through the fill pattern of an area condition. This is so that you can see any information on your background.

If you click X-Ray again, the green bar turns to a bright green bar. When you have the bright green bar displayed, you’ll be shown the background image and we’re going to go through the linear measurements, area measurements and count measurements so that way you don’t miss anything on your background.
If you don’t like X-Ray or don’t want to use it, click the drop down arrow and you can use BleedThru. This is going to change the opacity level of the colors that are displayed on the shape that you’ve drawn. You’ll notice that the opacity on the area has gotten a lot lighter than what it was before and you can see everything clearly.

Measurements
Once you turn measurements on, if you’ve already drawn a shape, you can click your select arrow and you can click on that shape and we will visually show you on the screen the measurements that you are calculating for that shape. We’re providing lineal footage for you around the perimeter, and if you zoom in we have the square footage displayed in the middle of that shape as well.

Tape Increments
When you start to measure we have a tape measure down at the bottom of the screen and you will get fractional numbers on the tape measure.
If you don’t want fractional numbers in your measurements, you can click the drop down for tape increments and choose the specific inch increments that you would like to measure by.

Performance
If you are working with a high resolution image, it is recommended to select performance. If you’re noticing some slowness on the takeoff screen because of the high resolution image, we want to make sure that you can navigate and maneuver your takeoff screen with efficiency.
When you click on performance and you’re viewing your image at a zoomed out view, it’s going to downgrade the resolution a little bit and it’s going to make it look a little pixelated.
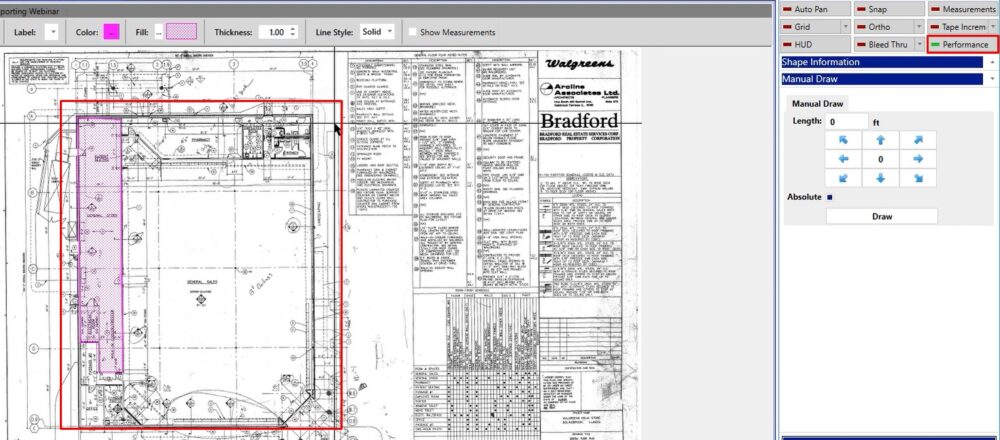
As you zoom in with performance turned on, everything will start to get a lot more clear and a lot more detailed. This is going to allow you to go in and make sure that you don’t miss anything as you’re doing your takeoff but still be able to work with that speed that you’re wanting to see.

If you have any additional questions about the drawing properties, please give us a call on our tech support line and we will be happy to assist you in any way we can.