![]() Estimating Edge’s team of experienced construction professionals and software engineers have developed the industry’s smartest takeoff and estimating software solutions for competitive estimates.
Estimating Edge’s team of experienced construction professionals and software engineers have developed the industry’s smartest takeoff and estimating software solutions for competitive estimates.
Don’t just estimate faster. Estimate better.®
- /
- /
- /
- /
How to use CQty’s and Tilde Codes
This video covers how to use CQty’s and Tilde Codes through v12.
Today we’re going to cover the CQty’s and Tilde Codes that you have the ability to use in descriptions or formulas throughout the program.
To see what CQty’s and Tilde Codes you are able to use:
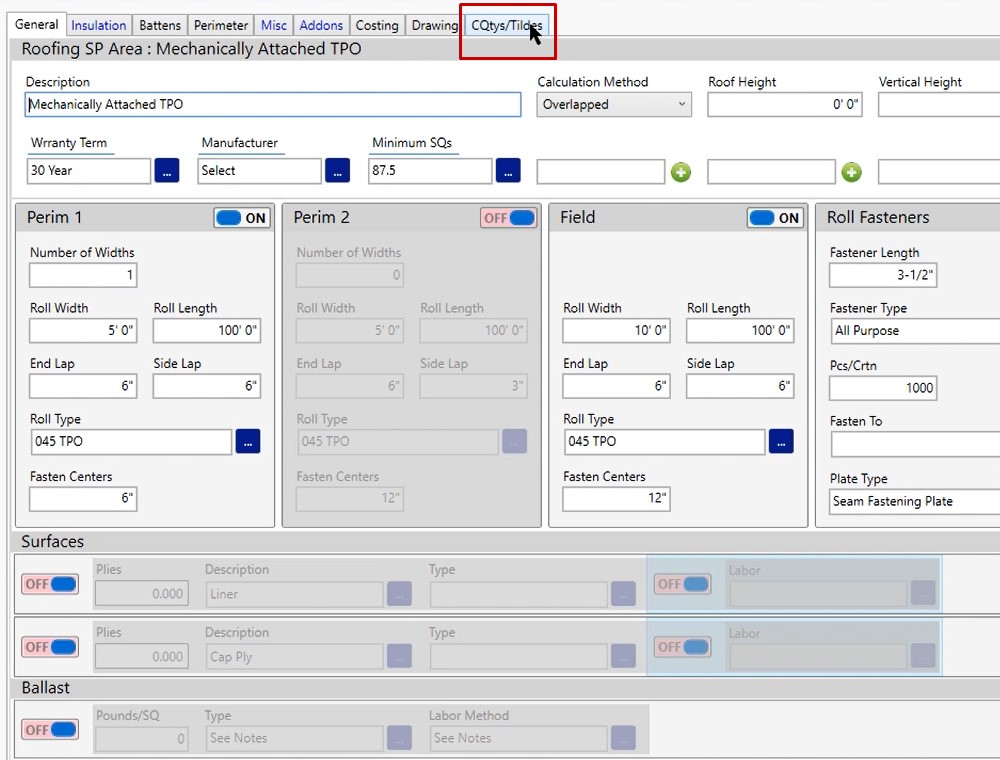
- Open your condition properties by double clicking on the description
- Click on the CQtys/Tildes tab
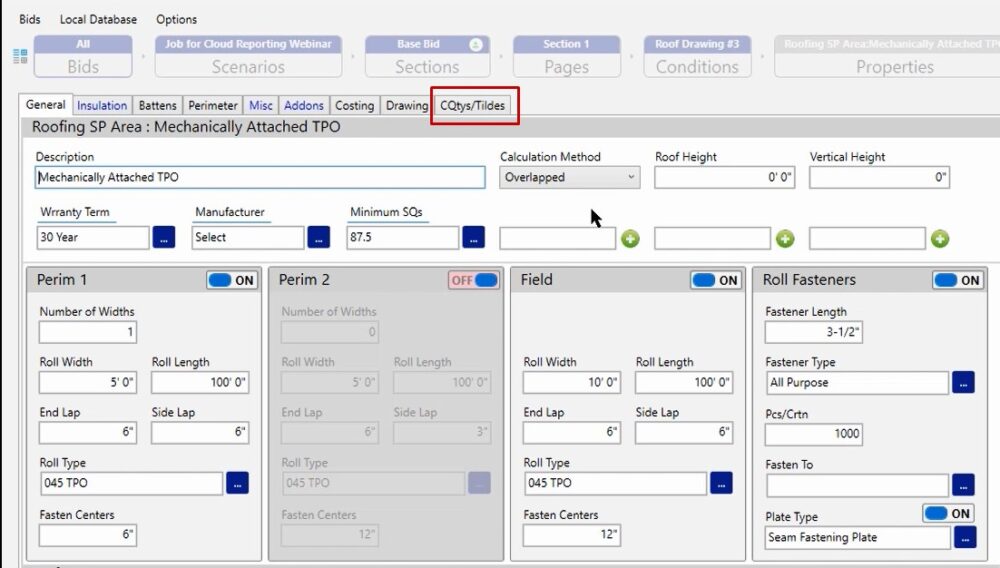
Tilde codes are going to be anything that have the squiggly line right in front of it and behind the letter number combination. A CQty is just going to be a letter number combination.
Tilde Codes
For example, if we open up the global tildes, you’ll notice that you see the squiggly line, GJ a number and then the squiggly line that is going to be representative of a tilde code. If you need to know where the symbol is on your keyboard – hold shift and hit the key right below the escape button and that’s the tilde symbol.
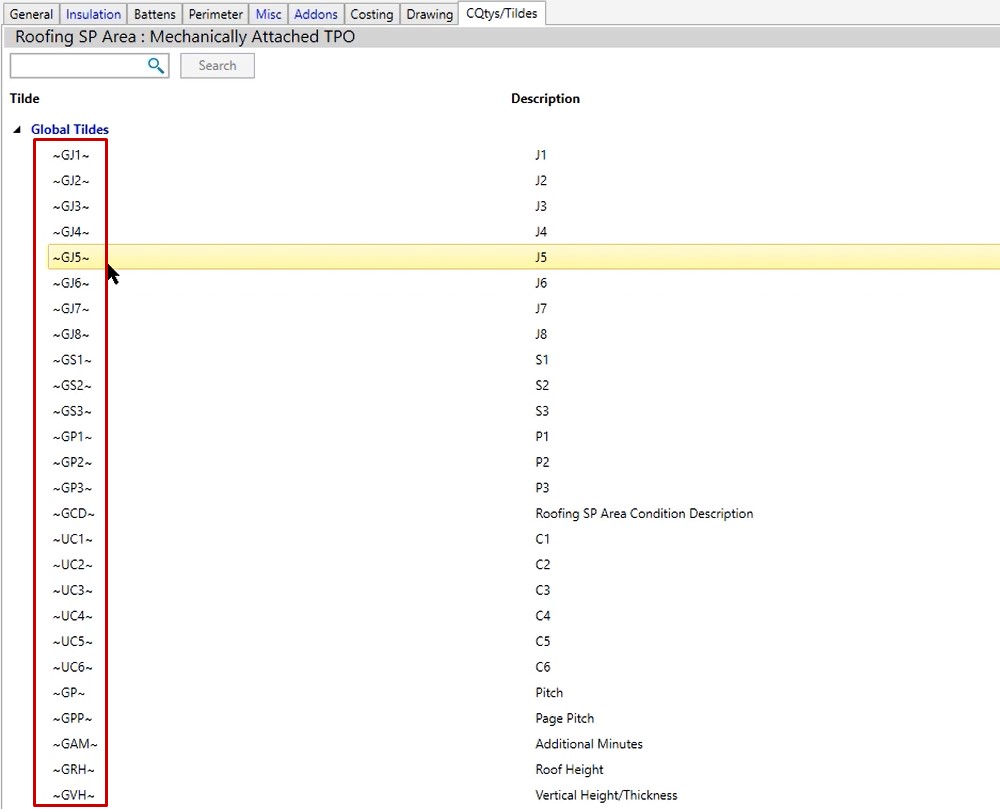
Tilde codes are most often user defined fields, so you’re going to be putting information in those fields. You’ll notice if you’re using J fields, s fields or P fields, you have that information here.
CQty’s (Condition Quantities)
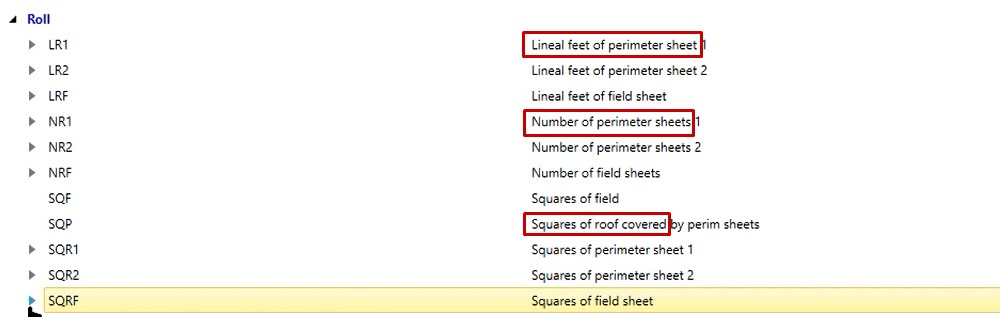
For example, in the roofing condition, we will take a look at row. In this case, you’ll notice that we’re providing lineal footage, number of sheets, and also the squares of coverage as well. So we’re giving you three different ways to be able to calculate the quantity that you’re producing on your project.
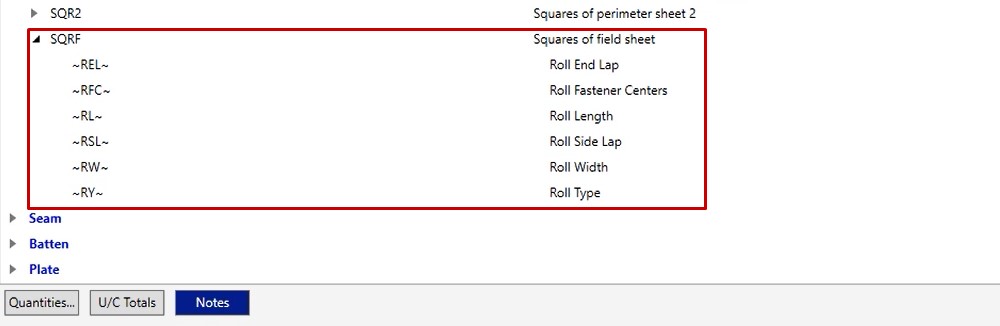
Makeup of CQty of SQRF
Click the triangle next to SQRF to expand it. Inside you will see it is made up of tilde codes that you are filling out inside of your condition properties. All of these codes come from information you have filled out on your general tab.
Each one of these fields that you’re going through and filling out has a tilde that’s assigned to it. We use those tilde codes in your descriptions and in your formulas to help you calculate your material accurately on a per project basis.
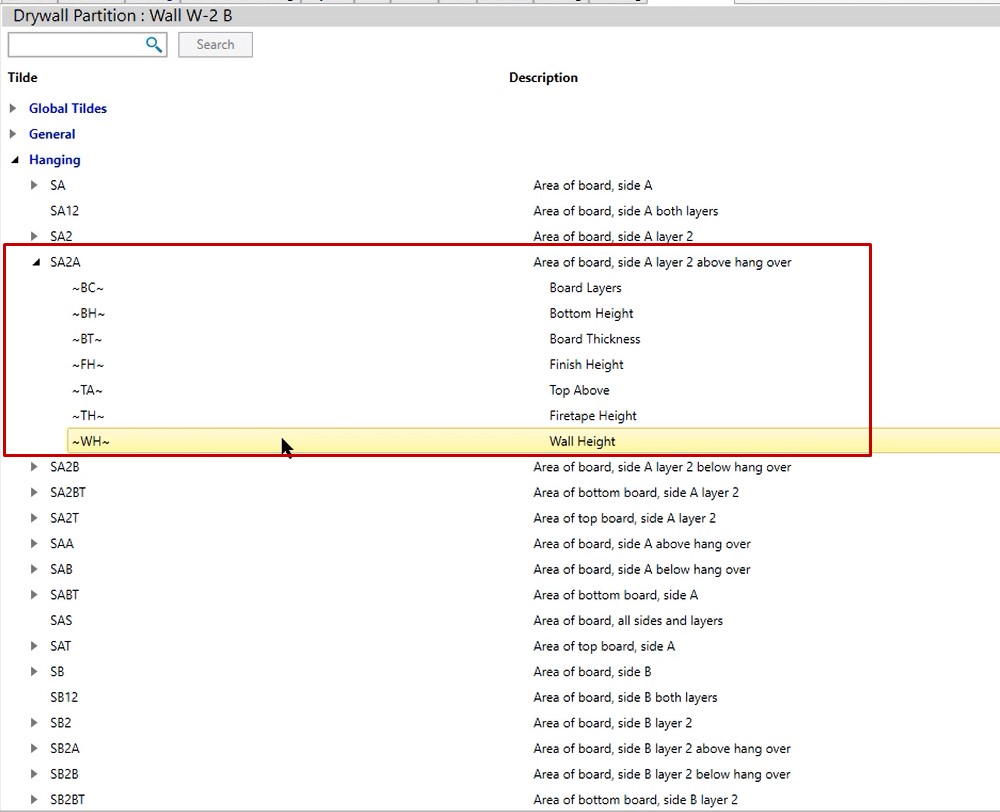
Let’s look at some examples of the CQty’s and Tilde codes if you’re looking at a drywall condition. In this example, we’re going to go look at a partition condition and we’re going to see how that differs from the roofing. You’ll notice that you’re going to have specific CQty’s and headers that are going to pertain to only the industry you’re working in.
So in this case, if we were to look at hanging or framing, we can expand those and you’ll see all of the CQty’s that are applied. All of the CQty’s are made up of tilde codes, so make sure as you are completing this that you pull in the correct information.
Now we will go over some examples of how we’re going to use tilde codes and CQty’s to come up with the formula or the specific quantity that you need in a project.
Item Screen
In this example we are going to open the Item screen.
CP (condition properties)
- Click on the CP circle
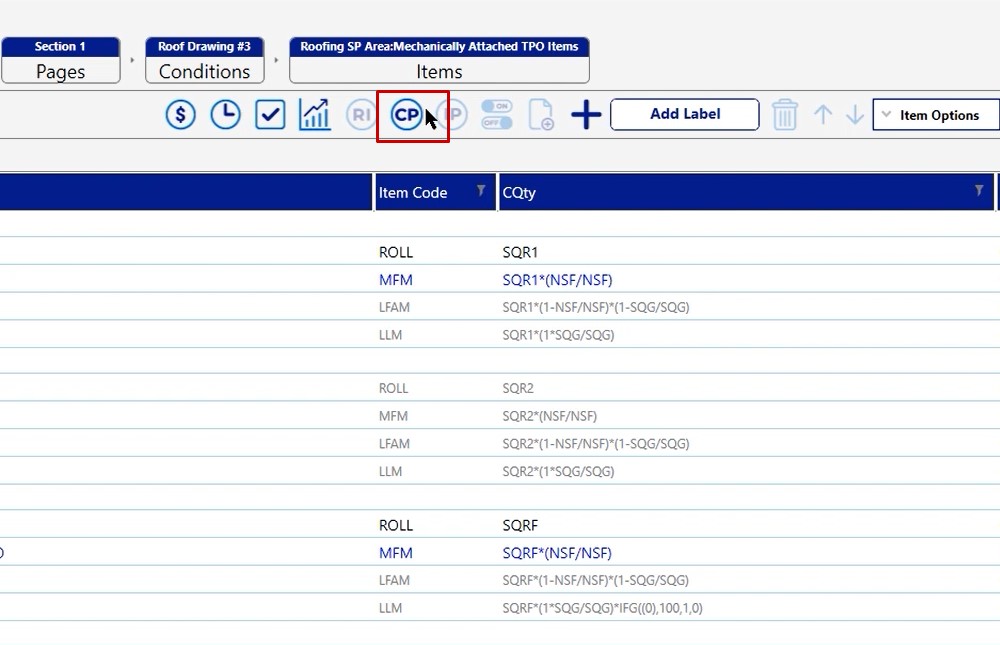
- Click the CQty/Tildes tab
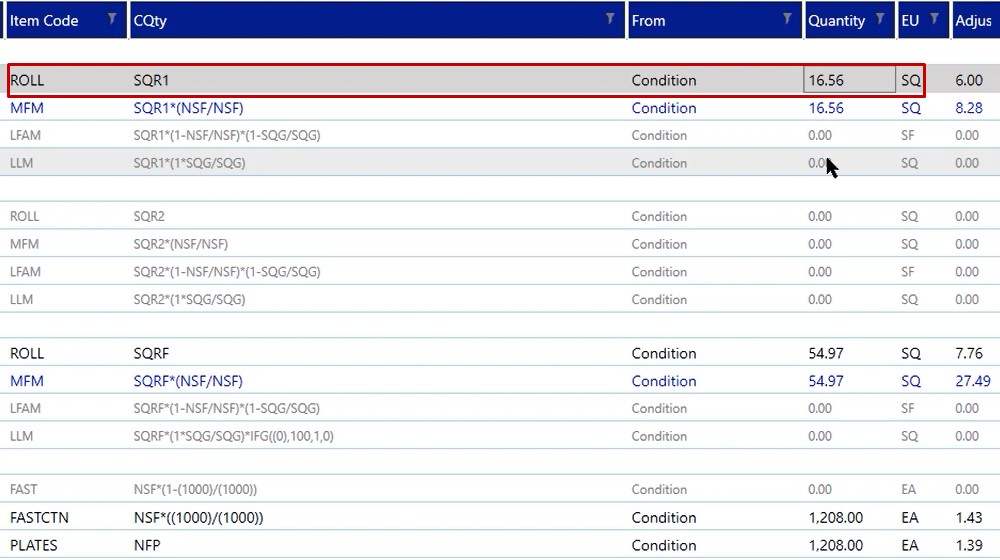
- Click on Roll
- Click on SQR1

All of the tilde codes that you fill out in your condition properties is what makes up the SQR1. In this case you’ll notice that all of this information has been filled out on the general tab in the perimeter 1 field
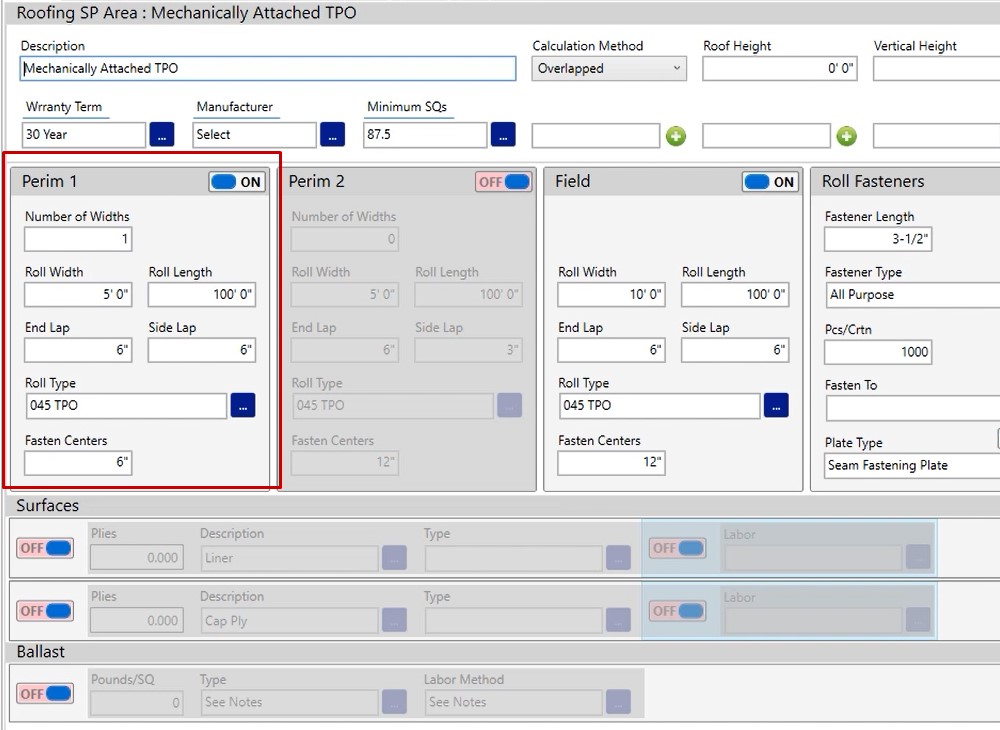
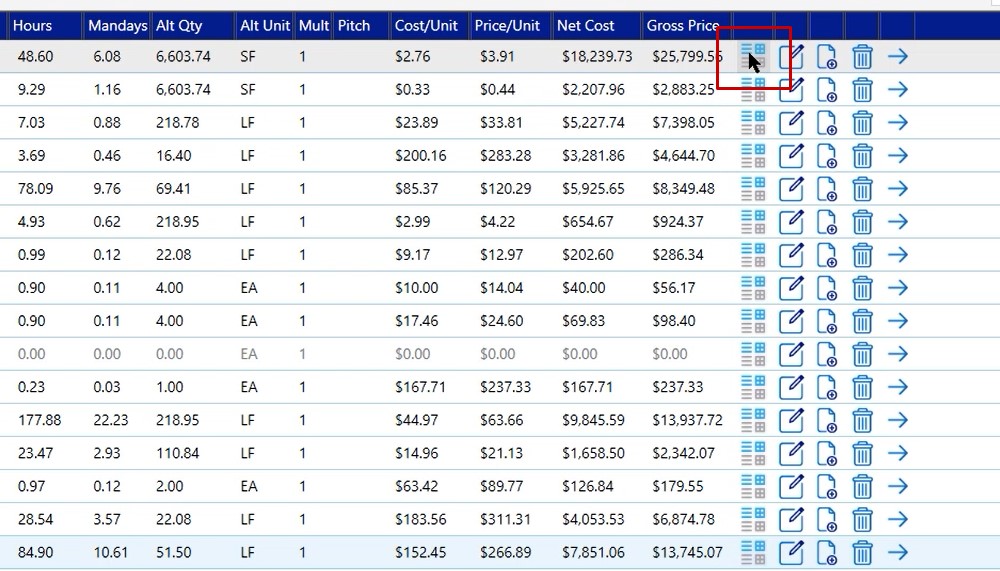
That’s how we’re producing the CQty of SQR1, which is giving us our 16.56 squares that we need.
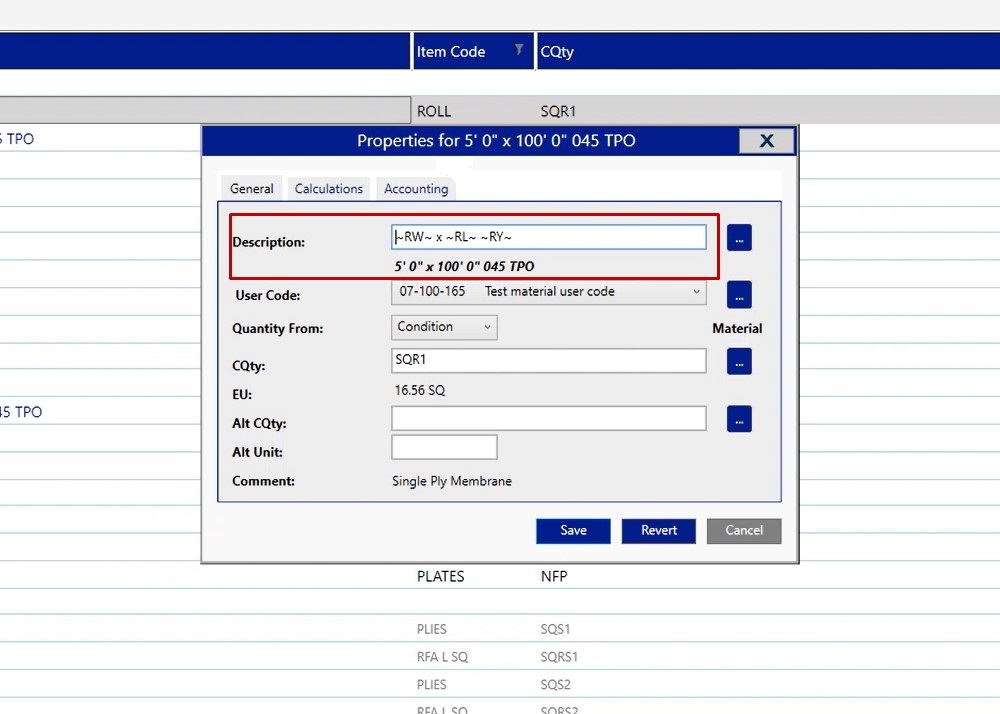
If you double click on this item, you’re going to open up the item properties. This is a great place to review information, but you don’t want to make any changes here.
Earlier we were talking about the tilde codes and how we use them in formulas or in descriptions. As you see, your description on the materials is reading the actual measurements, but the item itself is reading the tilde codes. The reason that we do this is so as you change your material inside of your condition on a per project basis, the program is going to read and display that information accurately for you.
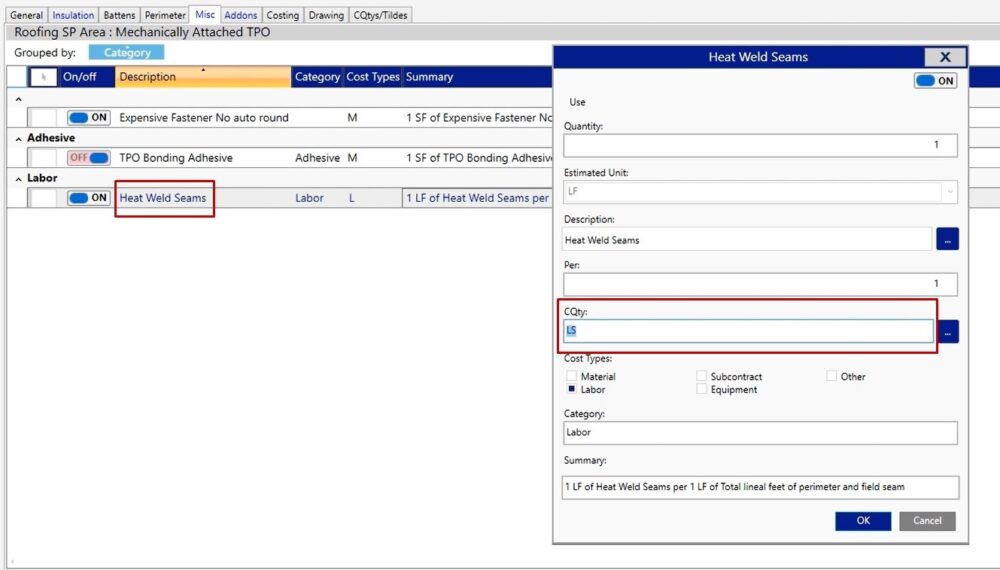
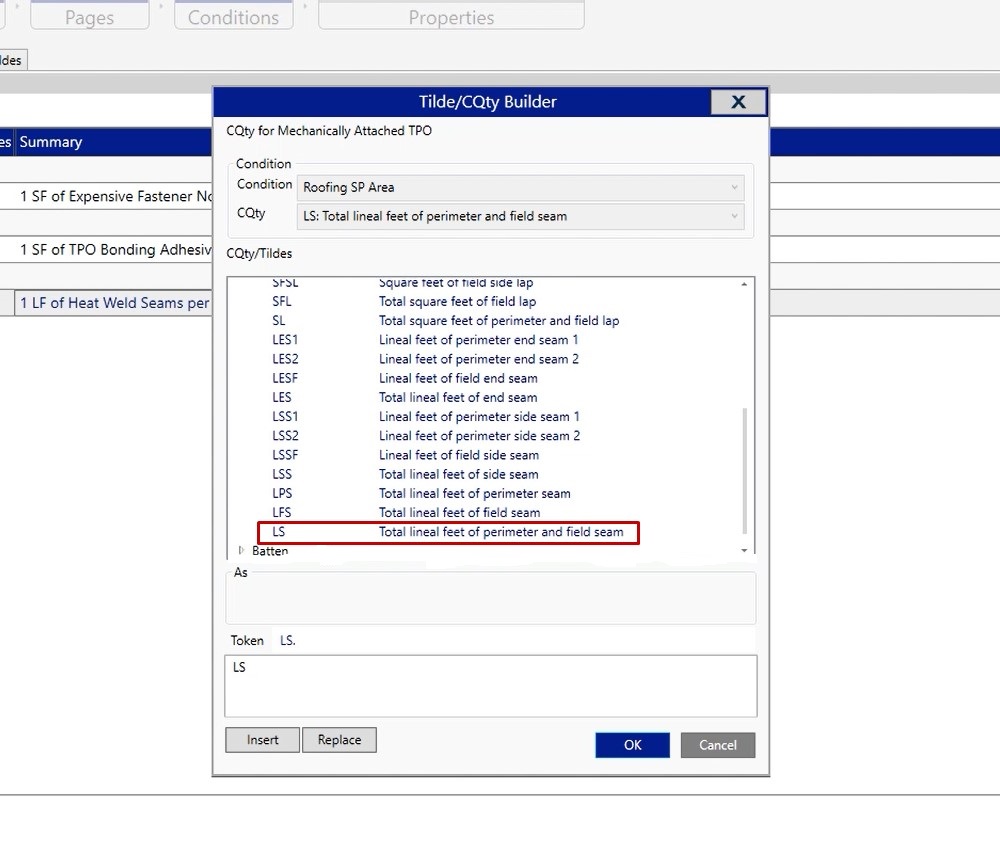
You do have that same capability with miscellaneous items to base information off of CQty’s and Tildes. For example, in the roofing condition. If you look at this heat weld seams, it’s based off linear footage, but if we open it up, it’s pulling the CQty of LS.
What does LS stand for?
Click the three dotted button, click on seam, and we scroll down and we see the description of LS.
So in this case, this means that for every one lineal footage of field and perimeter seam, I want to calculate one lineal footage of labor to heat weld those seams together
That’s not just in the roofing industry, you would also use that in your interior industry as well. So if you needed to base anything on a miscellaneous tab off of a CQty, you have that capability. (see video demonstration)
If you do have any additional questions or if you need any additional assistance as you’re manipulating these CQty’s and tilde codes, or trying to set up a condition that utilizes them, please feel free to give us a call on the tech line and we would be happy to assist you in any way we can.