![]() Estimating Edge’s team of experienced construction professionals and software engineers have developed the industry’s smartest takeoff and estimating software solutions for competitive estimates.
Estimating Edge’s team of experienced construction professionals and software engineers have developed the industry’s smartest takeoff and estimating software solutions for competitive estimates.
Don’t just estimate faster. Estimate better.®
- /
- /
- /
How to Remove Saved or Unloaded Production From a Shape
How to delete production that you have marked and saved for a shape, but not yet uploaded.
Note: This method is only useful if this is the first shape that you have been tracking for the day, or you have not gotten too far into it yet.
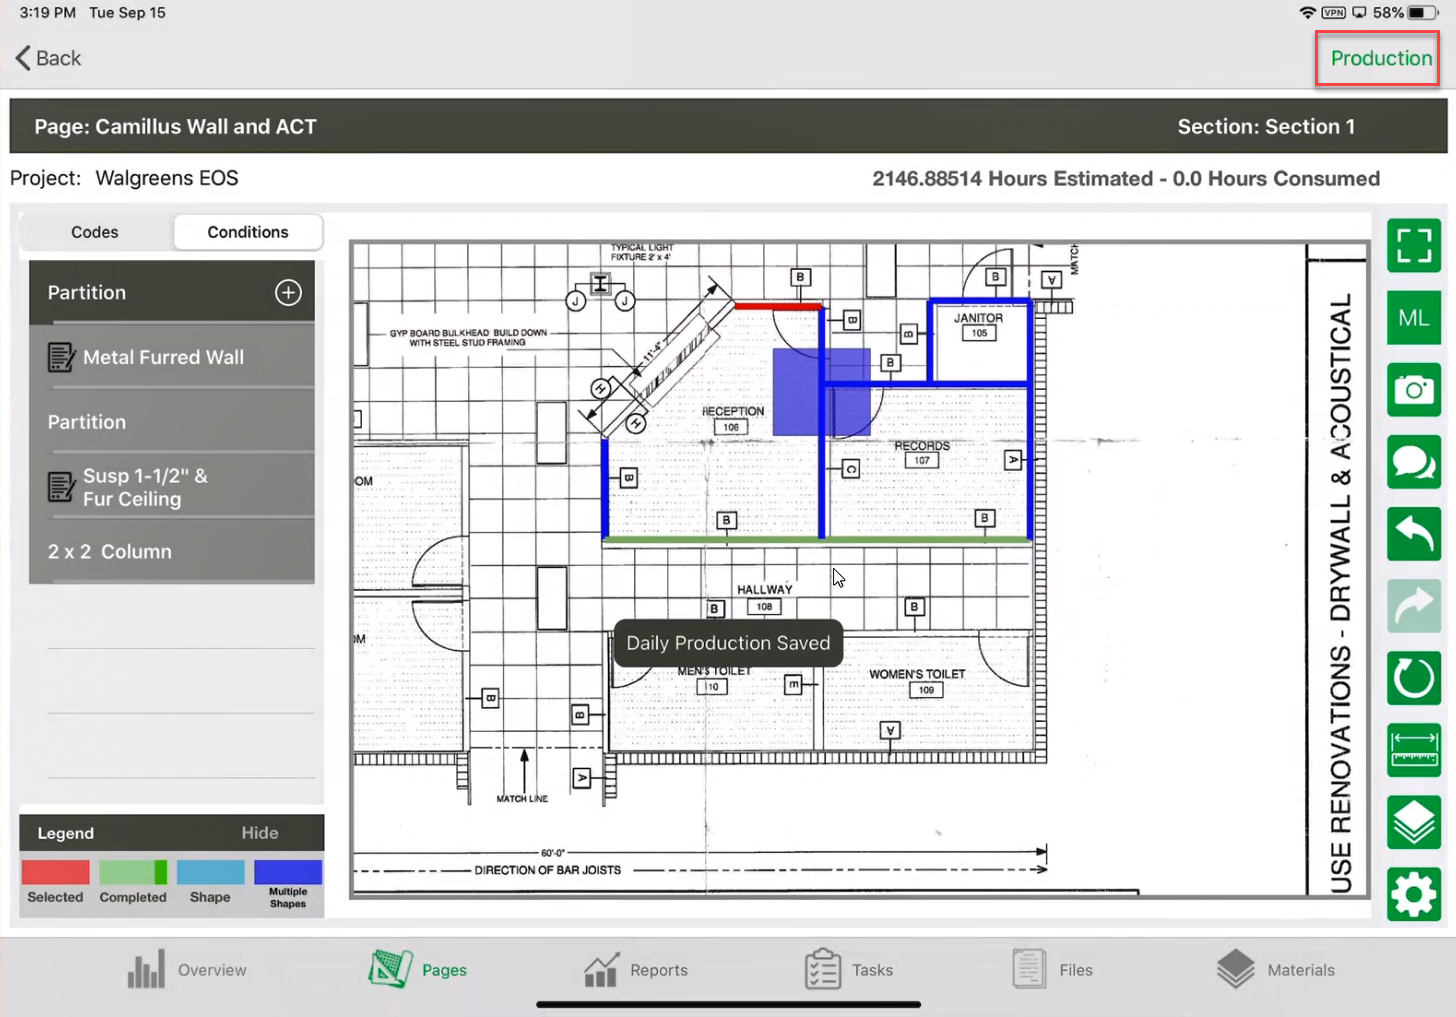
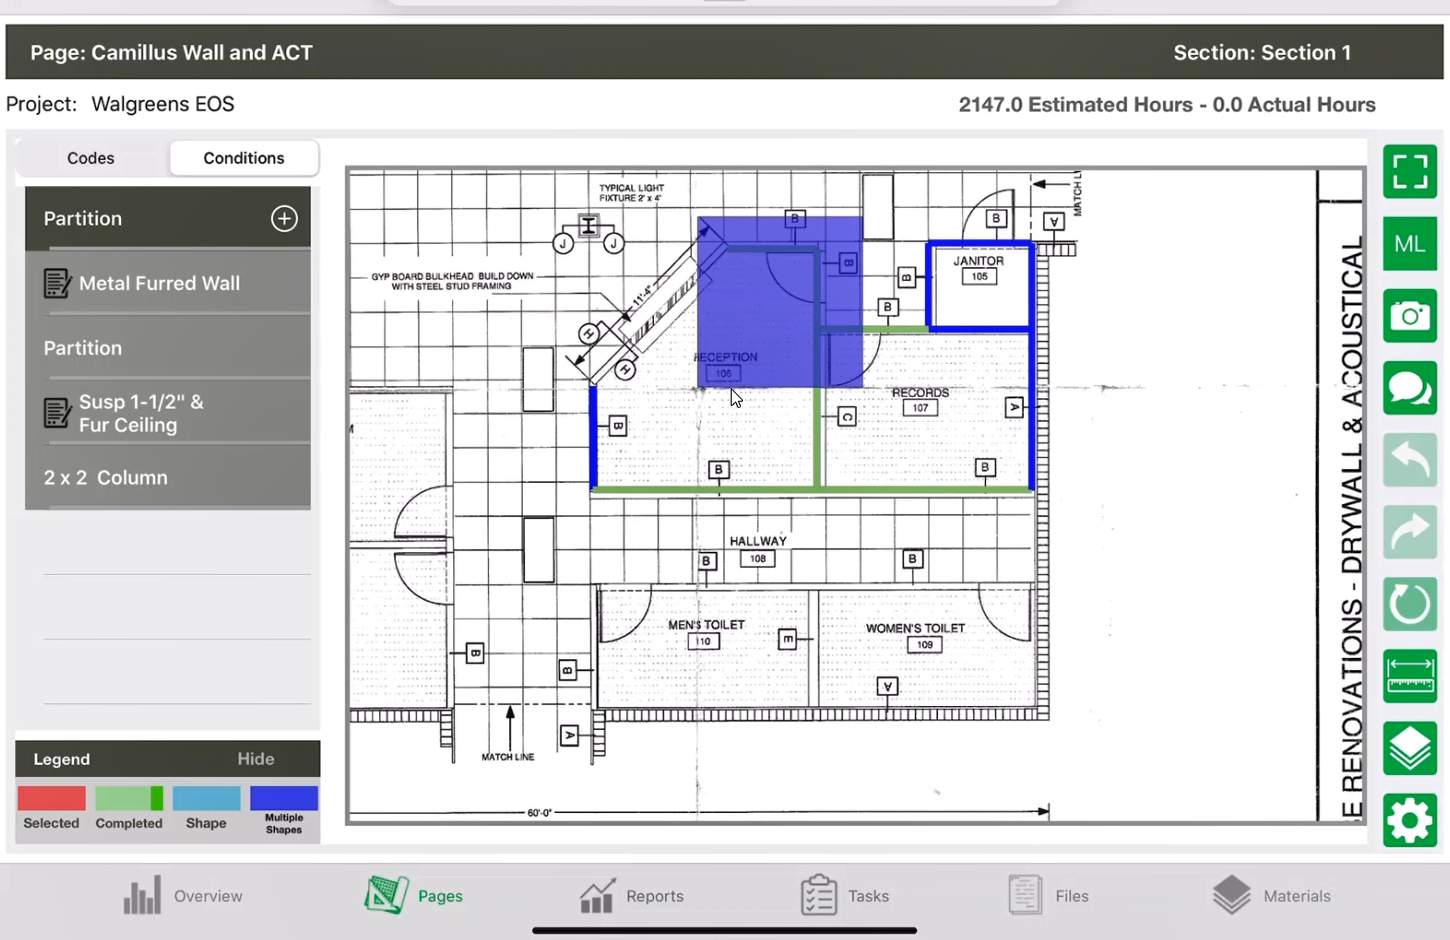
- Select a shape on the blueprint. Select a shape on the blueprint.
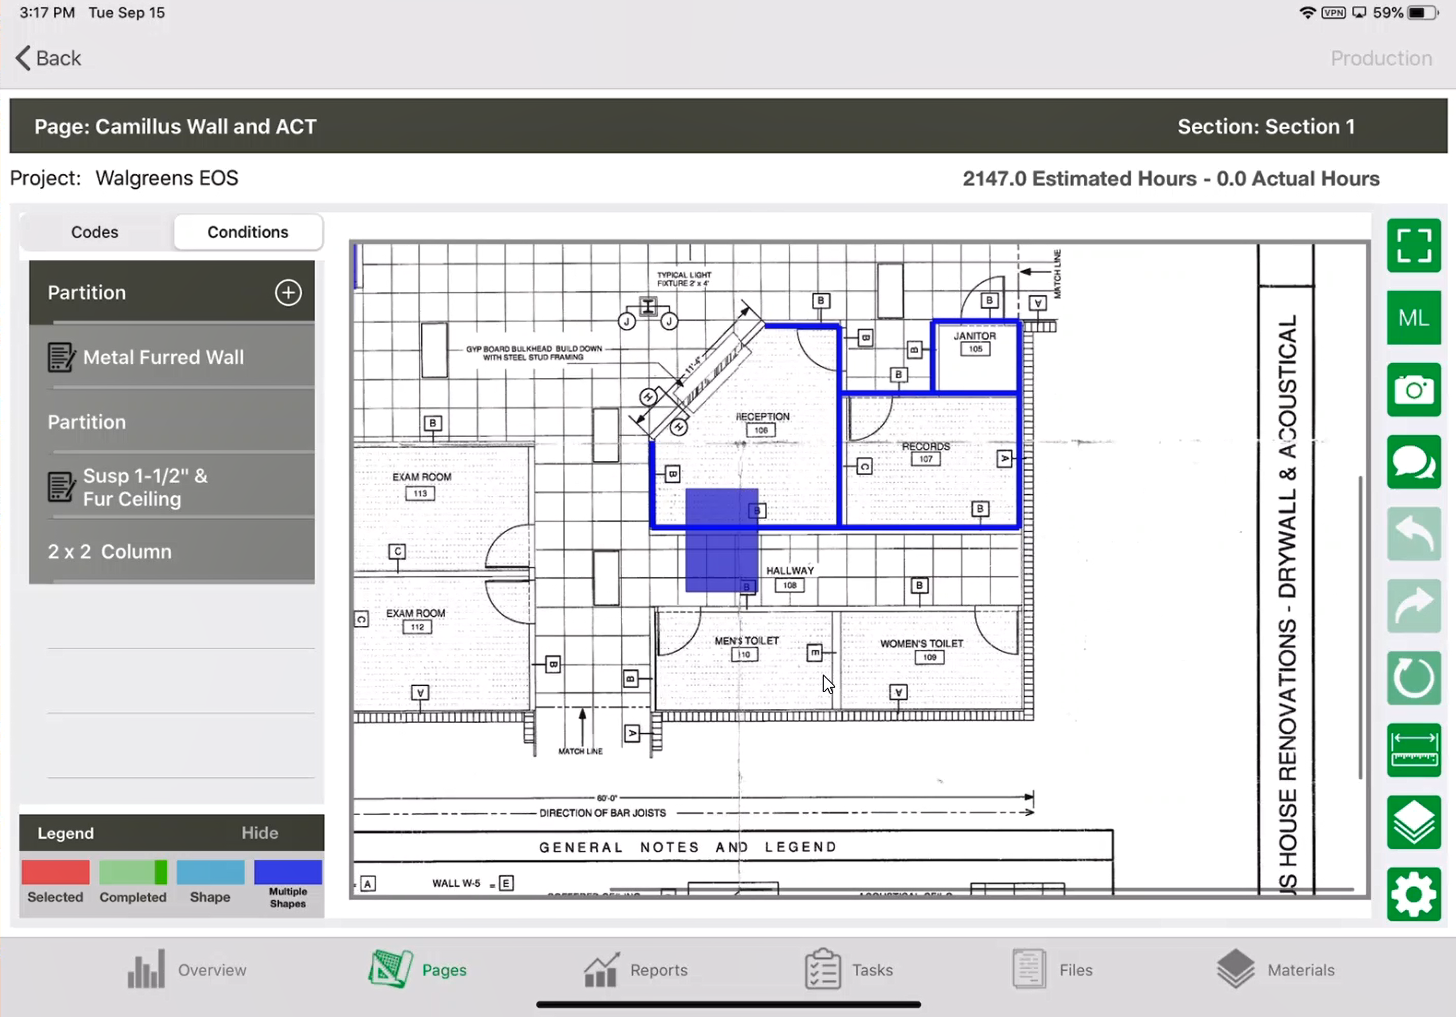
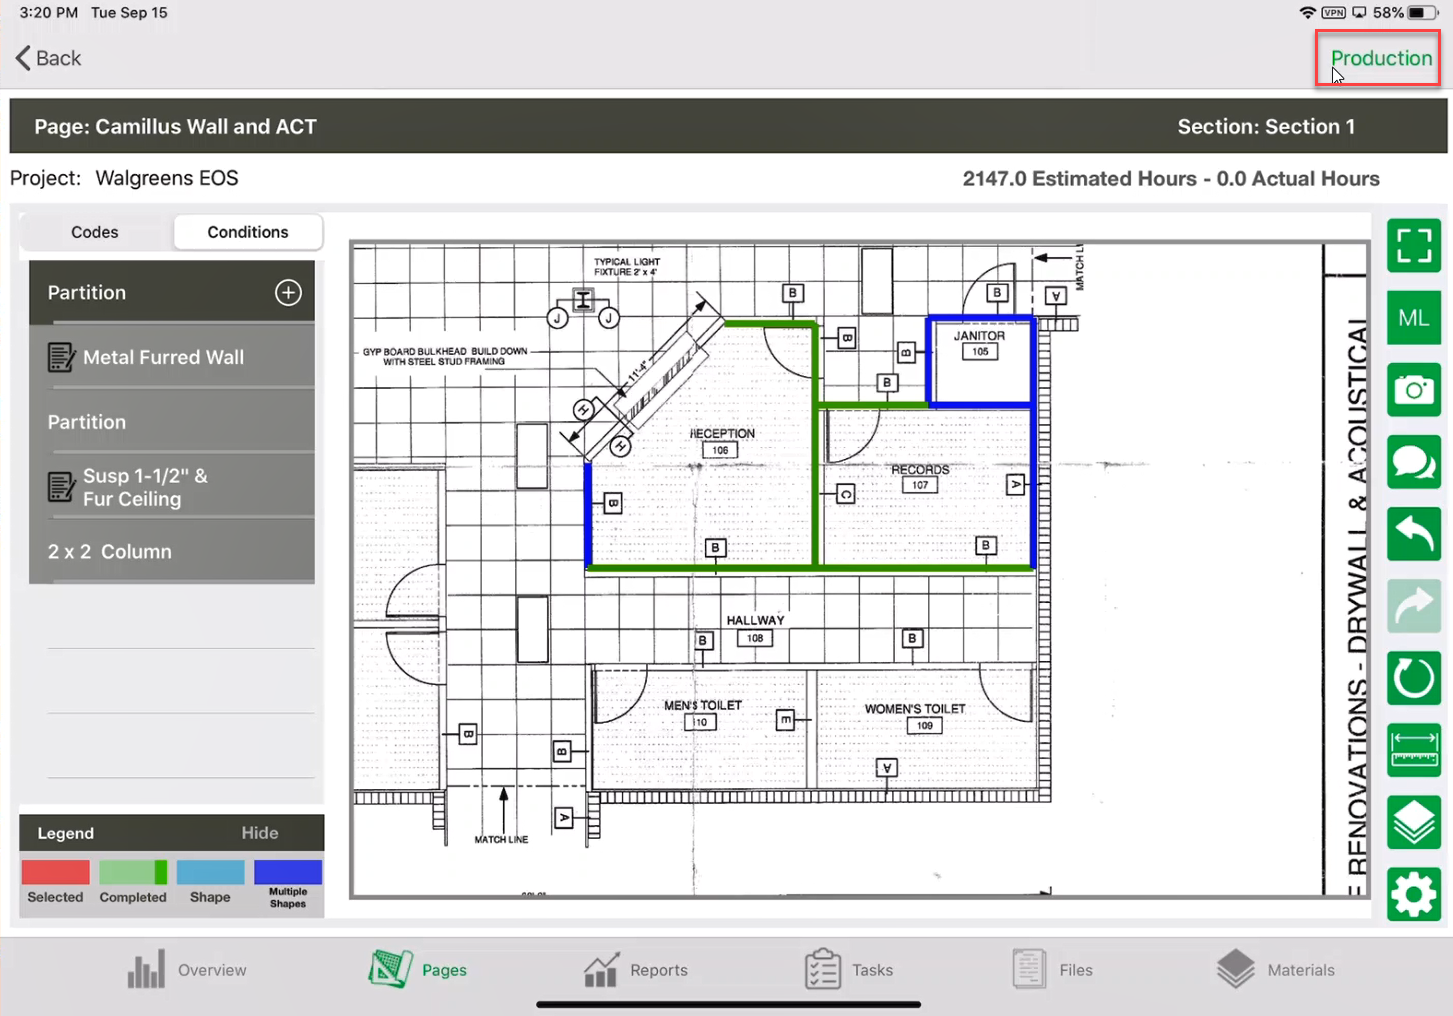
- Tap Production
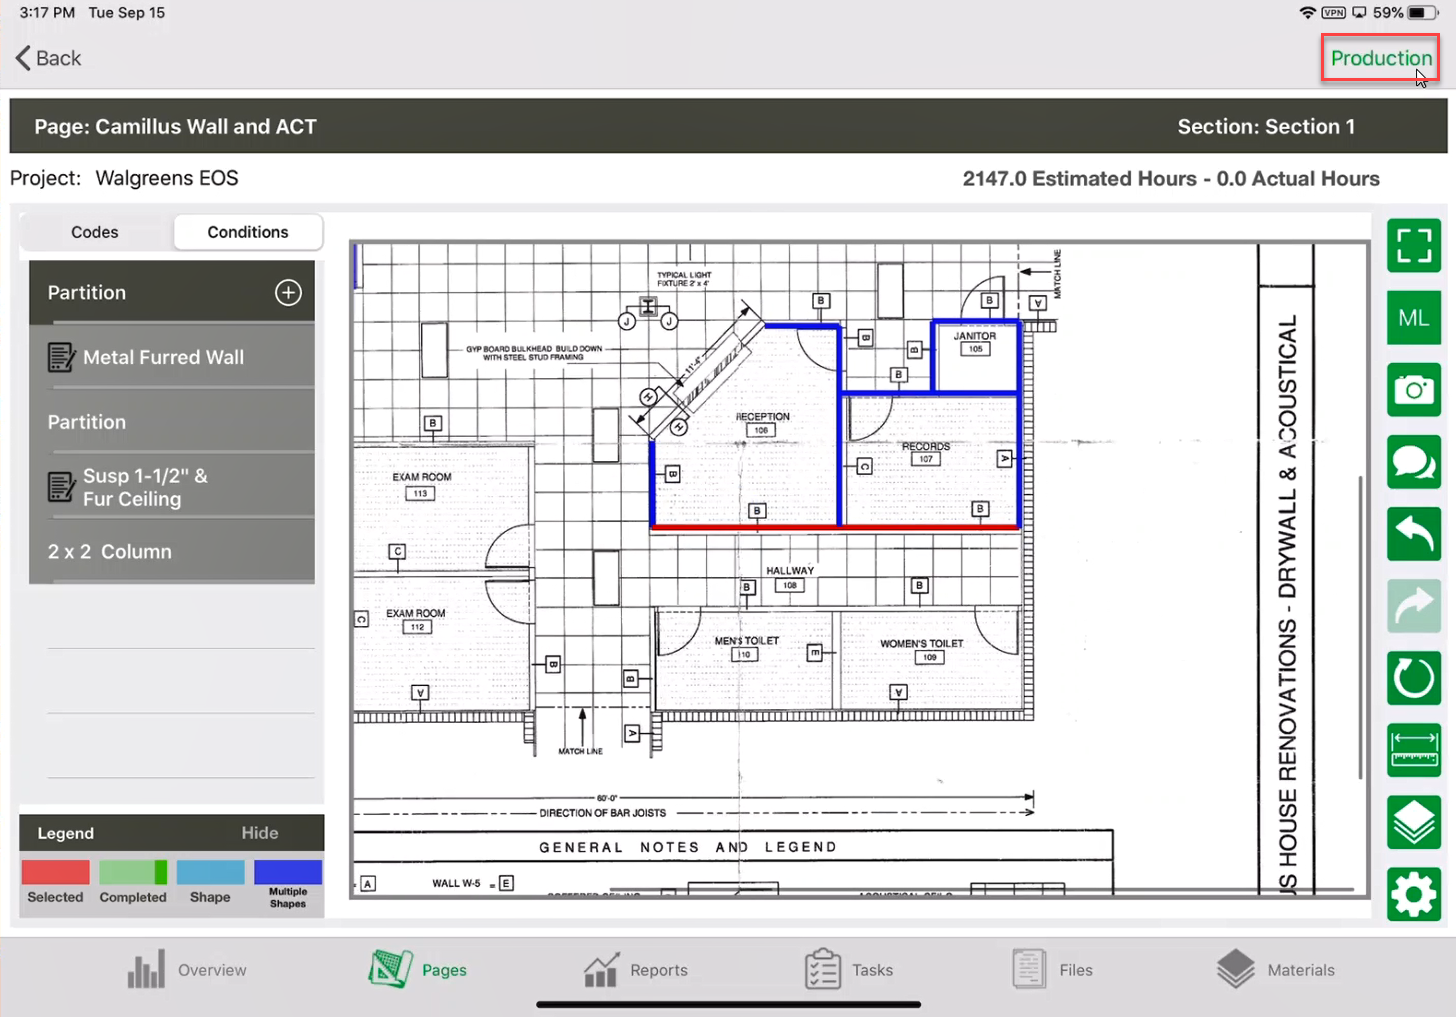
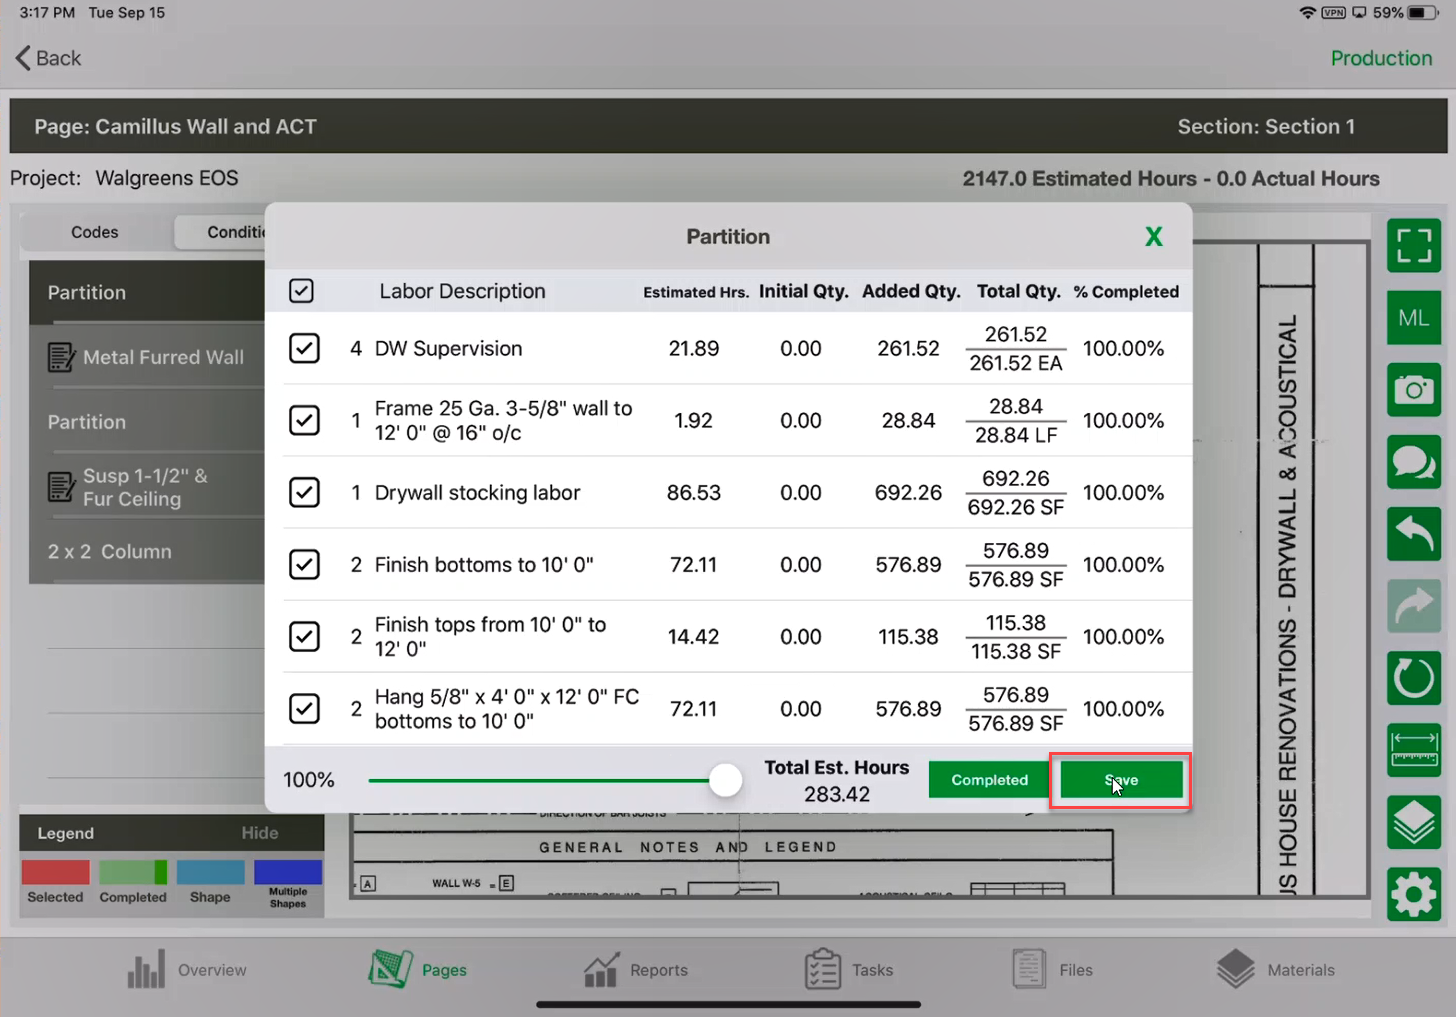
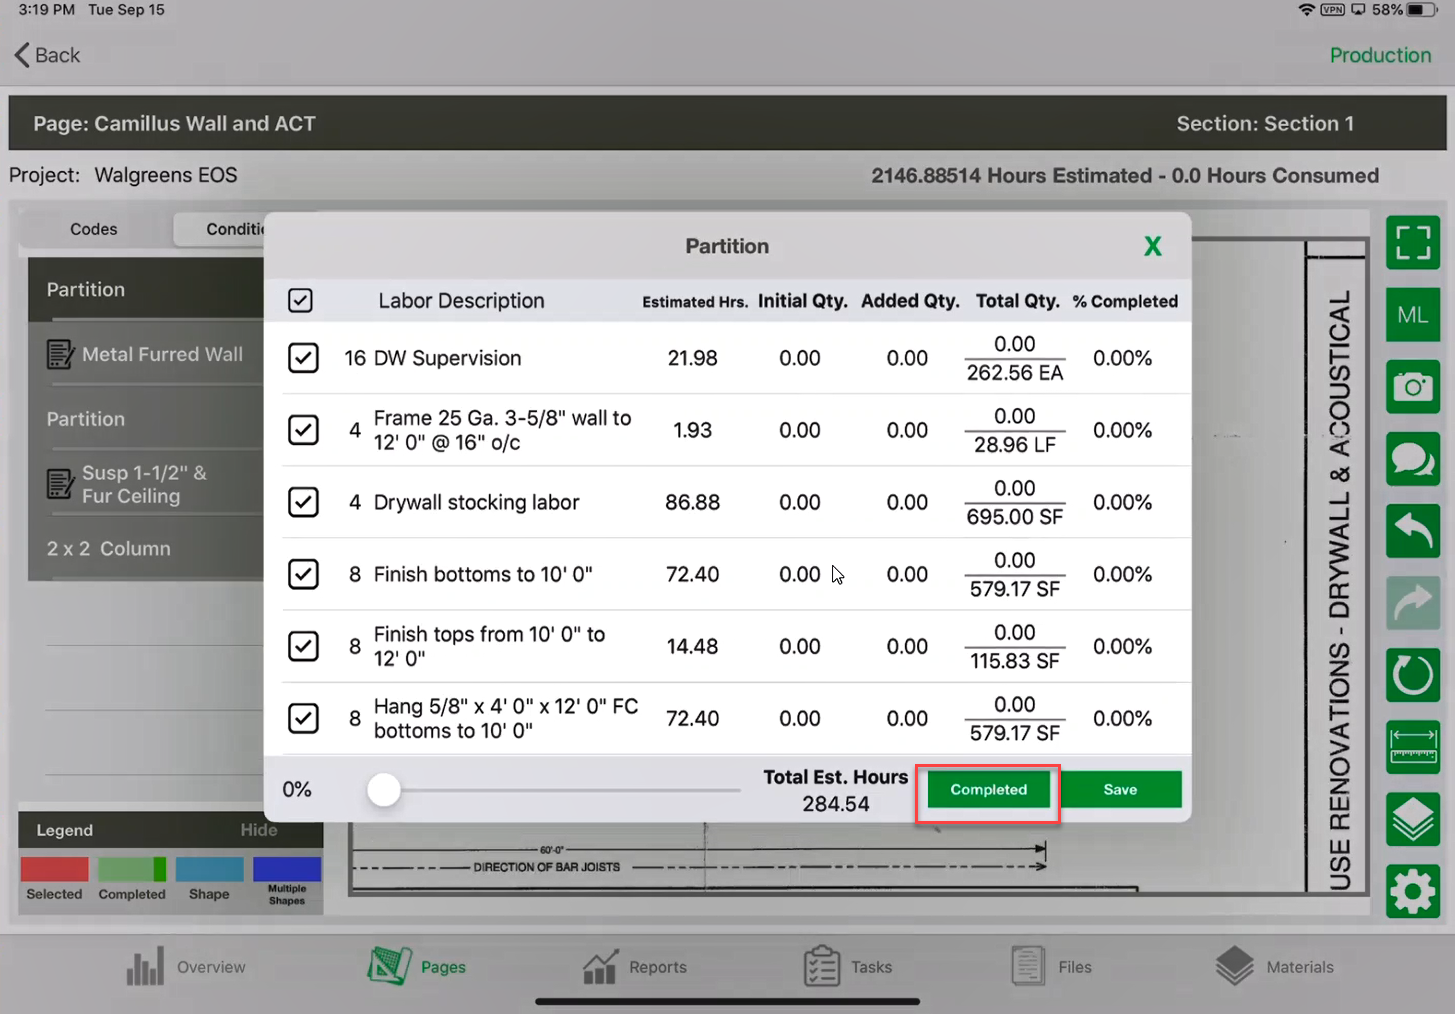
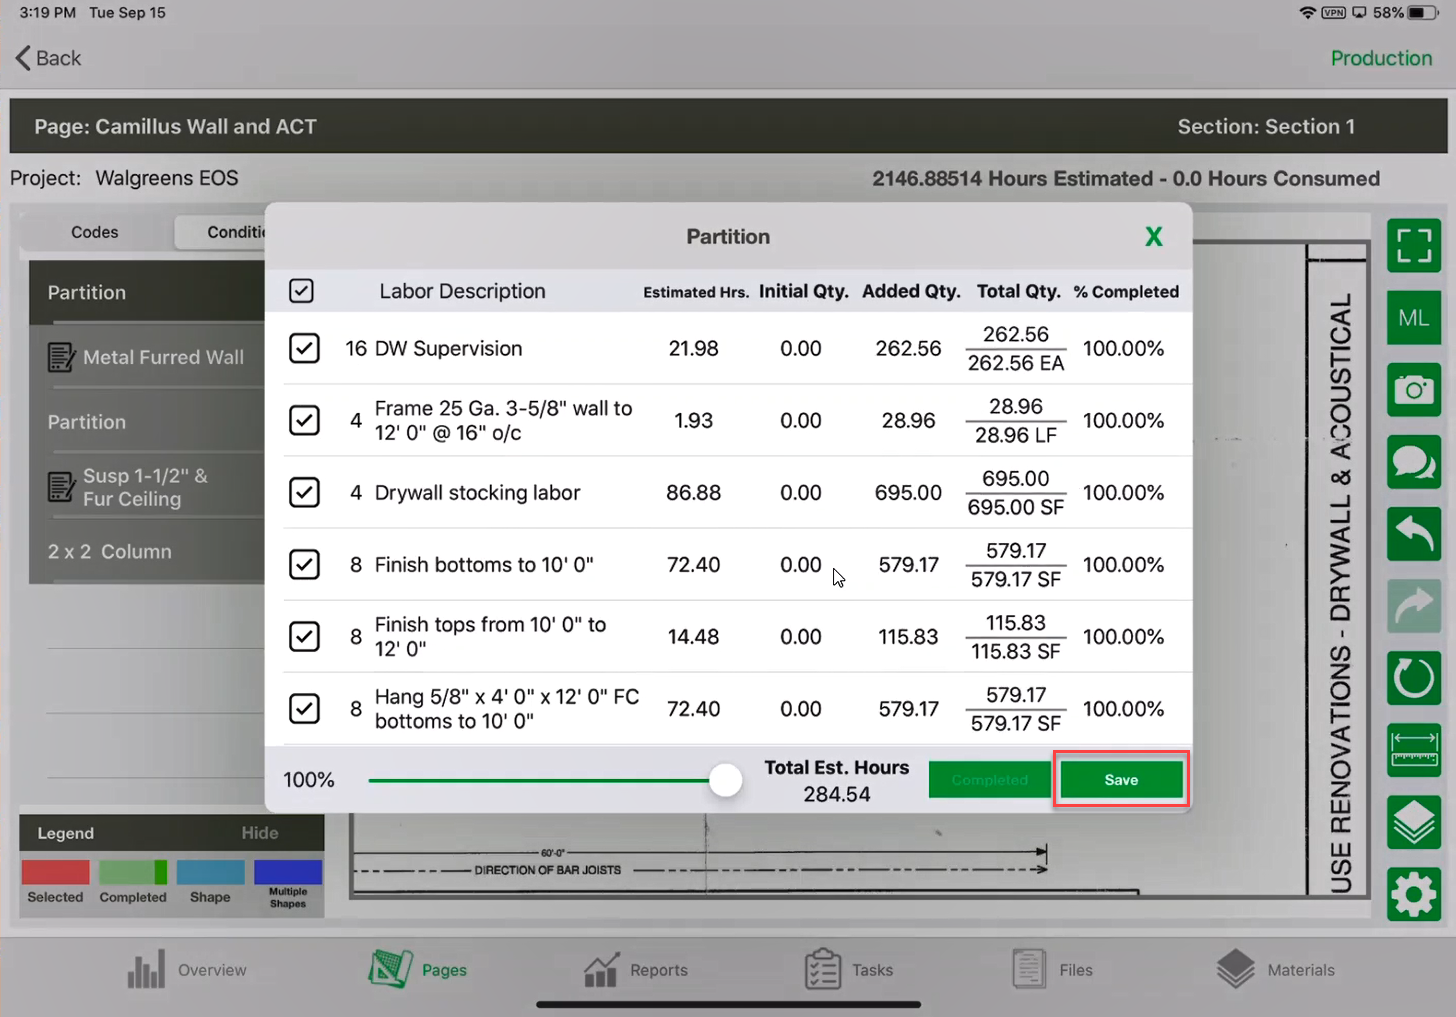
- Mark some completion. In this example, tap completed.
Note: Clicking Completed will bring the completion to 100%.

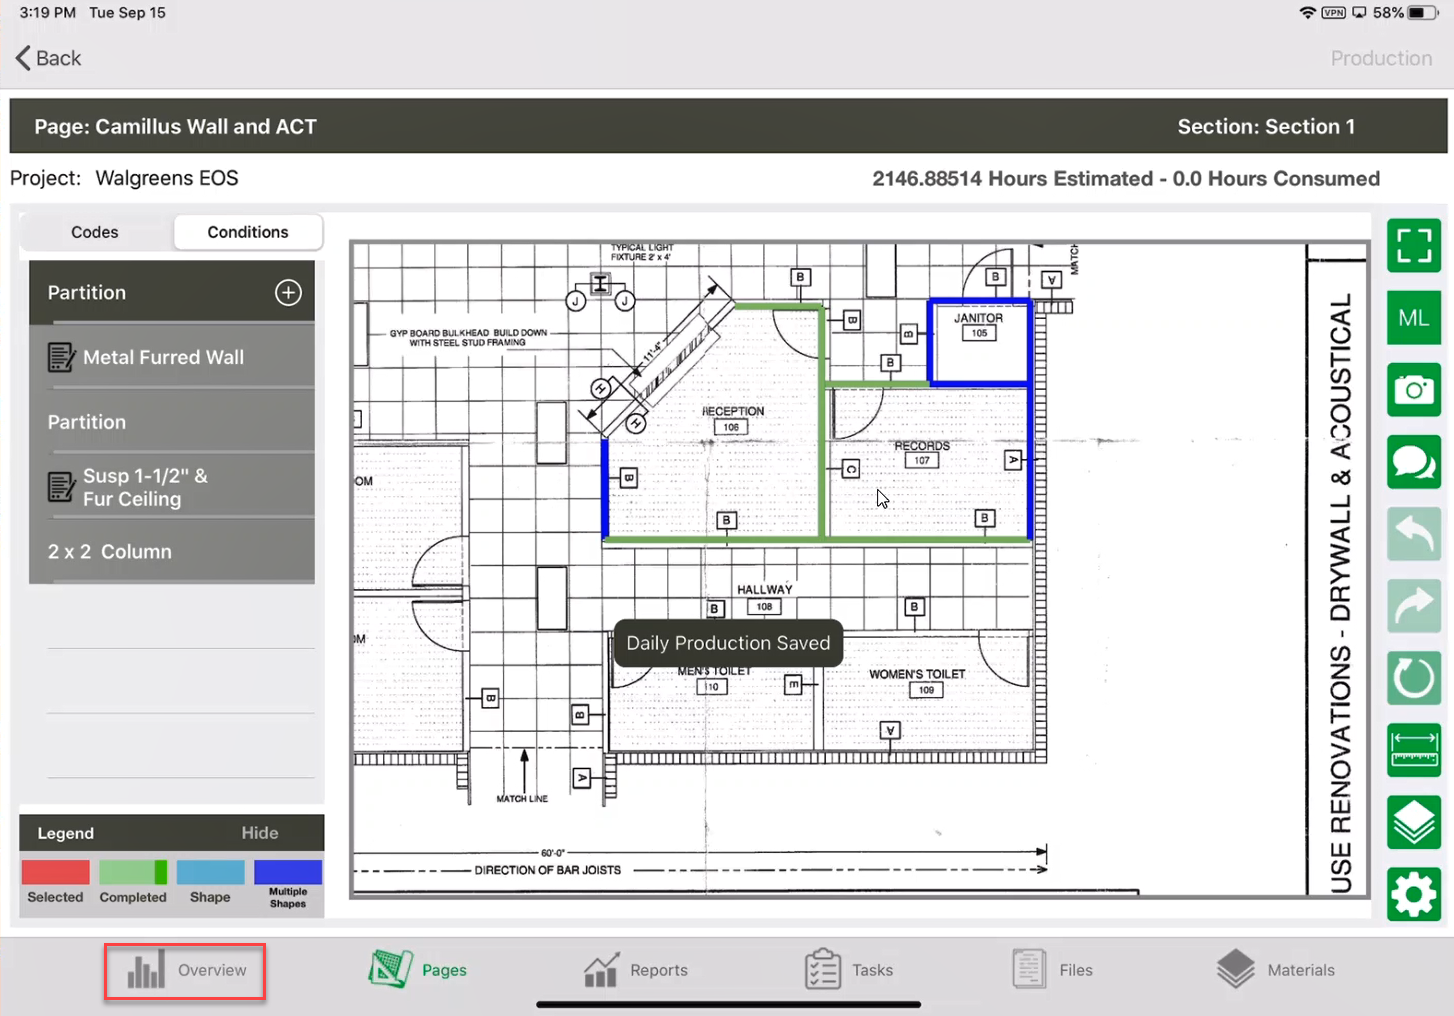
- Tap Save.
- Now, this wall is at 100% completion, and let’s say, oops, this is a mistake. Actually, meant to mark this 100% completion on the wall across.
Note: Unfortunately, because the production was saved there is not an easy undo button - Tap on Overview.
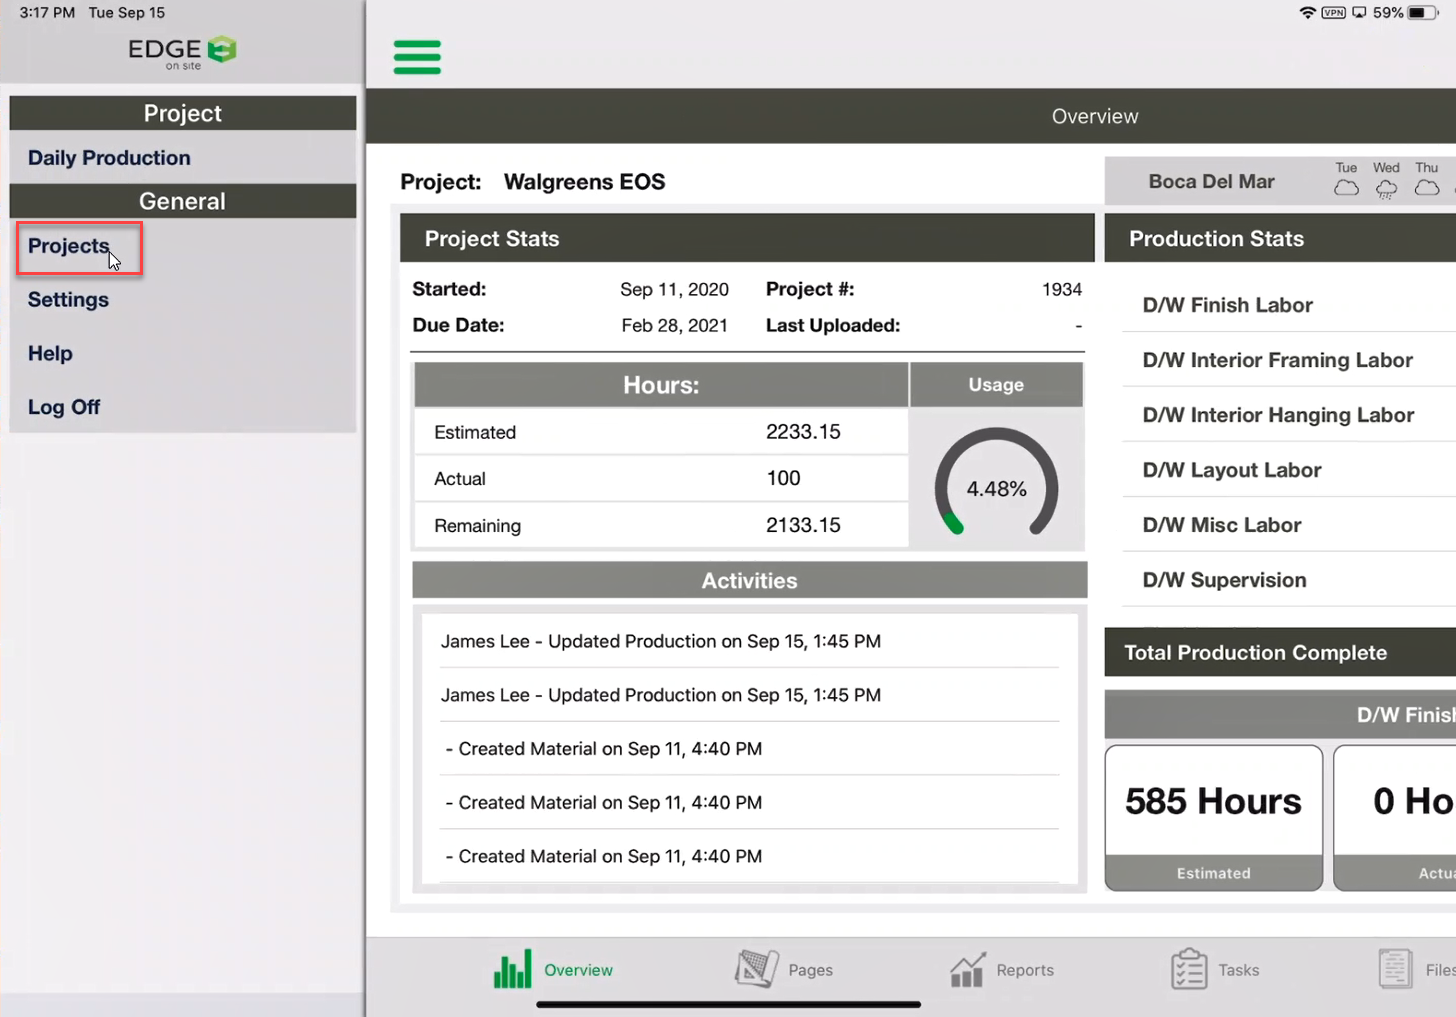
- On the Overview Screen, tap the hamburger button.
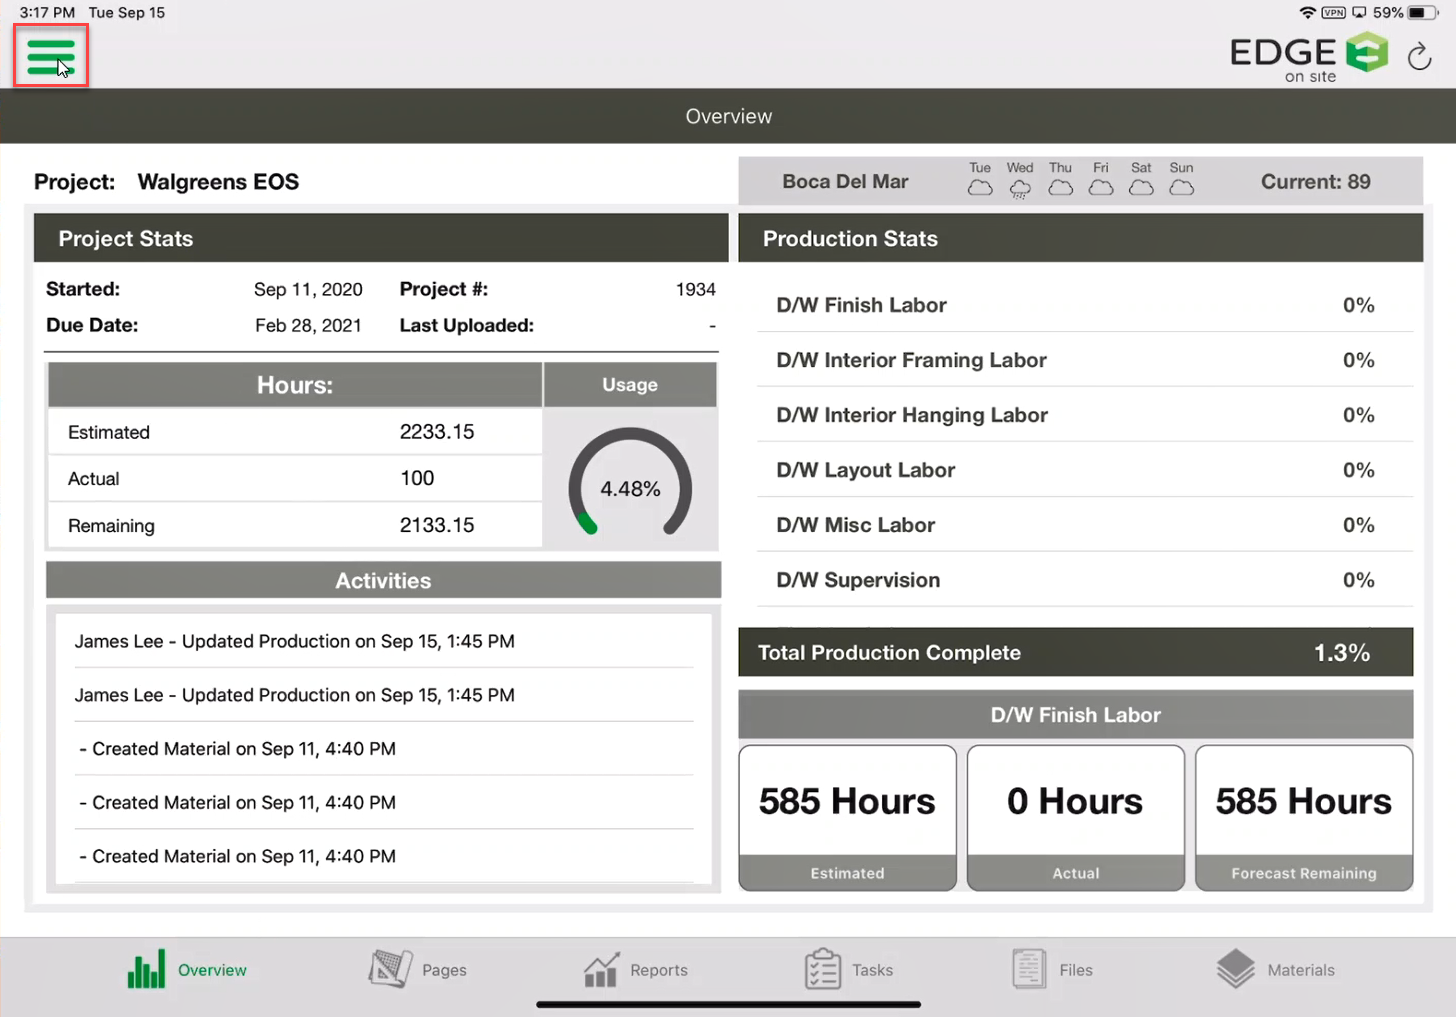
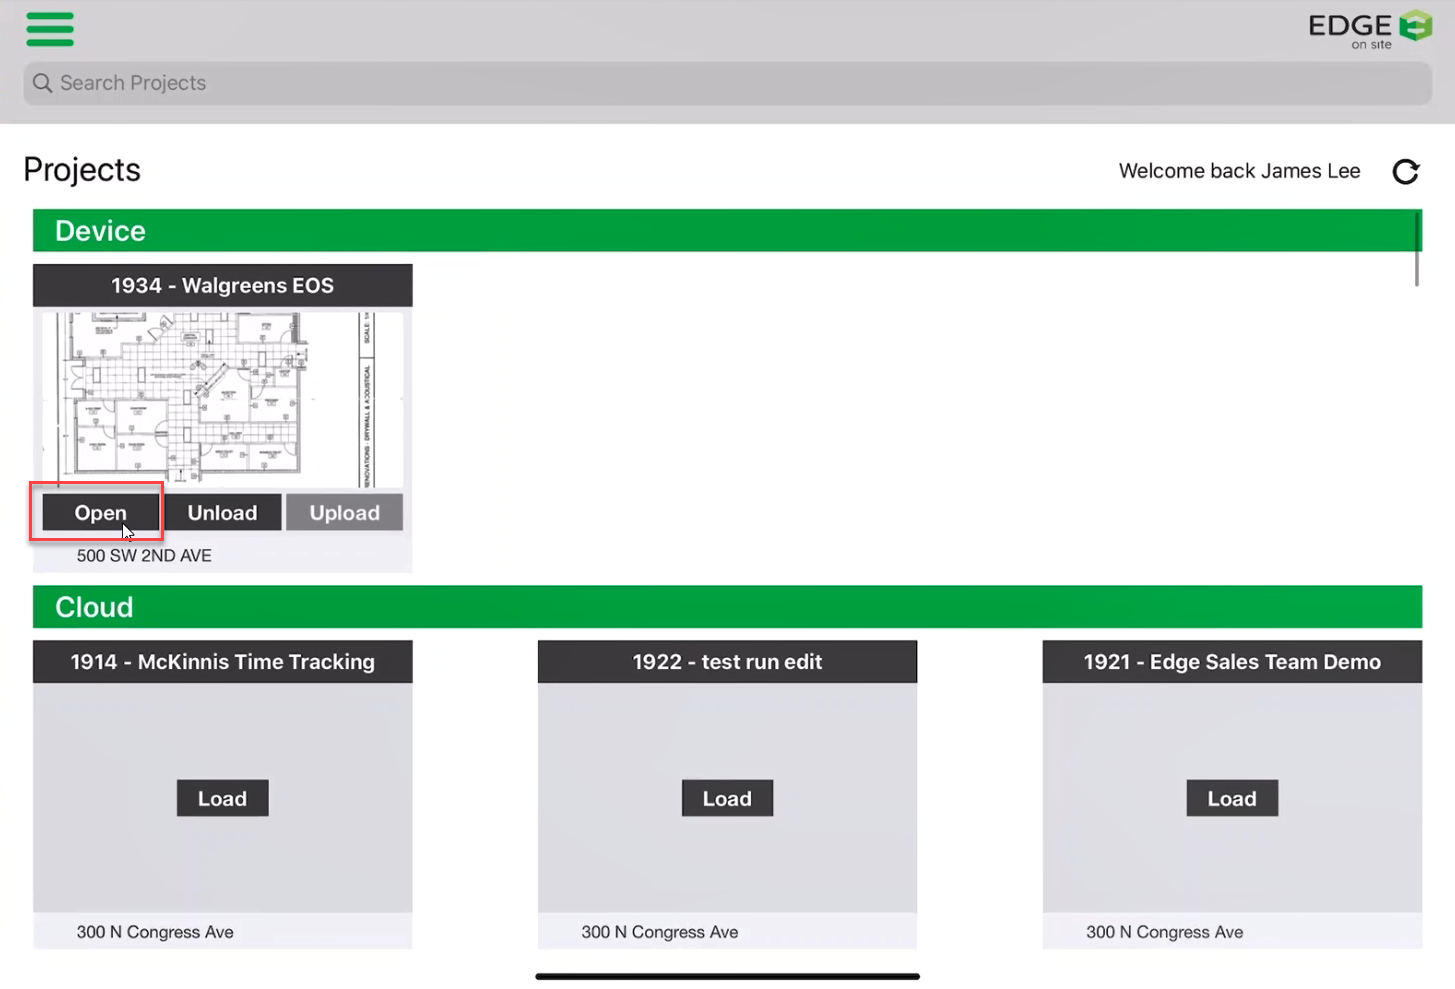
- Tap Projects
- To get rid of that saved production, but not uploaded production, tap Unload.
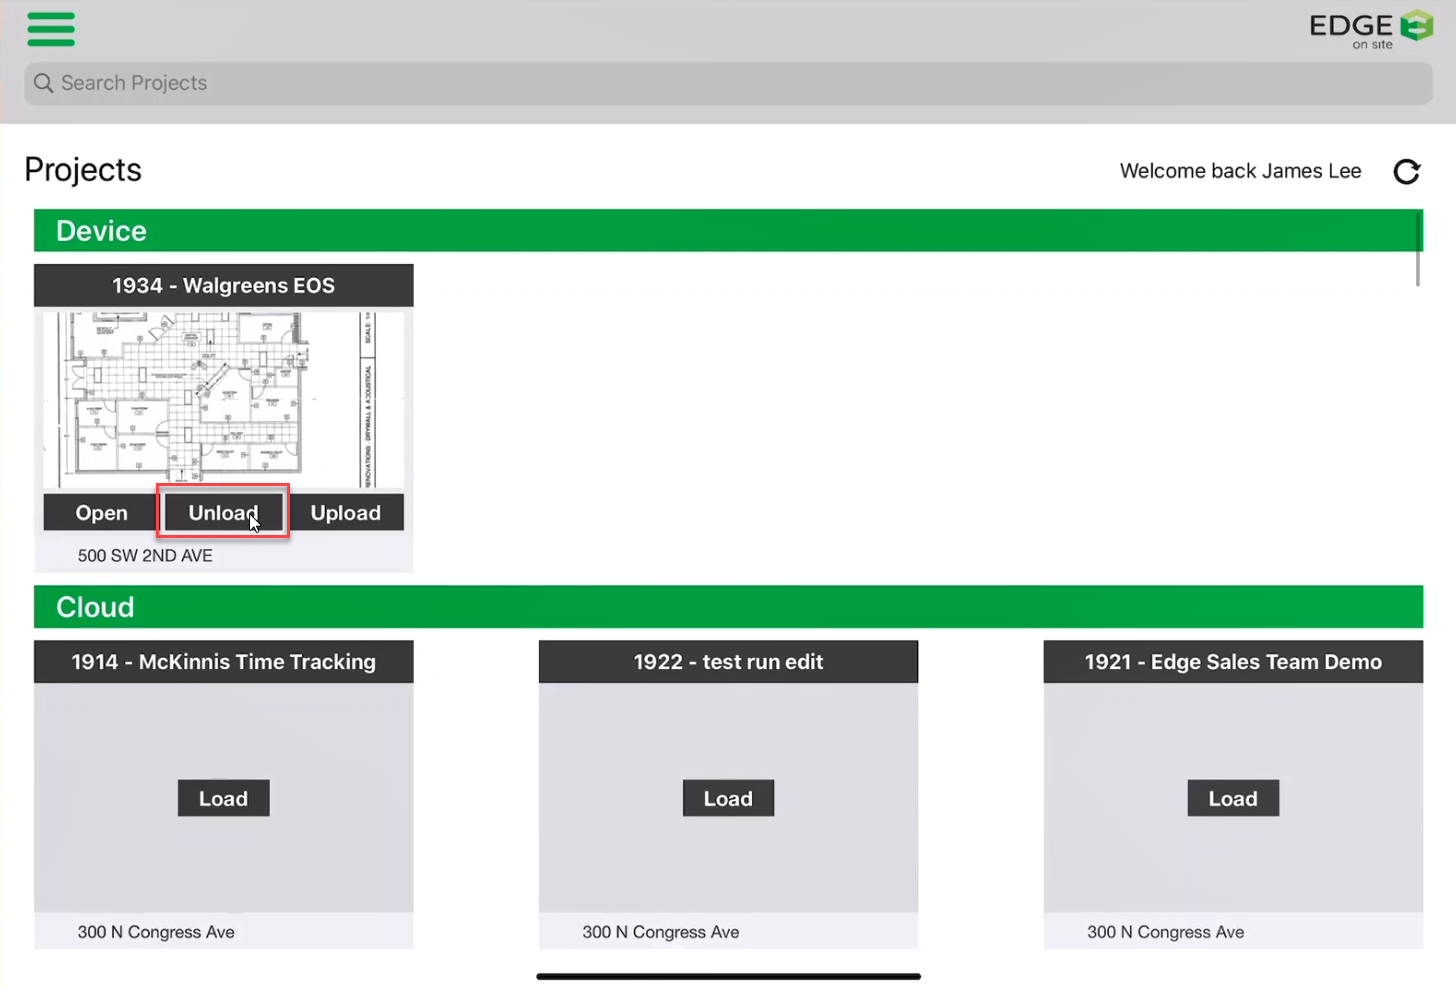
- A pop-up will appear, informing you are about to unload a project with unsaved data, tap Upload.
Note: What you just did got rid of the production because the project was saved to your device locally. However, the project’s production had not been pushed to the cloud yet, so when unloaded the project back to the cloud without the uploaded data, it effectively cleared it from your local device.

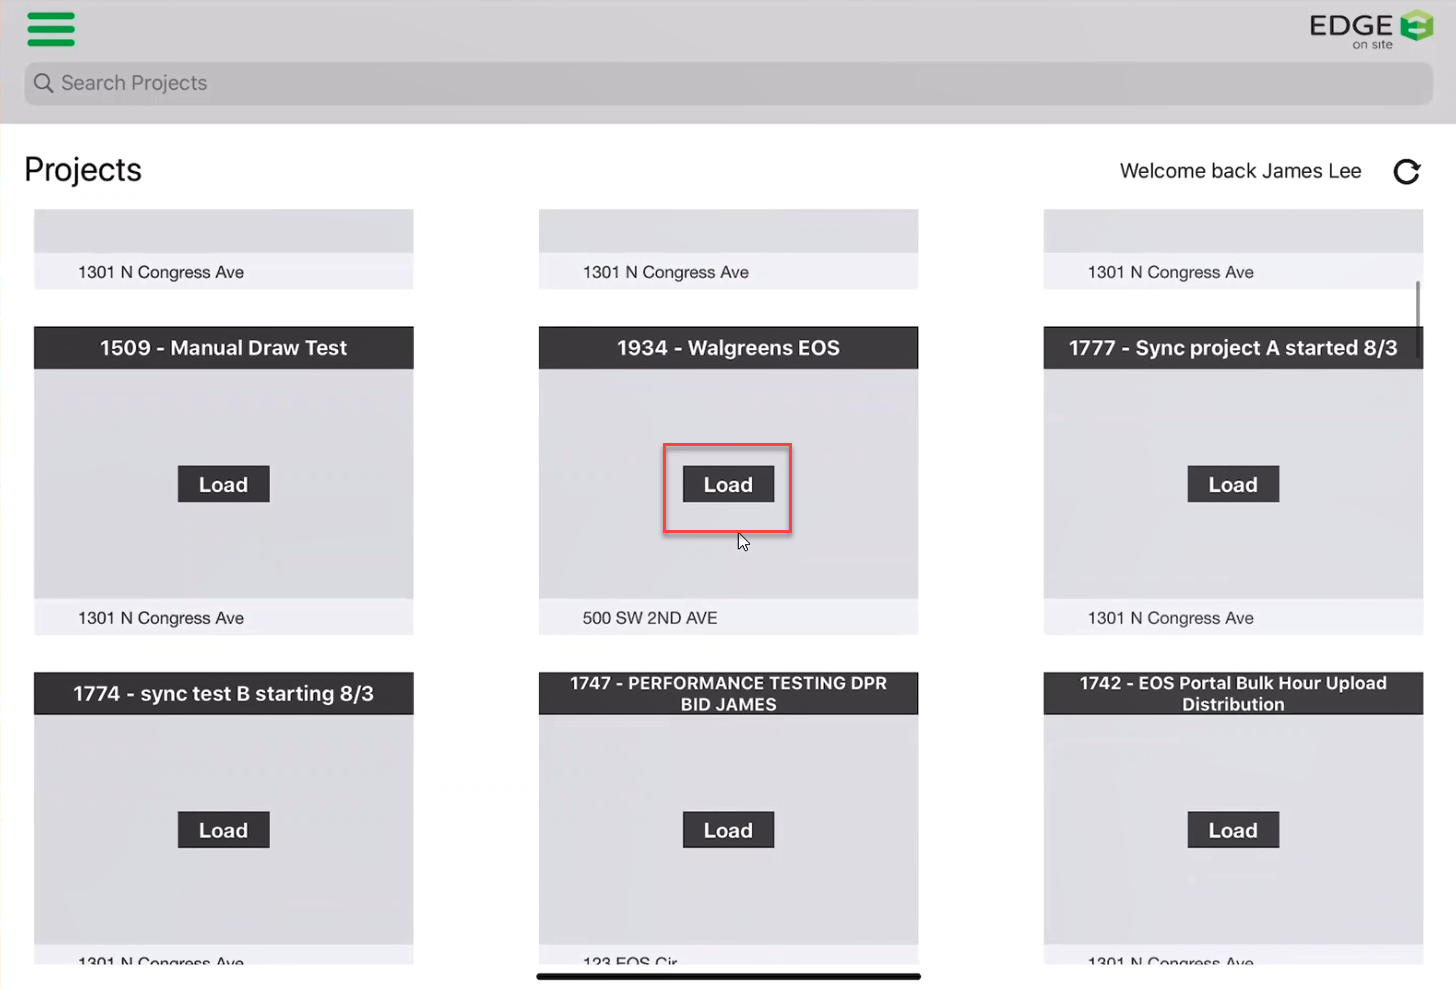
- Search through your Projects. Once you have found the project, tap Load.
- Click Open.
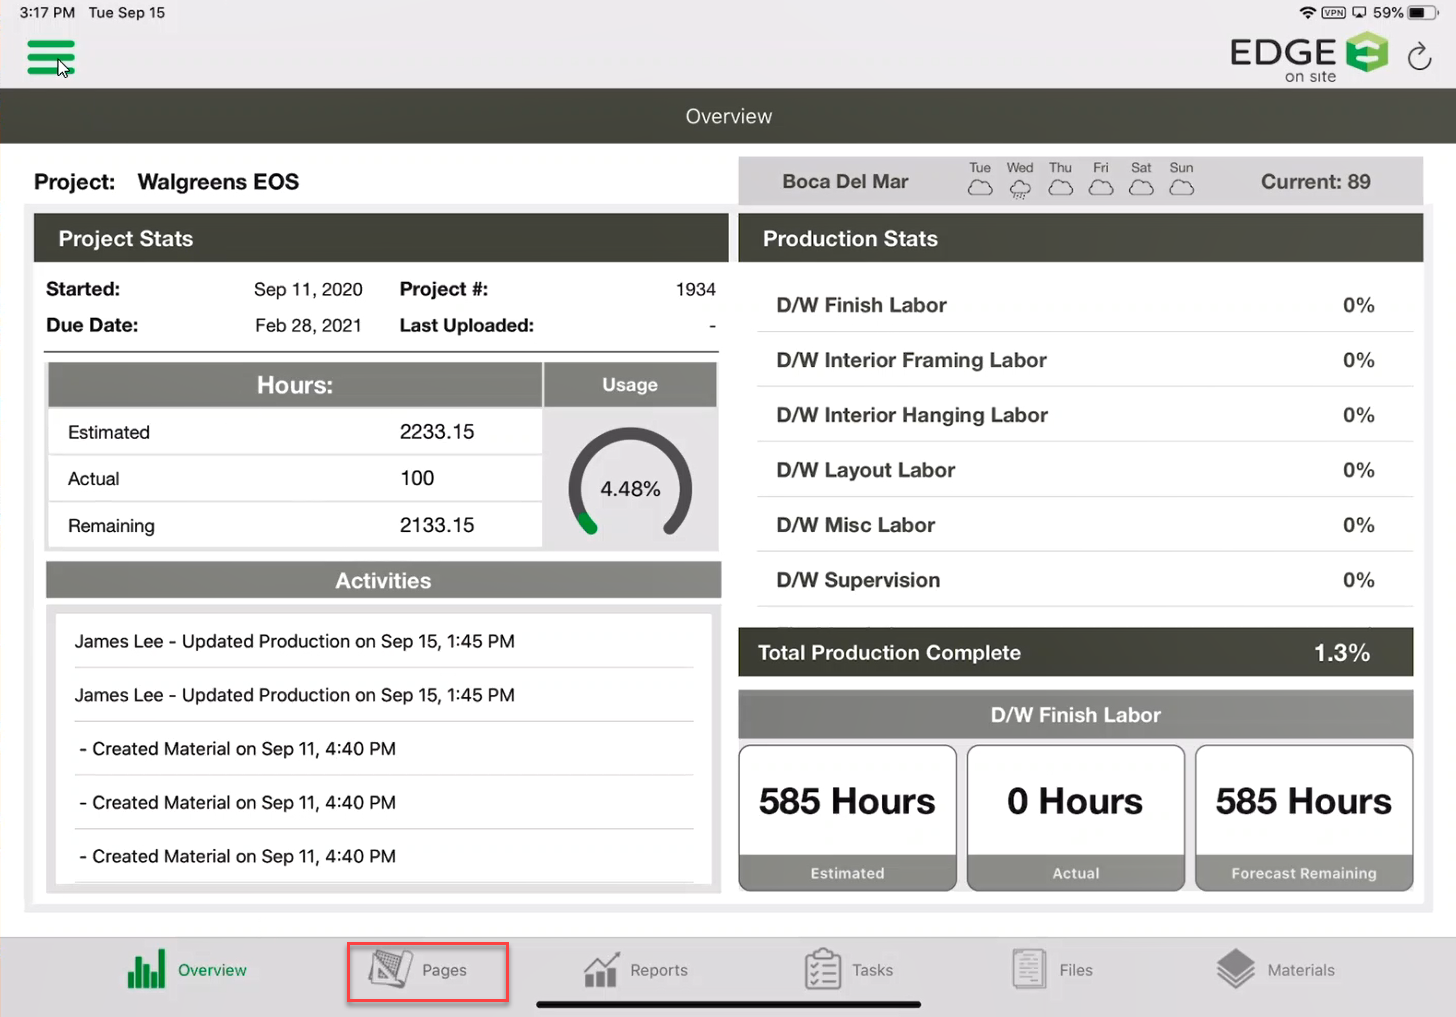
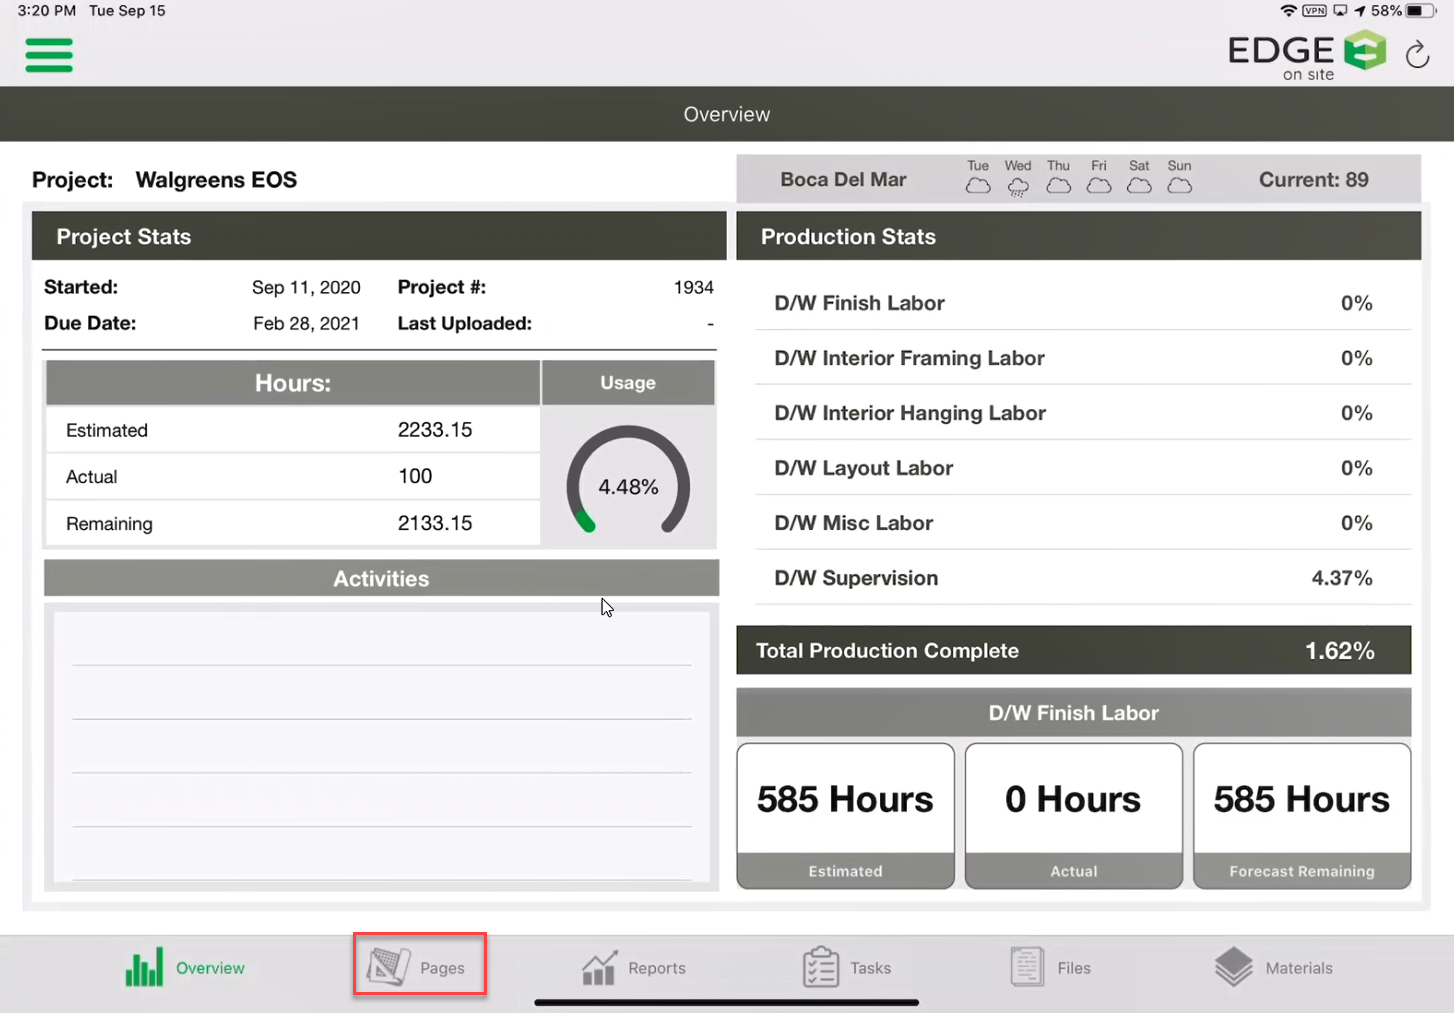
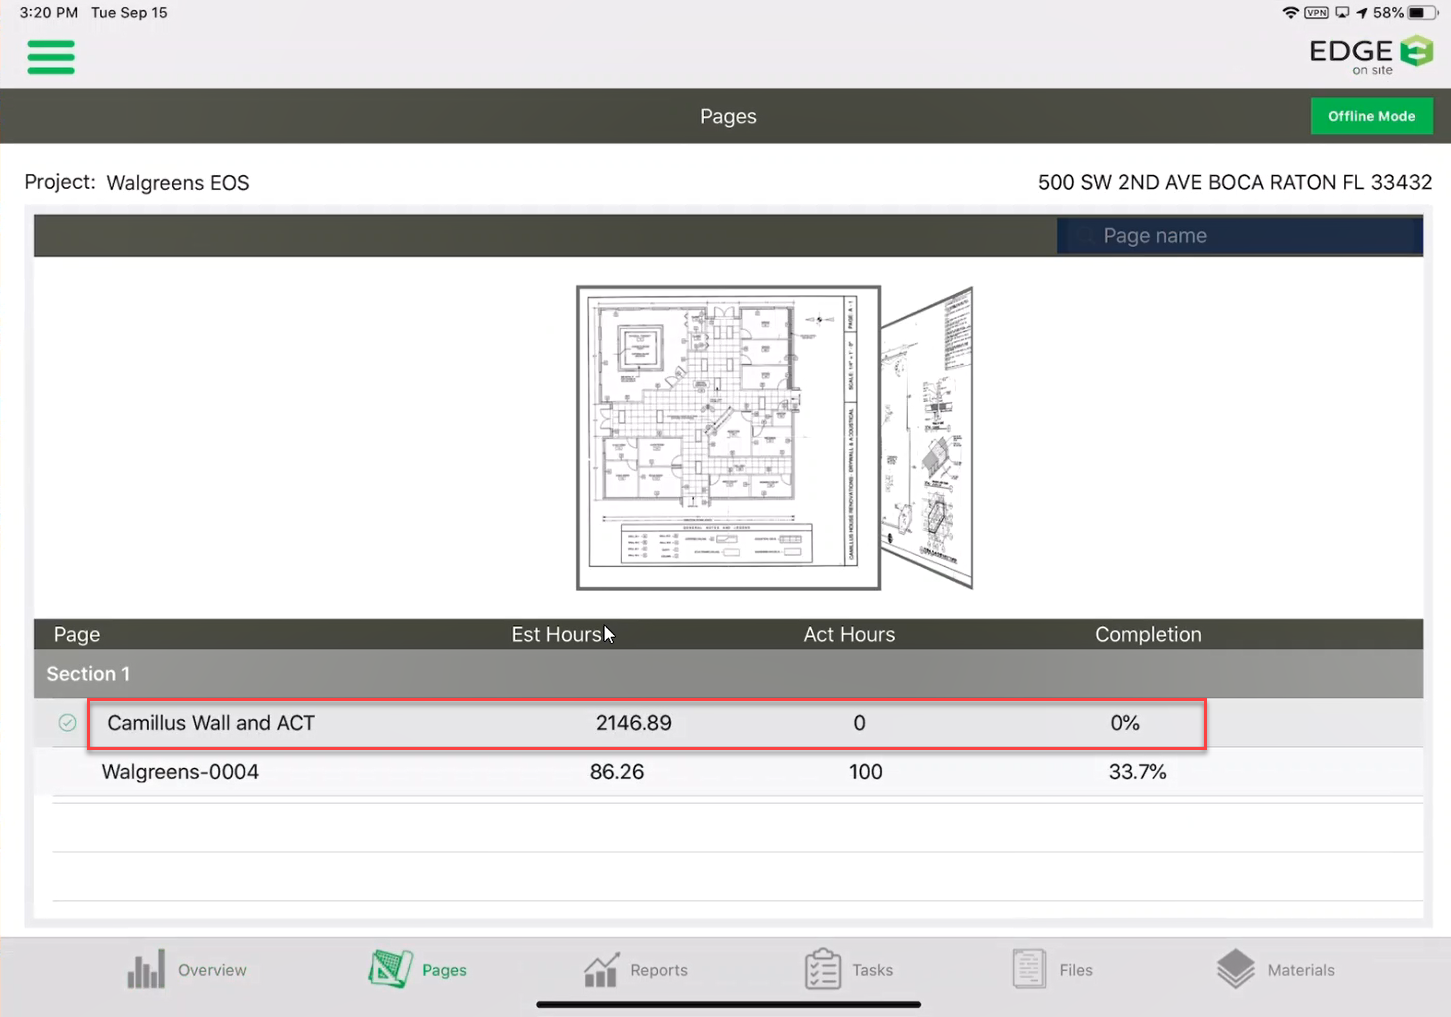
- Tap Pages.
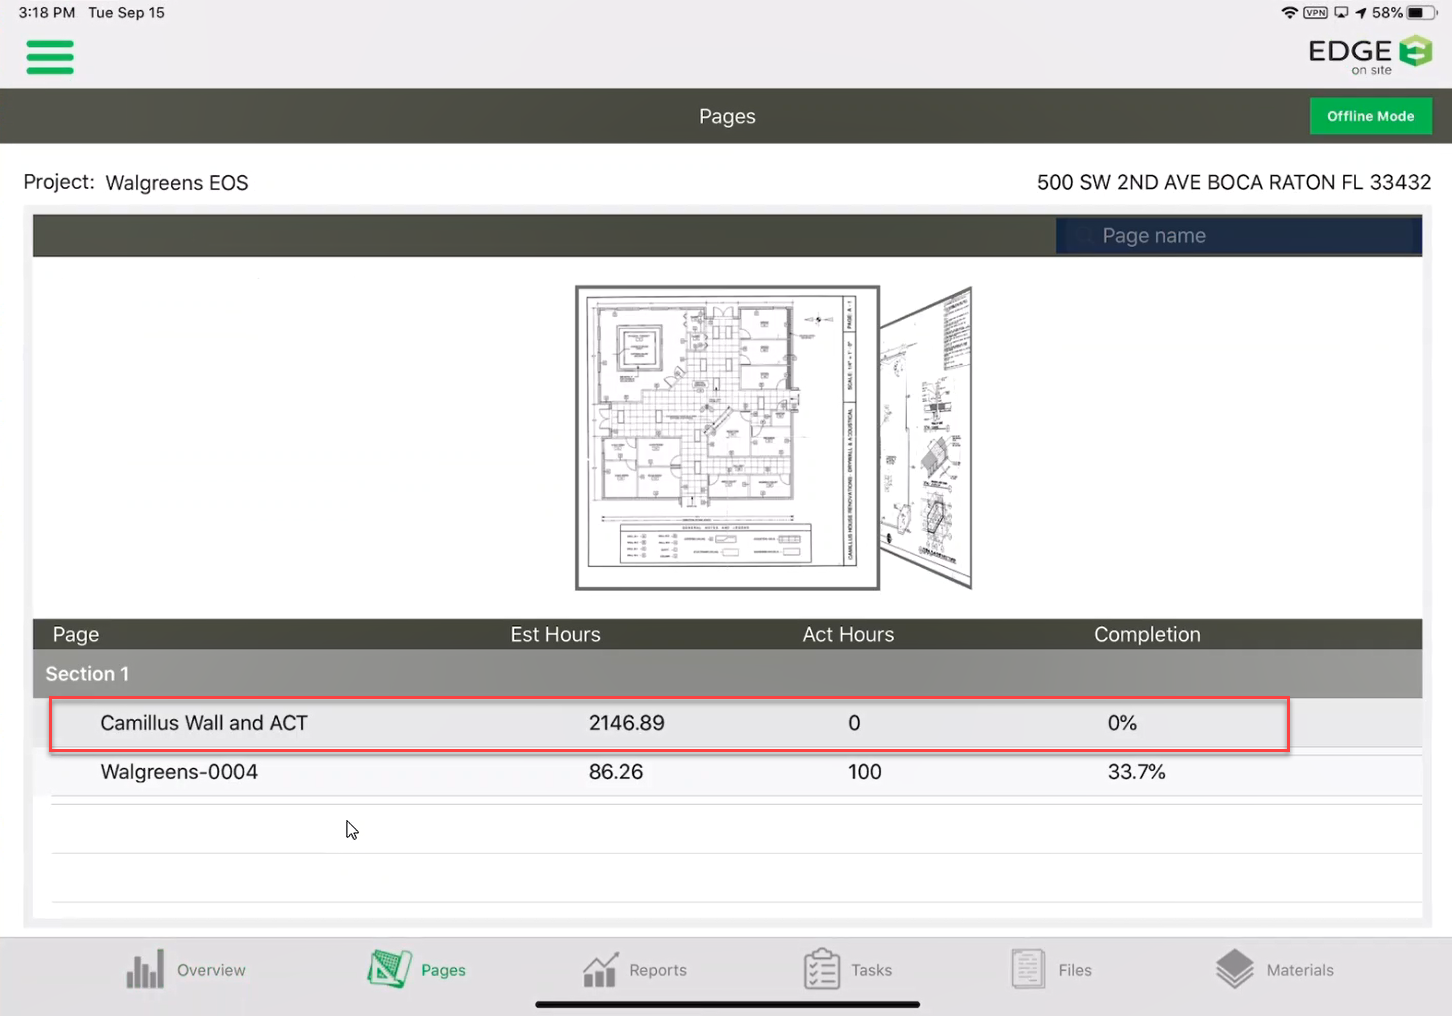
- Tap on the Page.
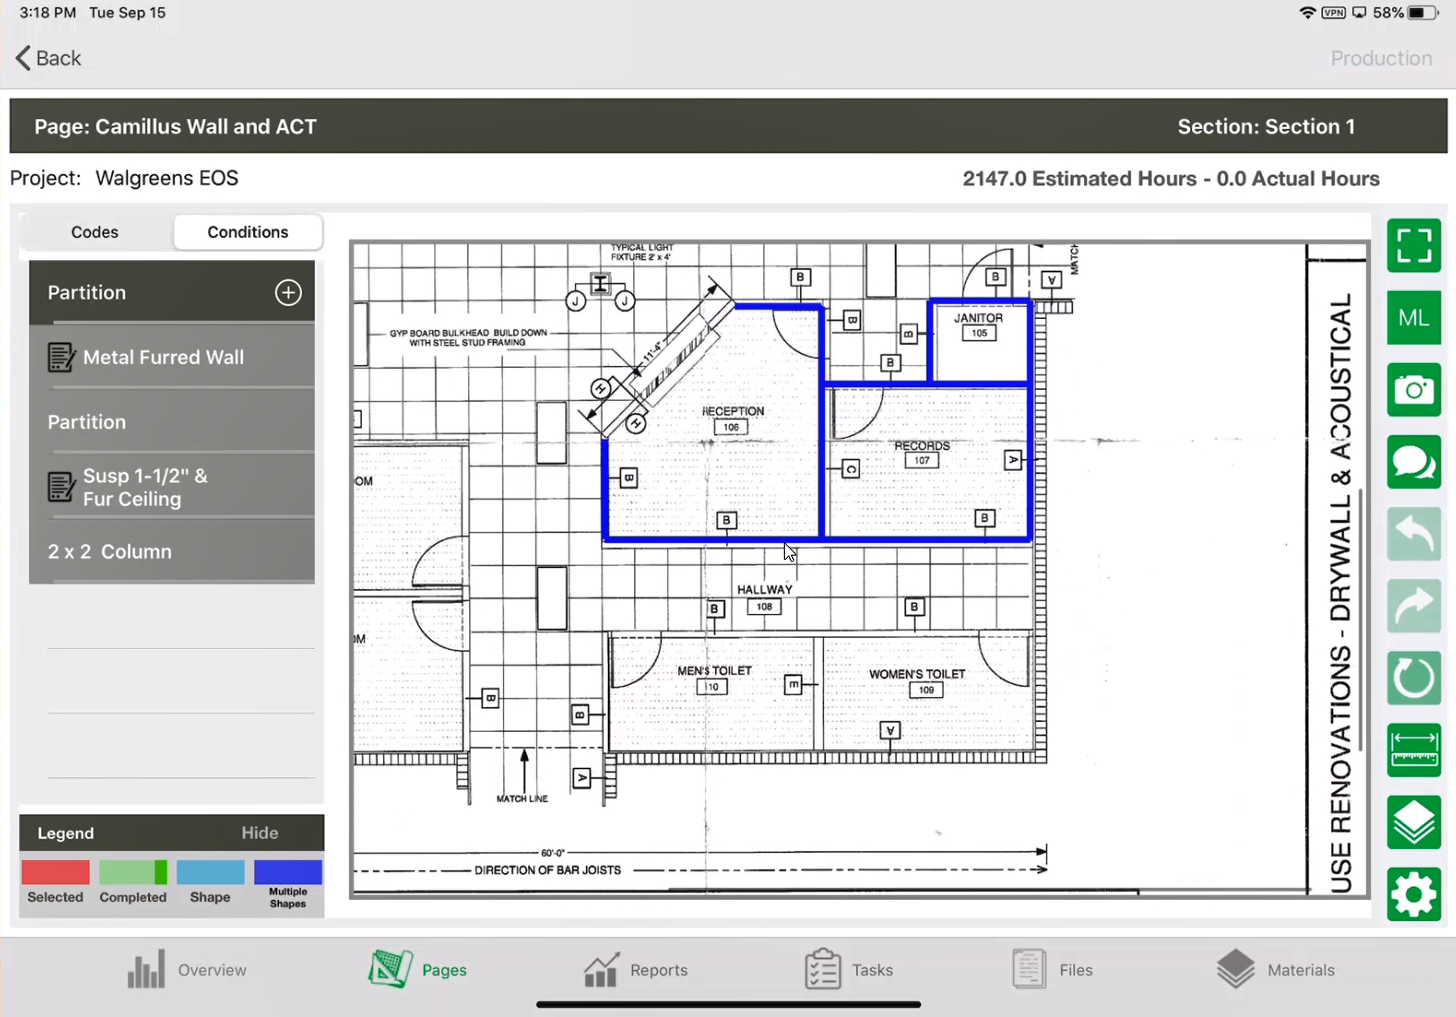
- The completion is now gone.
Note: If you had a lot of other production marked before making the mistake would be gone as well if you had not yet uploaded it.
How you can remove completion shading for a shape when you’ve already saved and uploaded it.
- Note: Let’s look at another way to remove completion shading for multiple shapes. When would this be useful? Got a false report, did not complete production for these shapes, or say that the only one of the shapes was not supposed to have production marked, but you have already marked production in other shapes. And you do not want to clear it all.
- Select a shape on the blueprint.

- Tap Production
- Mark some completion. In this example, tap Completed.
Note: Clicking Completed will bring the completion to 100%.
- Tap Save.
- Select additional shapes.

- Tap Production
- Tap Completed.
- Tap Save.
- Tap Overview.
- Tap on the Menu icon.

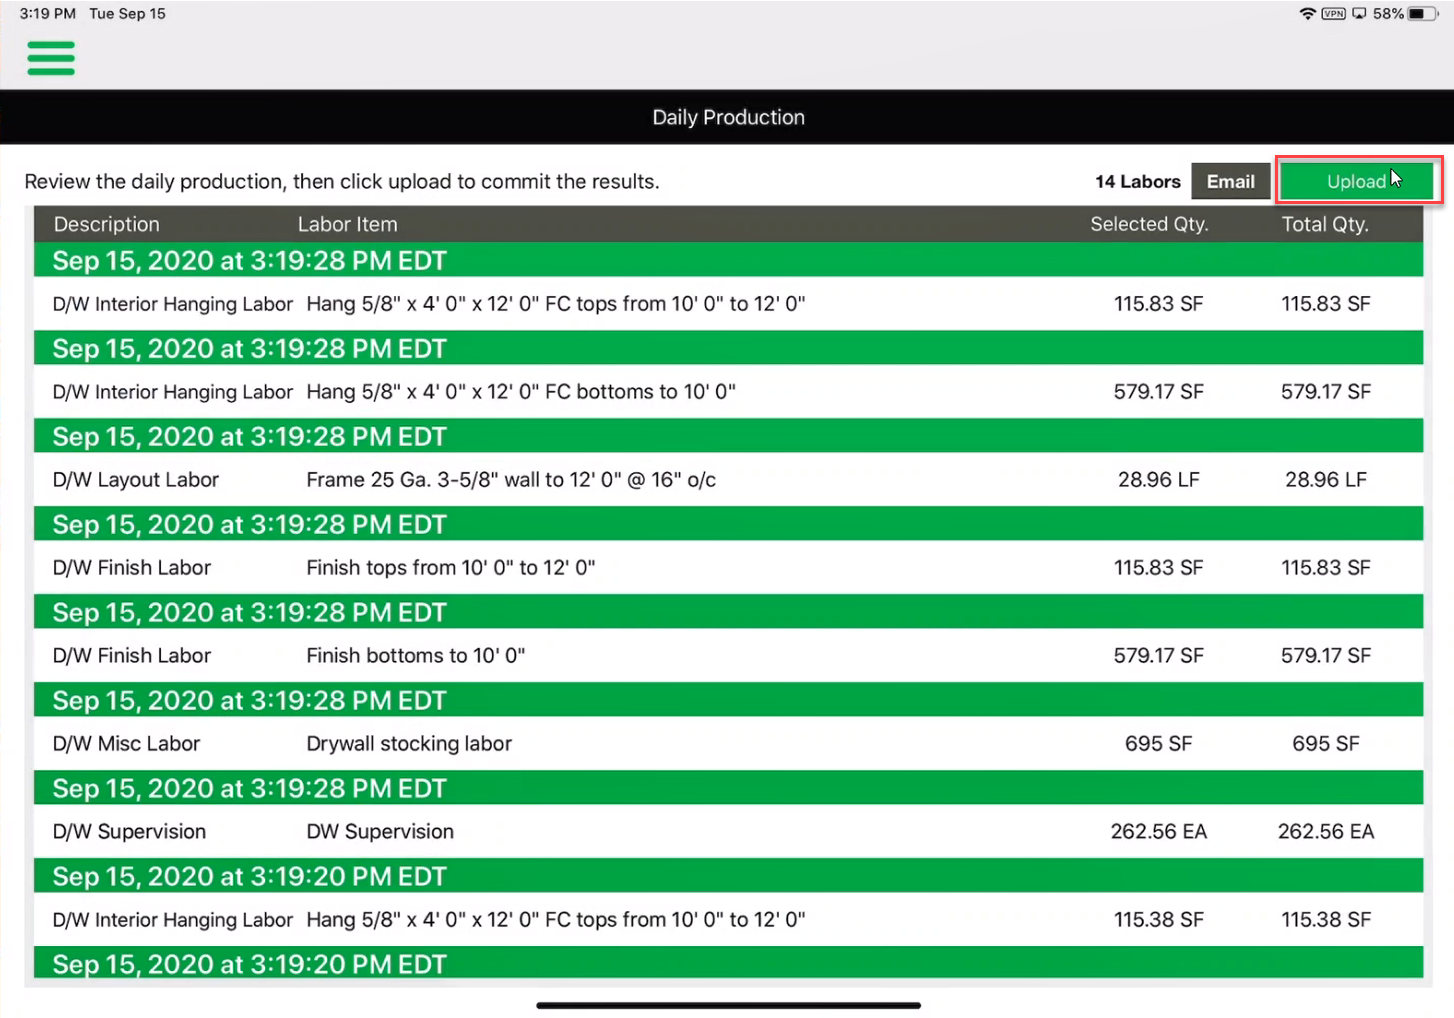
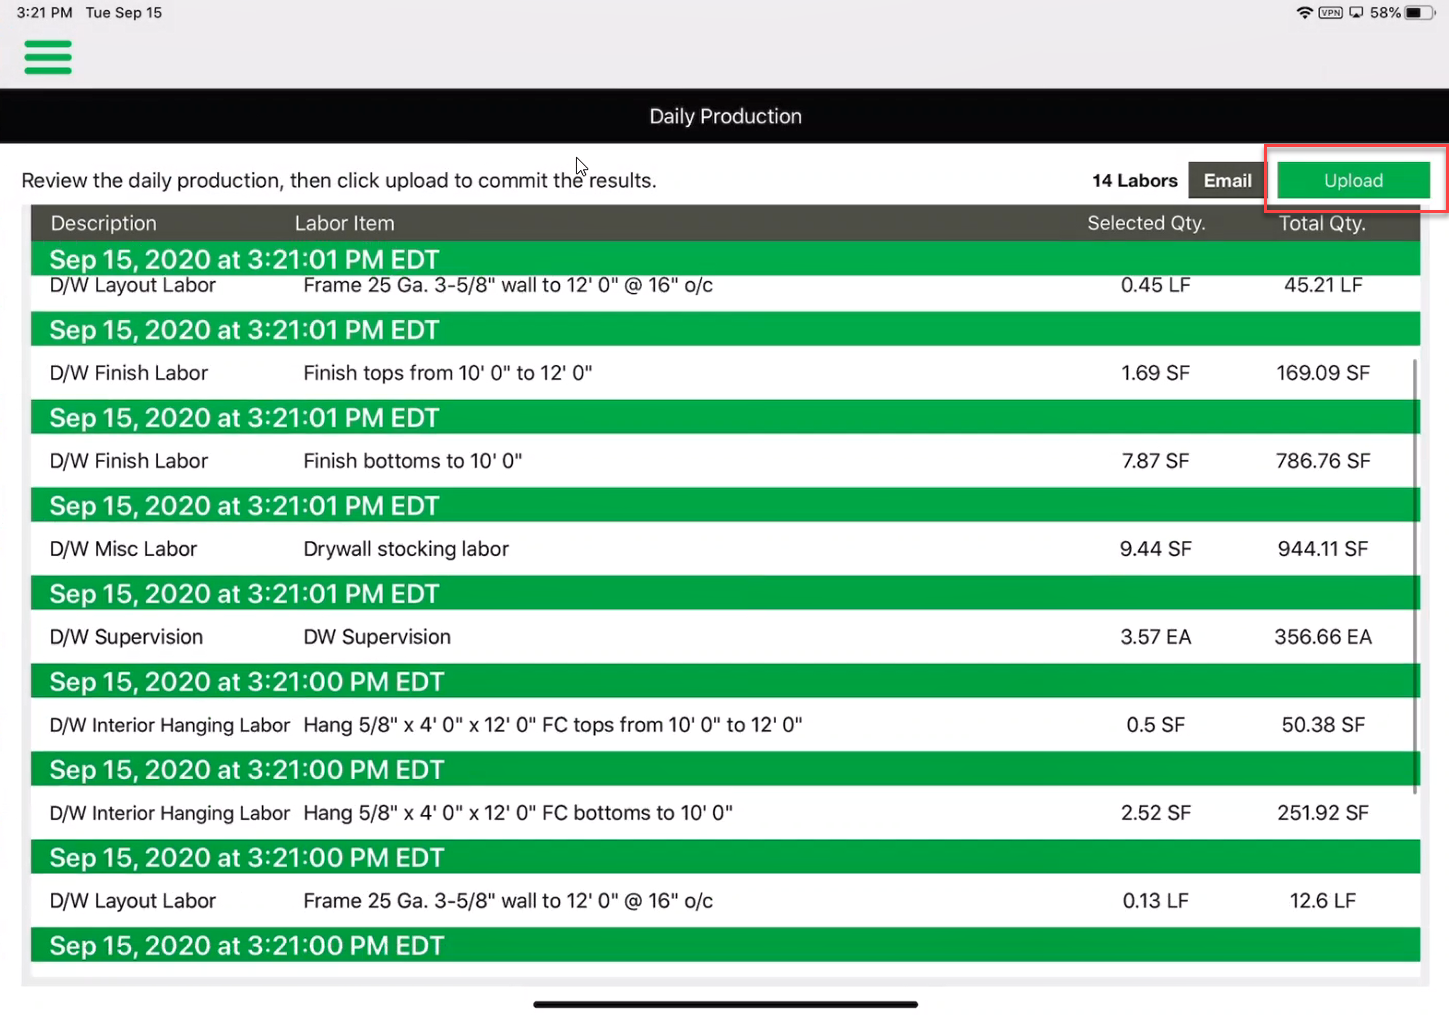
- Tap Daily Production.

- Tap Upload.
- Once the production is uploaded, you will appear back at the Overview Screen. Tap on Pages.
- Tap on the page.
- Select all of the shapes that production was added to.
- Tap Production.
- Slide the slider all the way back to 1%.
Note: Unfortunately, we don’t let you take it back all the way to zero, but we can get you pretty close.
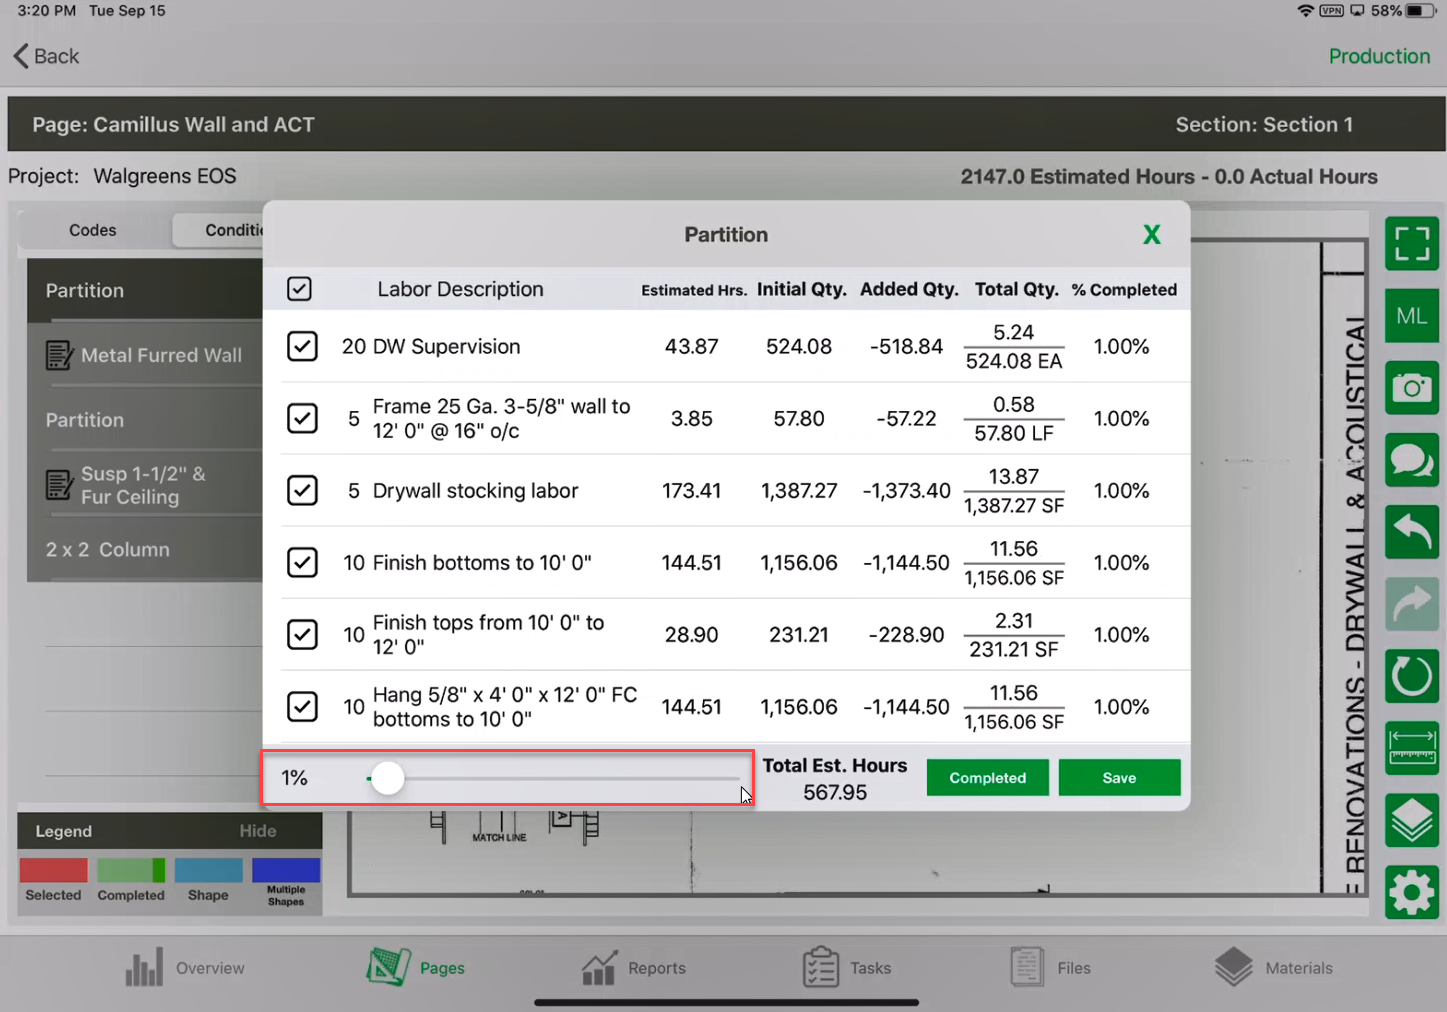
- Click Save.
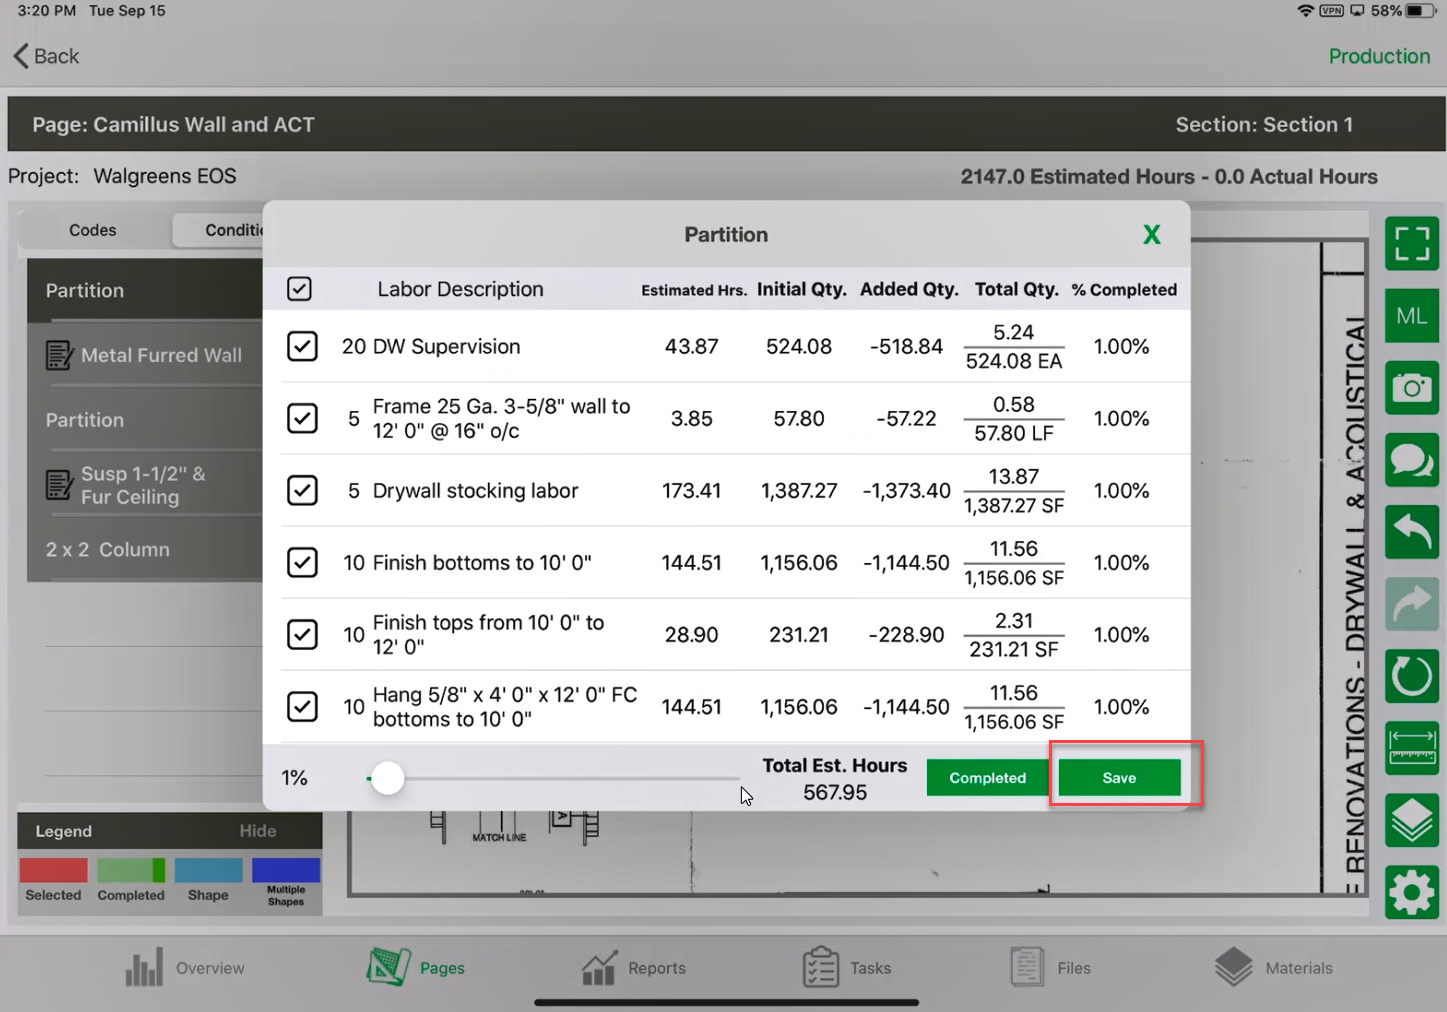
- Notice how the shapes went back to blue.

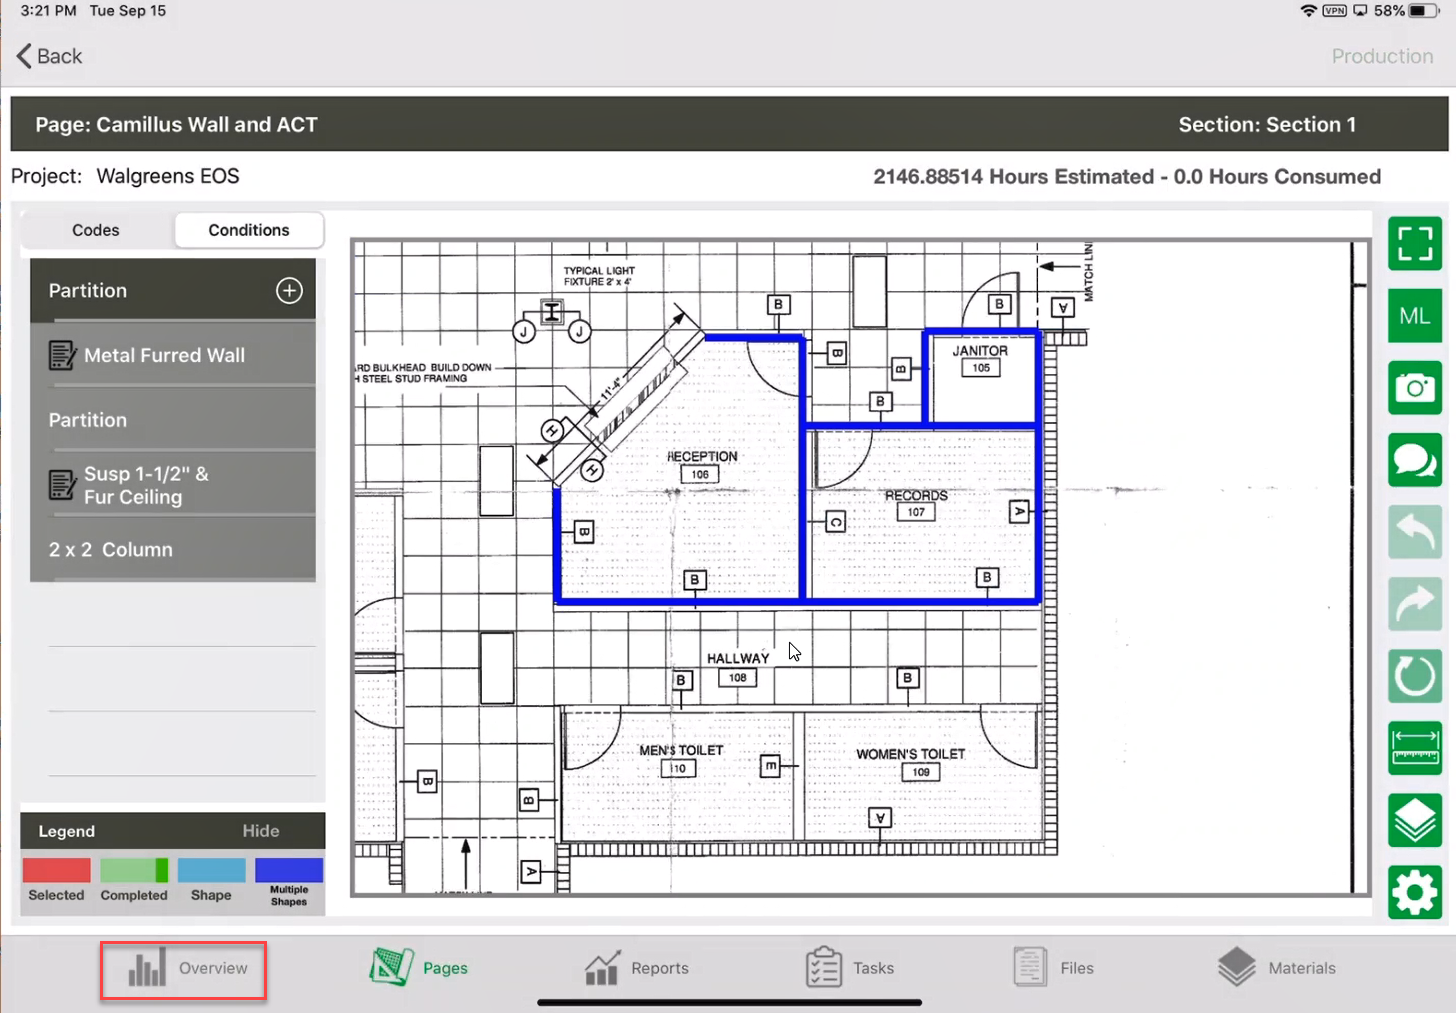
- Tap on the Overview screen.
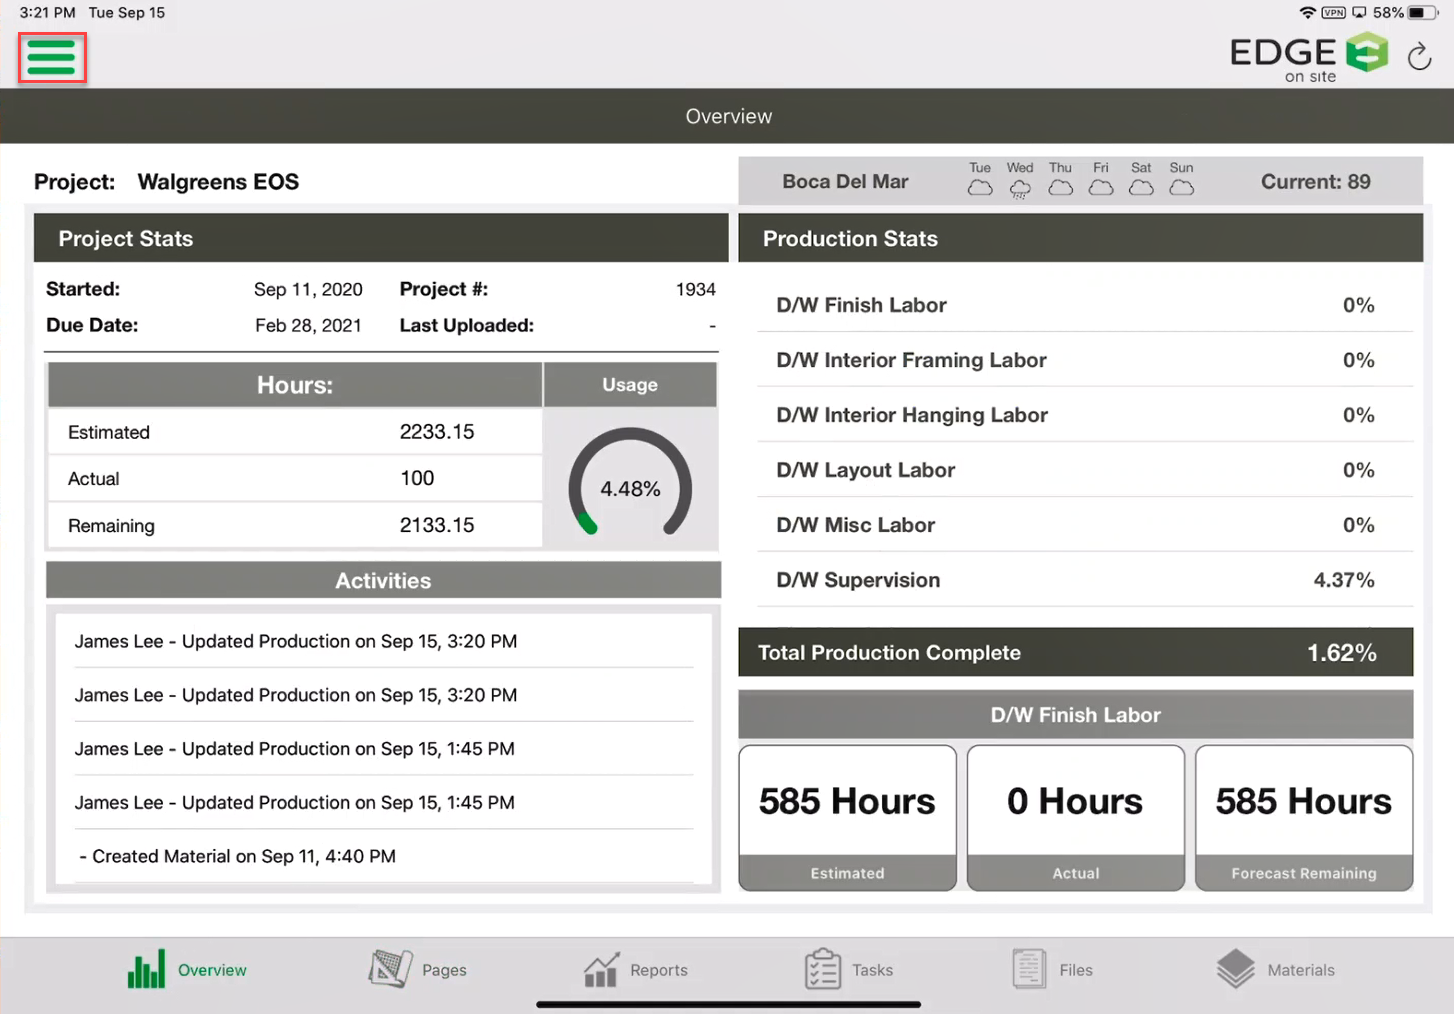
- Tap on the Menu icon.
- Tap Daily Production.

- Tap Upload.
The 1% will remain there until you are ready to add production to the shapes.