![]() Estimating Edge’s team of experienced construction professionals and software engineers have developed the industry’s smartest takeoff and estimating software solutions for competitive estimates.
Estimating Edge’s team of experienced construction professionals and software engineers have developed the industry’s smartest takeoff and estimating software solutions for competitive estimates.
Don’t just estimate faster. Estimate better.®
- /
- /
- /
- /
How to Create a Role
Learn how to Create and Edit a Role inside of the portal in v12.
When you access the portal, you’re going to be presented with one of two screens:
- Bid Grid Screen
- Dashboard
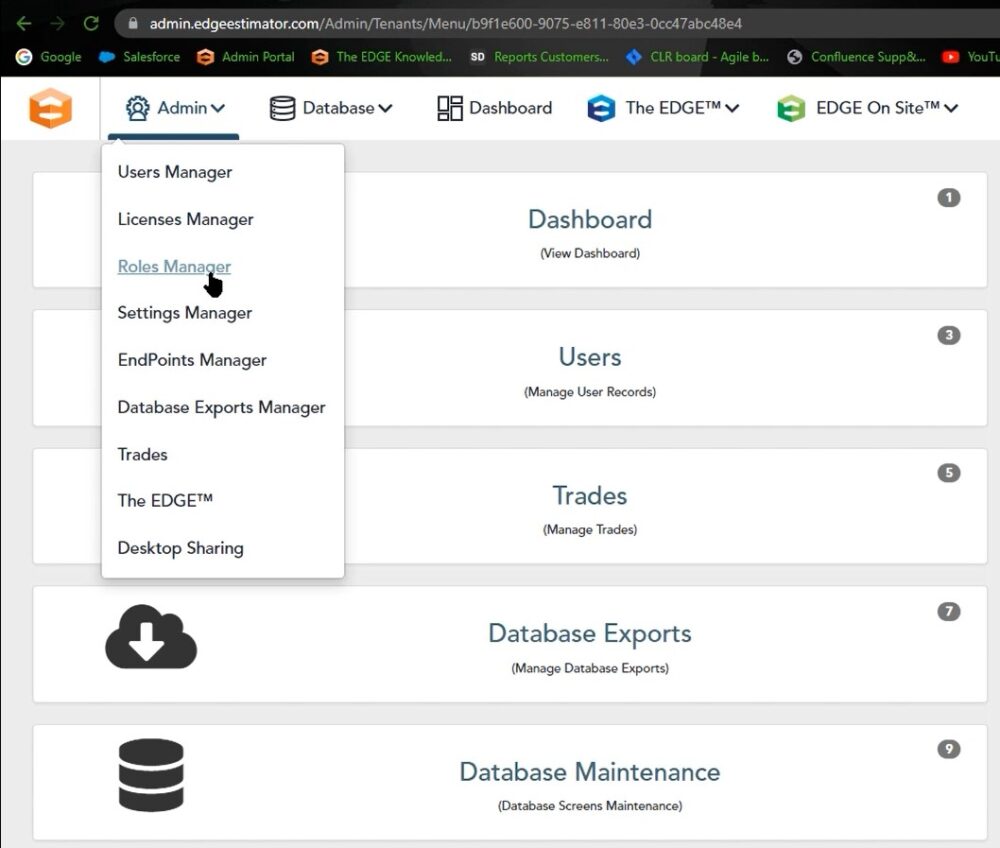
In either case, you’re going to click the admin dropdown, then select the roles manager
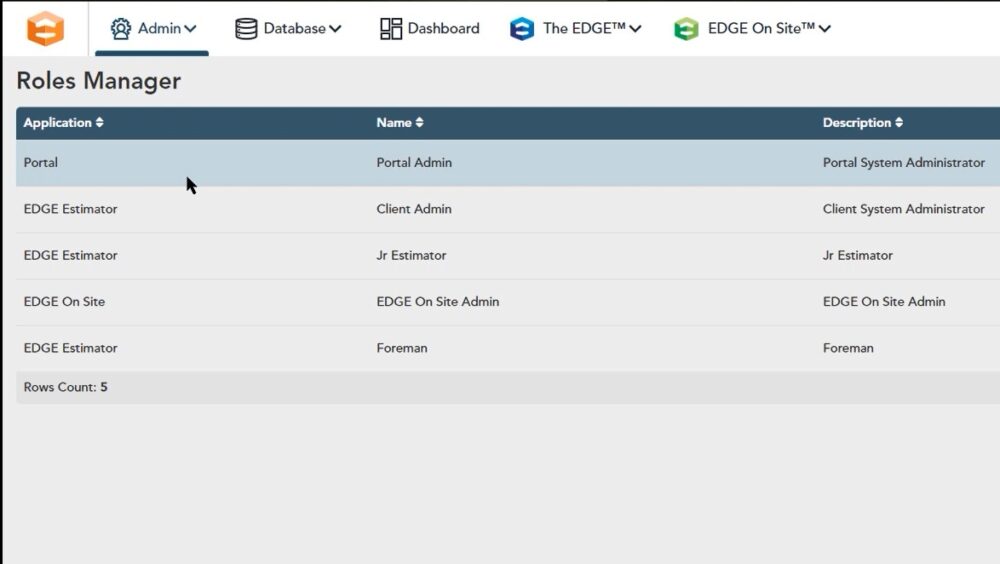
Once you choose the roles manager, you’re going to be presented with a list of the roles that you currently have available.
If you don’t have any roles created, you’re going to start out with the portal admin and client admin by default. The reason that you have two different roles is for two different portions of the application.
- Portal role: Specific to the portal and what you can do inside of the administration portal
- Client admin: Specific to The EDGE Estimator in version 12
Edit a Role
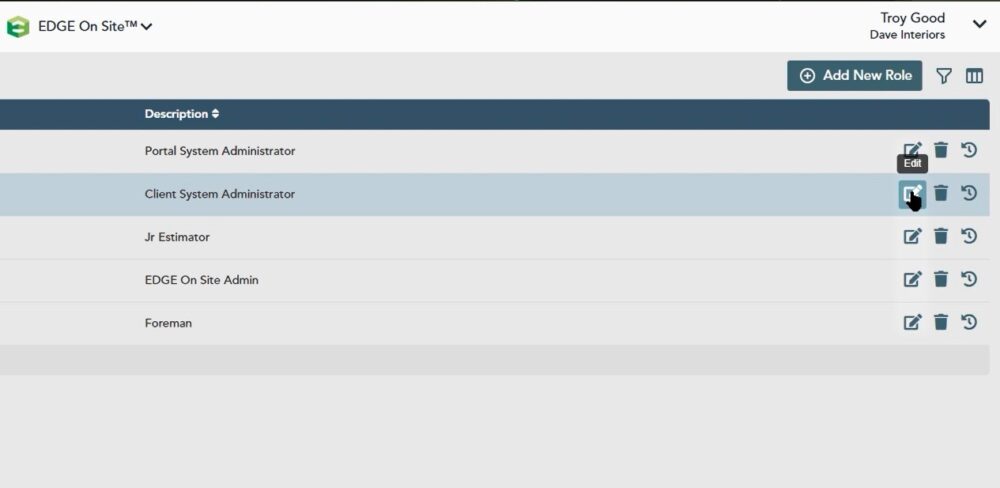
If you want to edit any one of these roles, first, click the edit icon, where you will be presented with a window that has specific options based on the application that you’re working on.
For example, if you want to edit the Jr Estimator role and you click the edit option, you’ll notice that you are presented with a list of toggle switches. These switches can be turned on or off depending on what you want this role to be able to do.
At the top of this window are two tabs:
Job Tab: Allows the estimator to manipulate information in the specific job that they’re working in. Toggle on and off any of these toggle switches, depending on what you want this role to have the capability to do.
Database Tab: Controls what this role can do inside of your database. So if you don’t want that user to be able to add, modify or delete any information, but you do want them to be able to view, then toggle view on and leave everything else as off.
Once you’re finished editing this role, click Save at the bottom, right of the window

Create a Role
If you do not have any roles to edit, you would need to create a role.
To create a role:
Click on add new role at the top

When the Add Role Information window opens:
- Type in a name. For this example, we will use Portal Role -Estimator
- In Description we will use the same as the name
- Click the drop-down by Application Type and choose Portal
- Click Add at the bottom, right of the window

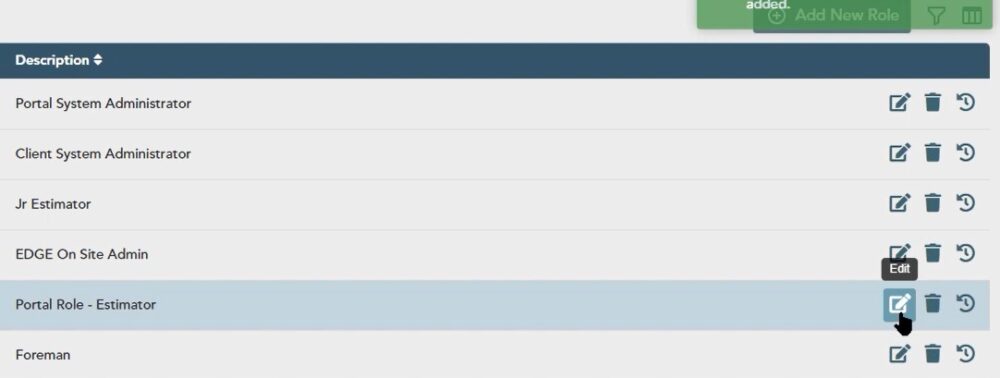
Once you click add, you will now see that role has been created. A newly created role has no permissions turned on. In order to assign permissions, click the edit button
Edit Role Information Window – Job Tab
Once inside the edit role information window, for this example we will look at the Job tab first.
This allows the user to make modifications to the bids that you have in the portal. Examples of modifications would be; to view or modify the status. If you had archived any of your bids, they would need to be able to unarchive them by means of modifying the job status. In order to do that, you would need to turn on that option as well as turning on the view option.

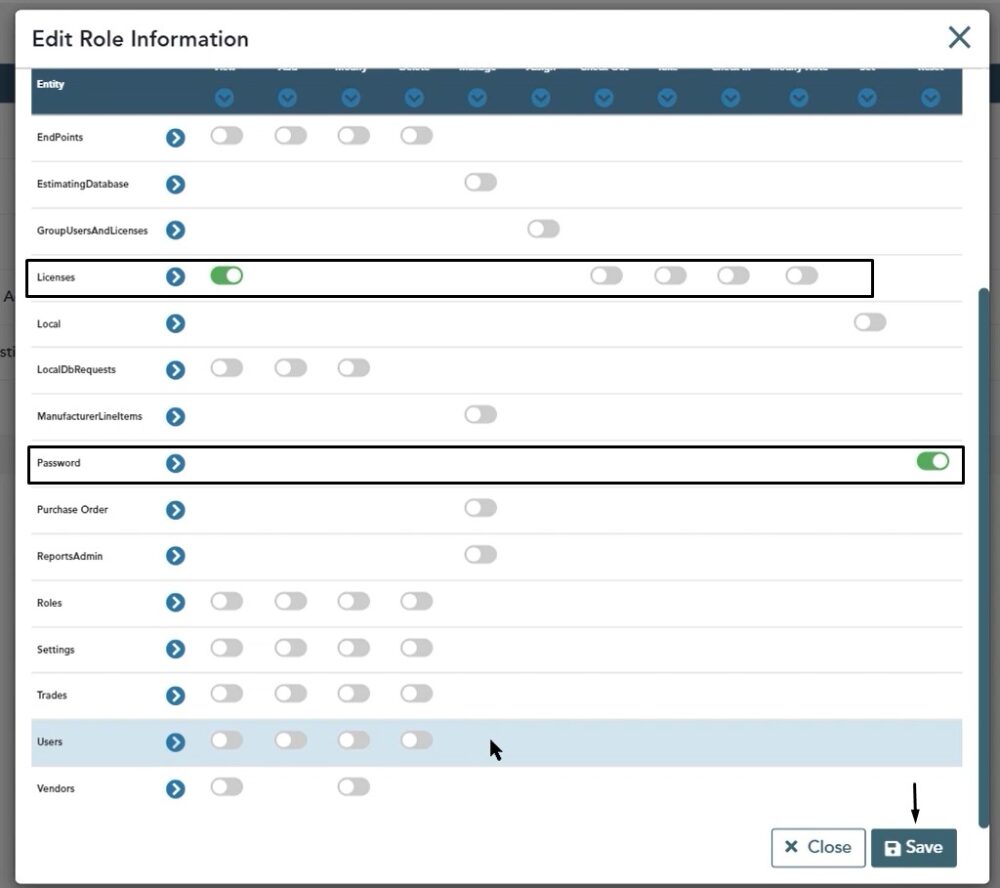
Edit Role Information Window – Portal Tab
The Portal tab is where permissions are more restrictive. For this example, we want to turn on the following permissions:
- Password: We do want them to be able to set their own password in the case they forget it they can easily reset it themselves
- Licenses: We want them to have the ability to view licenses but not have access to the other options
Proceed through the list and toggle on those that you want them to have access to, then click save
If you have any additional questions or you run into any issues while you’re walking through setting up one of these roles for your team, feel free to give us a call on the tech line and we’d be happy to assist you in any way we can.