![]() Estimating Edge’s team of experienced construction professionals and software engineers have developed the industry’s smartest takeoff and estimating software solutions for competitive estimates.
Estimating Edge’s team of experienced construction professionals and software engineers have developed the industry’s smartest takeoff and estimating software solutions for competitive estimates.
Don’t just estimate faster. Estimate better.®
- /
- /
- /
- /
How to Create a Group
This video covers how to create and save a group back to the database in v12.
Group Definition
This group or master is going to be a master list of conditions that you’re going to pull into your projects from this point moving forward. We provide some default ones to start out with, but these will be very generic. You will want to make modifications that are specific to your company.
It does not matter what trade you’re in, but for this example we will show roofing. The reason we’re showing roofing is because most of the time roofing is a package deal. They’re going to have every portion of that roof in one master.
However, if you’re an interior company, you could save typical walls specs that you’re finding yourself estimating over and over again. You could also save interior versus exterior.
Once you get your job created and you load these default conditions, you’re going to want to double click on every condition and manipulate the condition properties.
Note: If you have any questions about those, you can refer to the videos that we have on our YouTube page
Condition Properties Window
For this example, we will double click on one of these conditions to show you what the Condition Properties Window looks like. Here, you would change all of this information to resemble how you want this master to be presented every single time you pull it into a project.
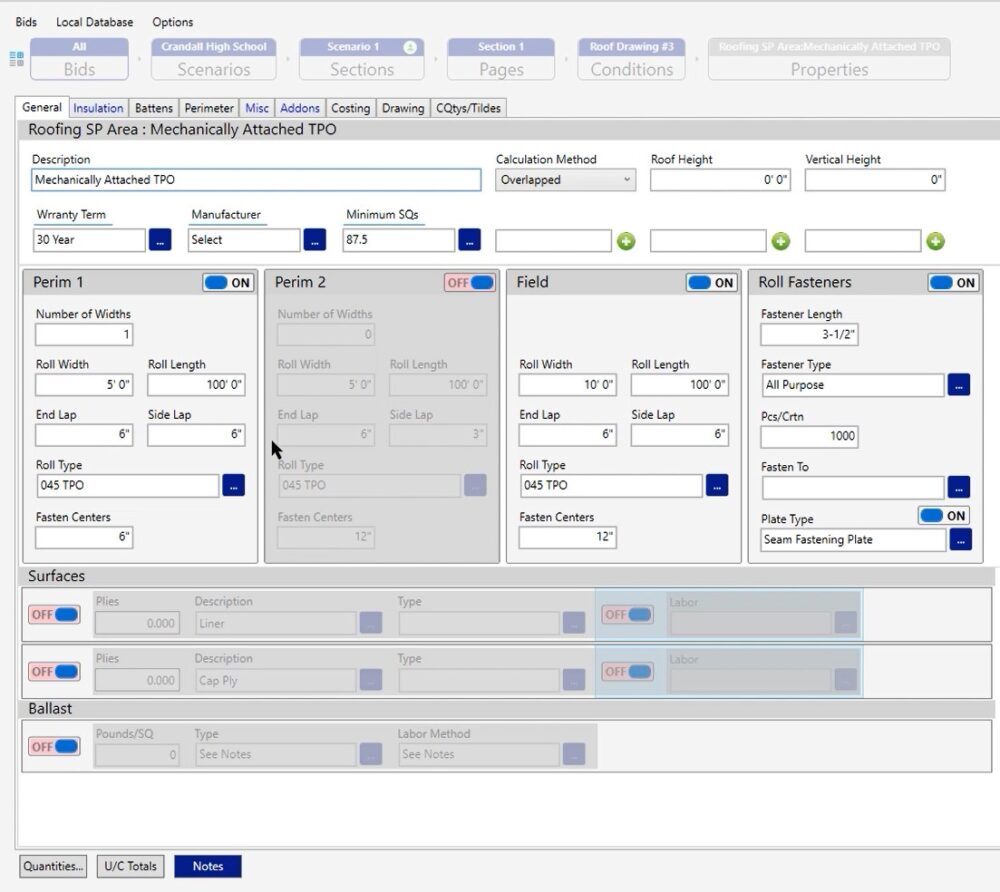
When you’re building this project, think about that 80% mentality. We know not every project is going to be the same, but we do know that your labor is going to be relatively the same as for what you need to see out there as well as the material. The products may change, and you may have to add more depending on warranty or different types of walls that you’re working with. However, those are simple modifications that you handle on a project by project basis.
Once you have your projects set up and you’ve modified all of the properties of the conditions, the next thing you want to do is go to your pricing screen. On the pricing screen you can verify that all of the material is being ordered and priced the way that you want to see it and has the correct coverage rates.
In the labor screen, you want to make sure that you have all of the labor available to you or if we provide you too much labor by default, we take some of that labor away so it doesn’t confuse you and your team.
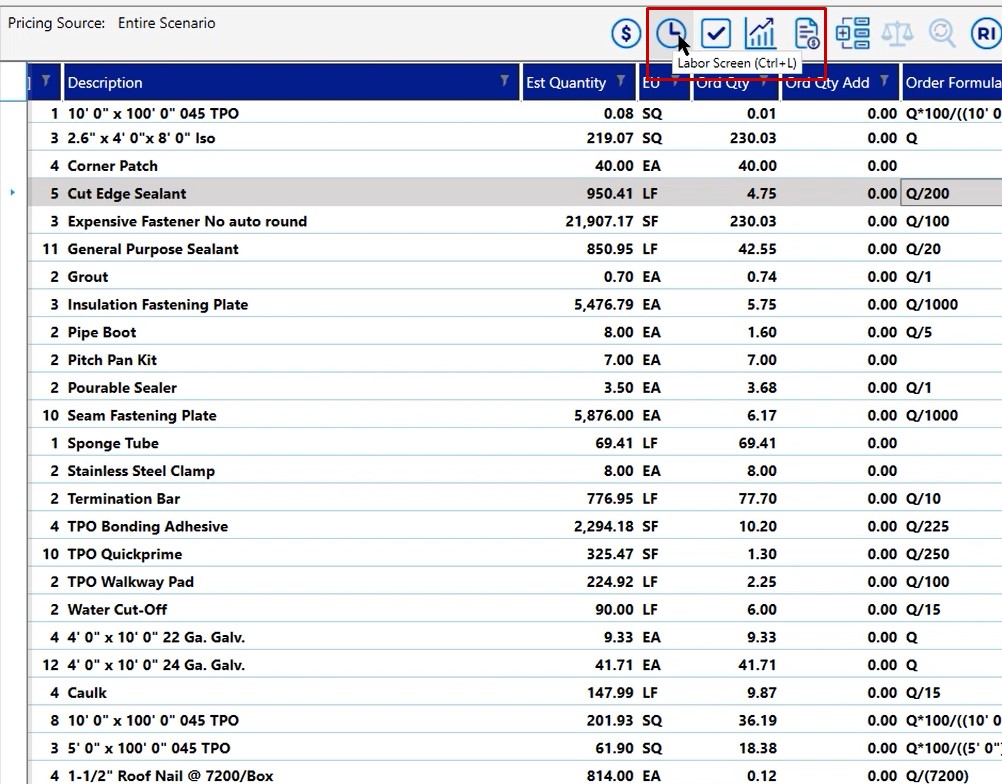
Pricing Screen
Click on the pricing screen
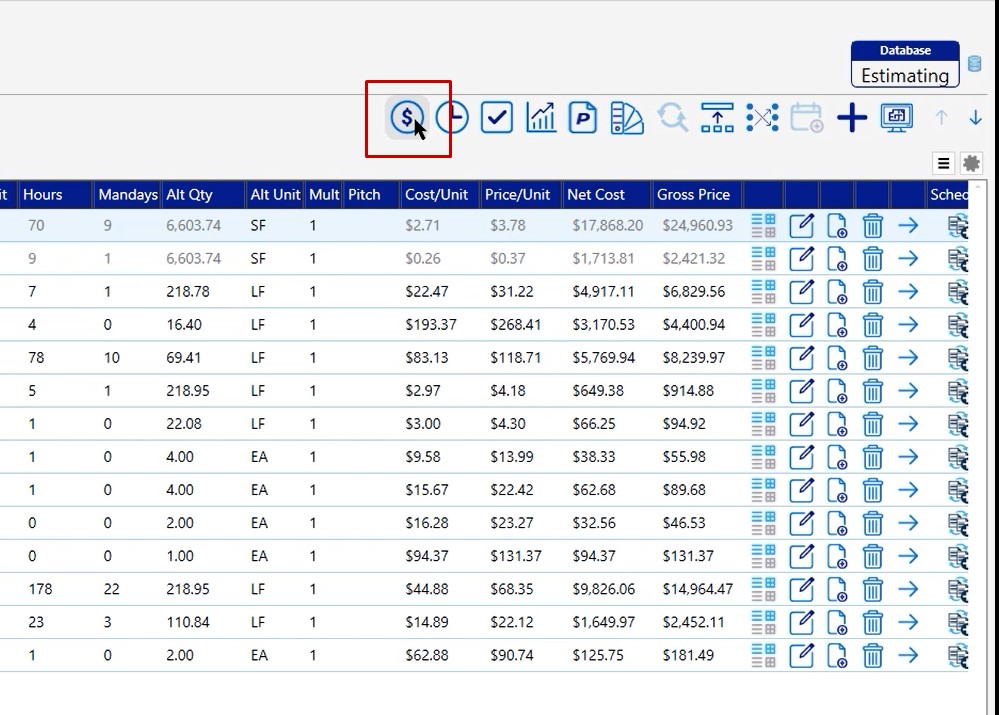
On your screen you will see the estimated unit, order unit, and if you scroll over at the bottom, you will see your pricing.
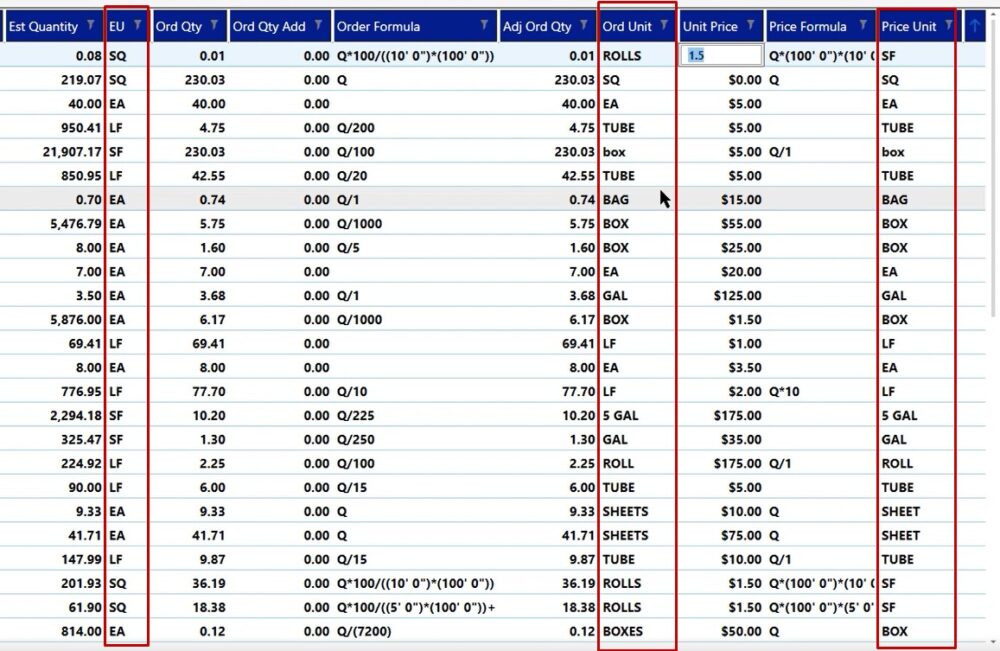
Columns
Your screen may not look like this, however, if you want to turn any columns on or off, simply click the columns dropdown and that will allow you to uncheck or check any of these columns and make this process a little bit easier for you.

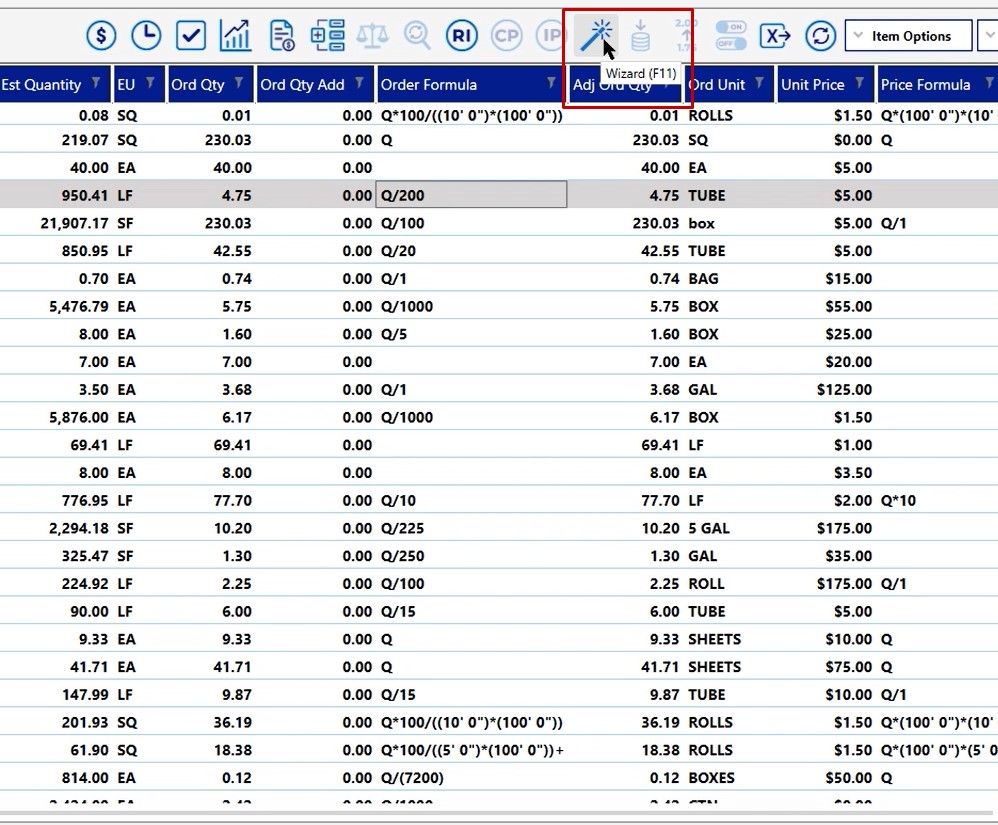
Wizard Tool
If you do need to change some of the information, most of the items you’ll need to change you can left click on and choose the Wizard Tool and that will allow you to go in and change the order unit and pricing.
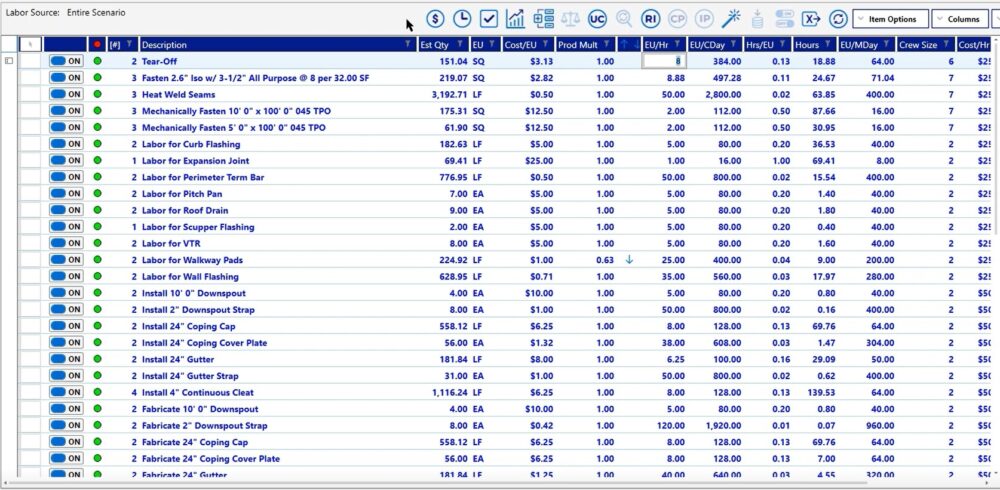
Labor Screen
Once you finish up with your pricing screen, click on the labor screen to open it
On the labor screen, we want to verify that we are producing all of the labor that we want to see or that we are not producing too much labor. So this is where you would go in and start to either turn off some lines or add more labor lines to the condition properties if needed.
Once your labor screen is set up and you’re displaying all of the labor that you would like to see, you’re ready to save those conditions back to the database.
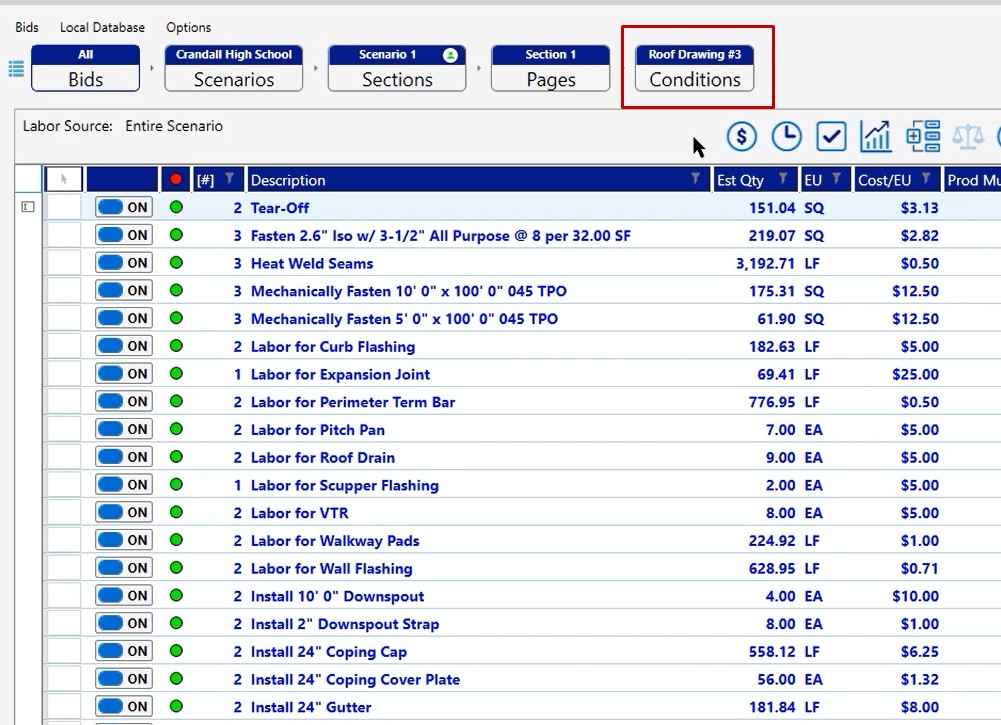
Conditions List
Click on conditions to take you back to the condition list.
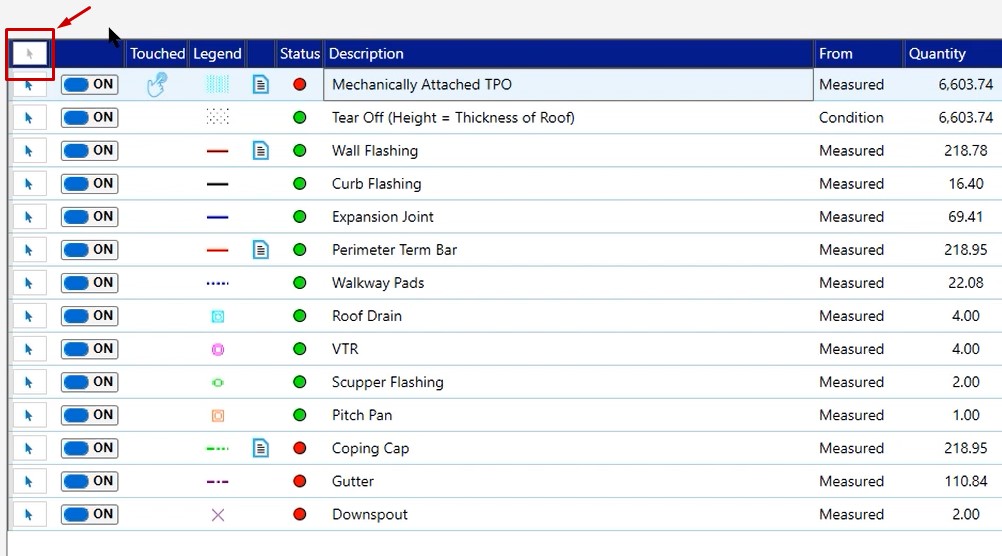
On the conditions list, click the checkboxes for all of the conditions that you would like to save as part of this group. In this example, we are going to click the toggle to select every condition.
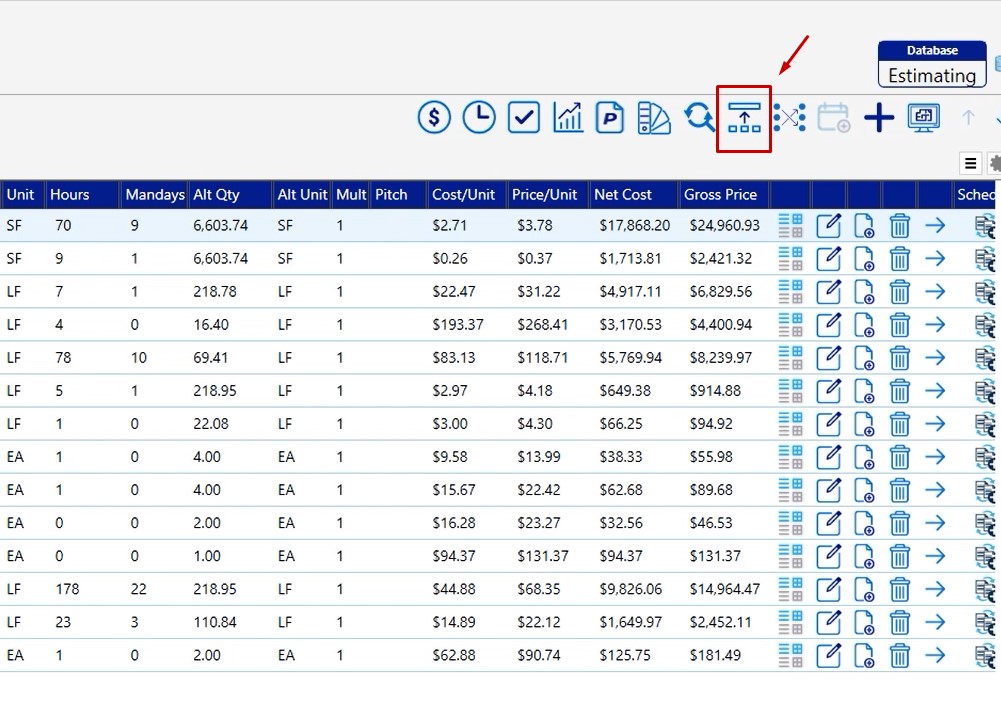
Create Group Icon
Click the create group icon
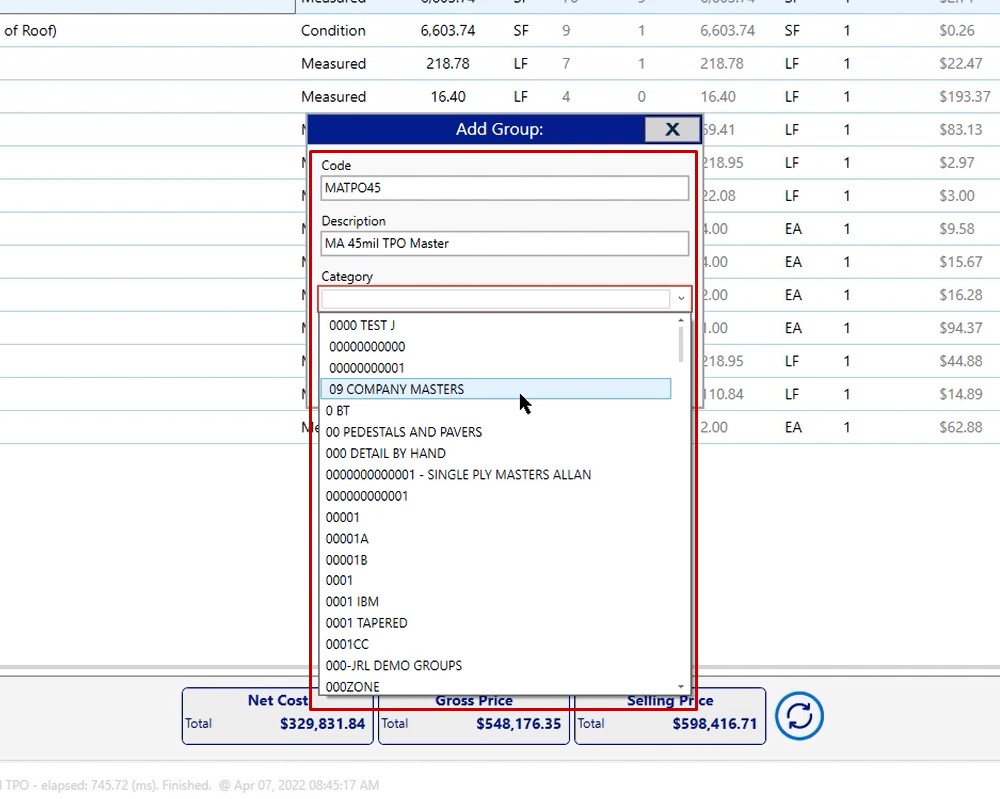
Add Group Window
In the Add Group window you need to give both your code and description unique names.
The next thing that you would need to do is choose a category. If you already have a master saved, you can go in and save these masters back to the database simply by choosing a category.
However, if you would like to start out with something new, we typically recommend using numerics, as you can see from the dropdown. This way, it’s the very first option in the list. In most database cases, you can usually start out with 001 space and then start typing in whatever you want.
Click Save and let the program finish processing this information.
You will get a window that lets you know that the program is in the process of creating that group back to the database. Once it’s finished, the blue window will go away.
At that point, you would be able to use that master and pull it into any new project or any existing project because it’s now in the database.

If you have any additional questions or if you run into any issues as you’re going through this please feel free to reach out to our technical support team and they’d be happy to assist you in any way they can.