![]() Estimating Edge’s team of experienced construction professionals and software engineers have developed the industry’s smartest takeoff and estimating software solutions for competitive estimates.
Estimating Edge’s team of experienced construction professionals and software engineers have developed the industry’s smartest takeoff and estimating software solutions for competitive estimates.
Don’t just estimate faster. Estimate better.®
- /
- /
- /
EDGE On Site: Inputting Hours into The Administration Portal
How to enter in hours for your EDGE On Site project inside the Administration Portal.
There are three different methods when inputting hours:
- Adding hours.
- Editing hours.
- Bulk Upload hours.
Note: If you have our time tracking application the functionality of time inside your project will be different. Click here to see that relationship.Let’s get started.
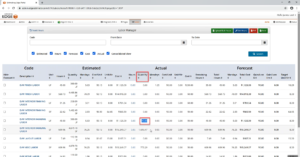
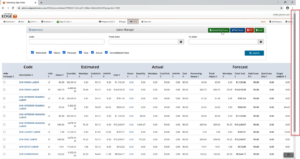
- On the Projects Manager list, locate the project which you would like to enter hours for.
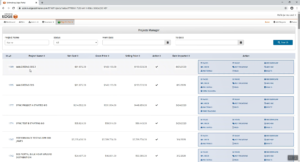
- Click on the Labor for the project.
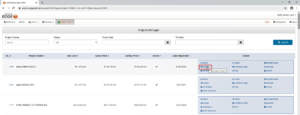
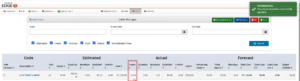
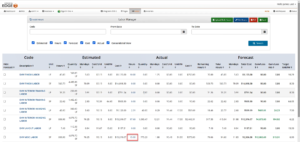
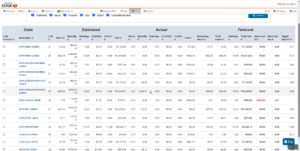
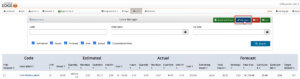
- The Labor screen will appear, displaying the estimated, actual, and forecast data.
Note: Actual quantity are in some of these codes, simulating there has been some tracking in the past week or month.
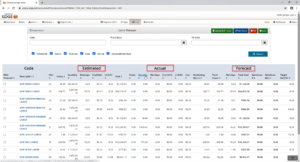
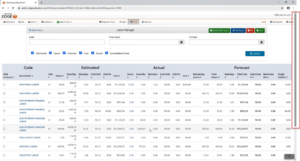
Adding Hours is the method used when you are trying to enter time into a code that has no actual quantity shown by a zero in the actual quantity column.
- Hover over when it says zero, a hyperlink will appear.
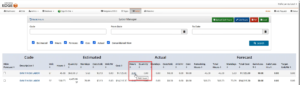
- Click Add Hours.
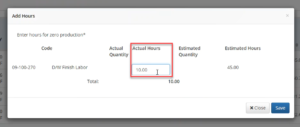
- Enter in how many hours you would like to add.
Note: The numeric code and the description that is being working in is being shown. It is displaying how many hours you currently have right now and the estimated total.
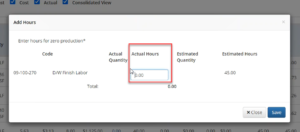
- Click Save.
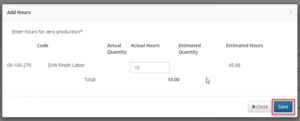
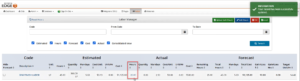
- The hour inputted will be stored in your finished labor line.
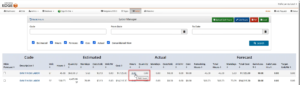
- The user has the ability to click back into the hours added to add more hours or reduce hours, if they so choose. To do this:
-
- Click the hours inputted.
- A pop-up will appear, delete the number in the box and type a new number.
Note: If a user wants to deduct hours the user can place a “–“ in front of the number.
- Click Save.

- The hours will be added to the Code.
- Click the hours inputted.
Distributing Add Hours: Distributing a little bit of the hours to every labor item in the code, regardless of quantity because add hours means that you are putting time into a code that has no quantity.
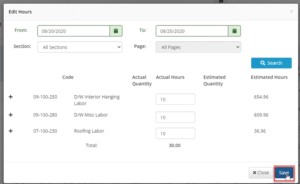
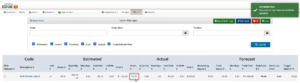
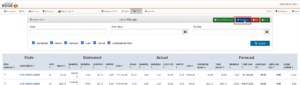
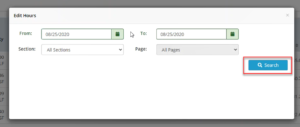
Editing Hours has to do with when you have codes that have production showing in the quantity column.
- Scroll to the top of the screen.
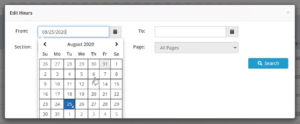
- Click Edit Hours.
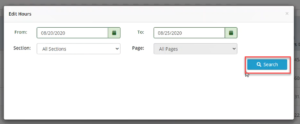
- A pop-up will appear, requesting a date range in which you would like to enter in time for.
Note: The user also has the ability to search my page name. Filtering by page name allows the user to only view the codes from that page in the selected date range.
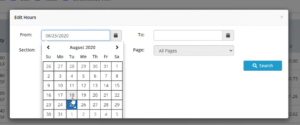
- Click Search.
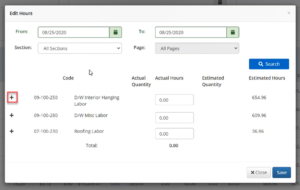
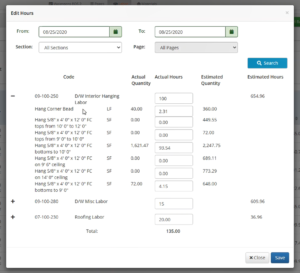
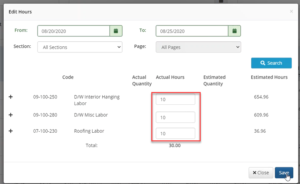
- A list of codes will appear, this is where you enter the time as you see in the fields.
Note: There is a “+” sign next to some of the field, when click the code will dropdown all of the labor items inside of the code.
- Enter the time you would like to add or deduct.
Note: When hours are entered, in the labor items you can see these hours are only distributing to the labor items with an actual quantity greater than zero.
- Click Save.
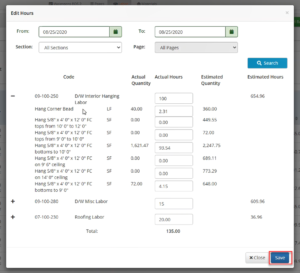
- The user will go back to the labor screen. Notice that now the code has the added hours.
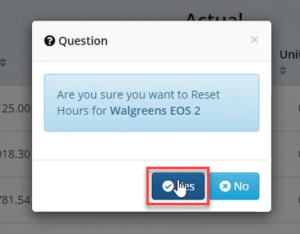
There is a reset hours button in the top left that will effectively get rid of all the hours inside of the project.
- Click Reset Hours.

- Click Yes.
Bulk Upload allows the user to input hours through a file template. The user may not see this upload bulk hours button until we add the setting to make it appear.
- Scroll to the top of the labor screen.
- Click Bulk Upload.

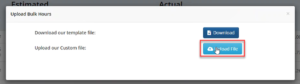
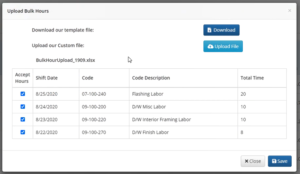
- A pop-up will appear, click download our template file.
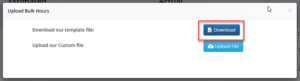
- It will pop-open the document. There will be five columns, and they are just depicting what need to be filled out.
-
- What need to be filled out is a project reference number, a numeric code description of the code, the shift date, and time.
- Users will be able to take the information from on spreadsheet and paste it into this sheet.
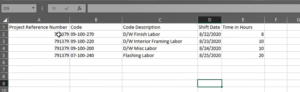
- The numeric codes and the project reference number need to match exactly with the numeric codes inside of the Administration Portal. These numeric codes are sent over from inside The EDGE. The project reference number needs to match so that the spreadsheet knows which project it’s uploading to. The project reference number can be found by going to the Projects Manager list, finding the project and clicking Reconfigure.

- What need to be filled out is a project reference number, a numeric code description of the code, the shift date, and time.
- Once the document has been filled out, save the file.
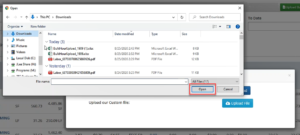
- Go to the Administration Portal, on the Bulk Upload. Click Upload.
- Select the file.
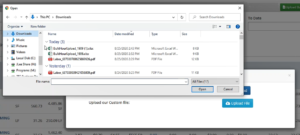
- Click Open.
- There will be a little preview of the information that was uploaded, if you did not want to upload some of these simply uncheck what you wish to not upload.
Note: If there were any errors, you would see them appear in a red banner at the top of this.
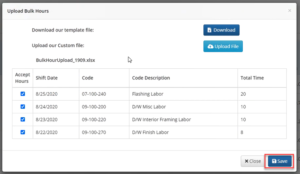
- Click Save.
- The bulk upload is going to distribute similar to the Add hours if you don’t have any actual production. It’s going to give a little bit to each labor item inside the code. If you do have quantity than the book, our upload will distribute the same way as edit hours.
Editing Bulk Upload and Add Hours allows the users to make a change to the Bulk Upload or Add Hours.
- Click the Edit Hours.
- A pop-up will appear, enter a date range.
- Click Search.
- The hours that were inputted will appear, click inside of the number and enter the correct number.
- Click Save.
Note: The difference between Edit hours and Add Hours is Edit hours will actually overwrite what you had.