![]() Estimating Edge’s team of experienced construction professionals and software engineers have developed the industry’s smartest takeoff and estimating software solutions for competitive estimates.
Estimating Edge’s team of experienced construction professionals and software engineers have developed the industry’s smartest takeoff and estimating software solutions for competitive estimates.
Don’t just estimate faster. Estimate better.®
- /
- /
- /
- /
DW Ceiling Condition Properties – General, Stud & Trim Tabs
This video covers the drywall ceiling condition properties for the general, stud & trim tabs in v12.
General Tab
- Description – Fill the name out to be whatever you would like to see there
- Ceiling Height – Ceiling height is going to come into play for descriptors when you’re looking at your labor screen
- C fields – These are user definable fields
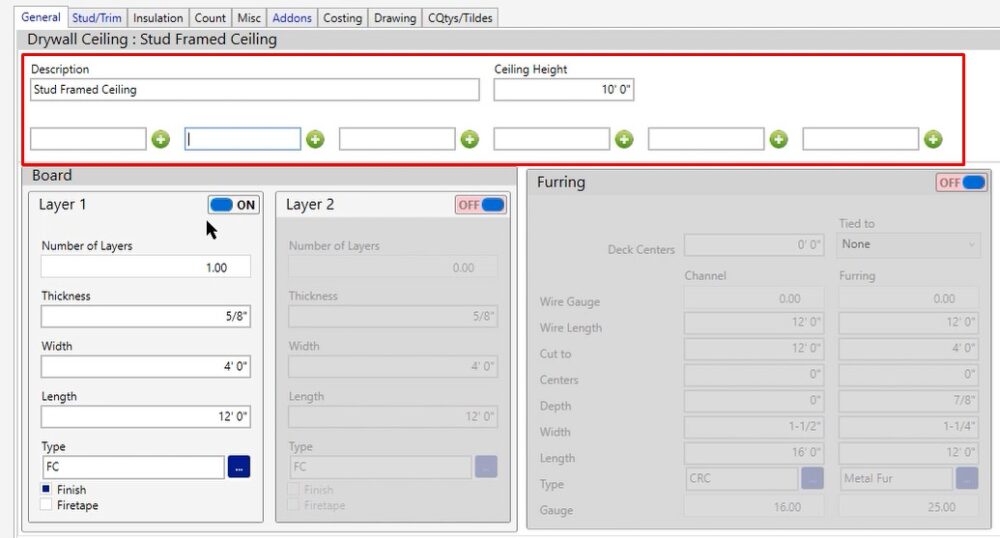
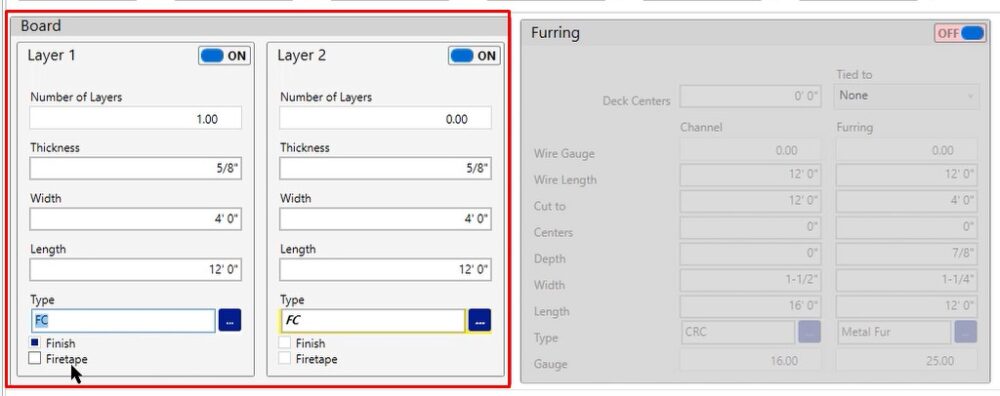
Board – Layer 1 & Layer 2
- Number of Layers – How many layers of that board you will be putting on
- Thickness – Thickness you will be using for the board
- Width – Width of the board you will be ordering for this project
- Length – Length of the board you will be ordering for this project
- Type – The type of board you will be working with. If you don’t need finishing or firetaping, uncheck the box.
Furring – Suspended DW Ceiling
The furring is used when you look at a suspended ceiling condition, so we are going to cover how to fill this information out and how it is going to be utilized.
- Deck Centers – If you’re using this for a suspended ceiling, these are going to be your wire drops.
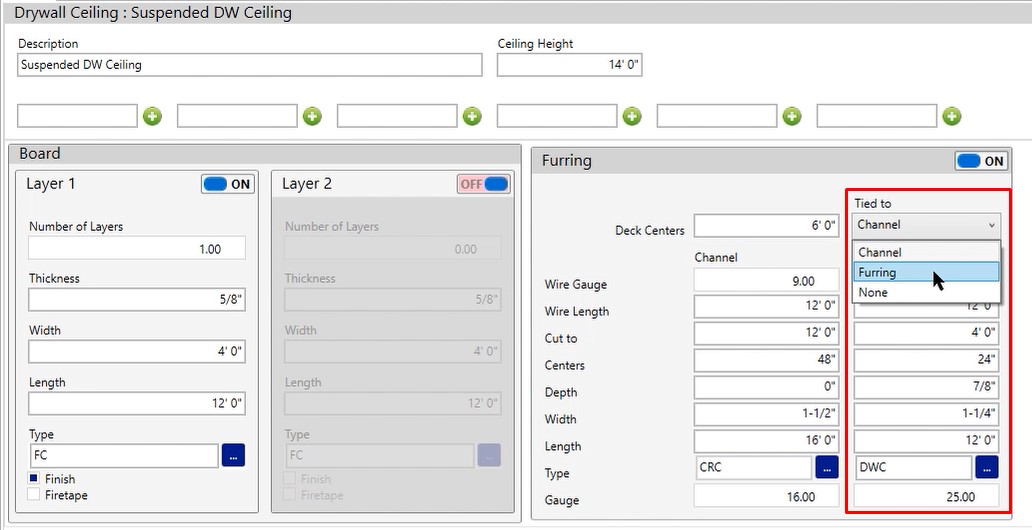
- Tied to – You have channel or furring to choose from and whatever you choose here depends on which column you’re going to be filling out the information and which column we’re going to be pulling data from for you.
So if you were to look at a suspended ceiling condition, you’ll see that the tied to is based off of channels.
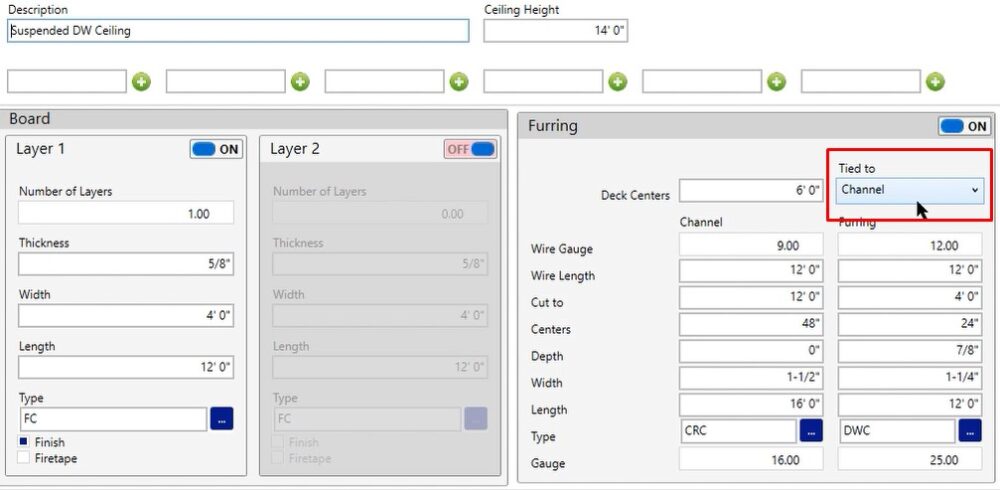
- Centers – Where your centers are
- Wire Gauge – Gauge of wire
- Wire Length – Length of wire
- Cut to – Change if you’re going to cut that to a different size
- Centers – This will be how often you are going to be dropping this wire
- Depth – When you’re working with channels you don’t have a depth
- Width – Referring to the CRC that you’re working with
- Length – Length of CRC
- Type – The type is CRC
- Gauge – Gauge for this material

If you were going to be utilizing the furring, you would want to click the dropdown, choose furring as an option and then go through all those same fields.
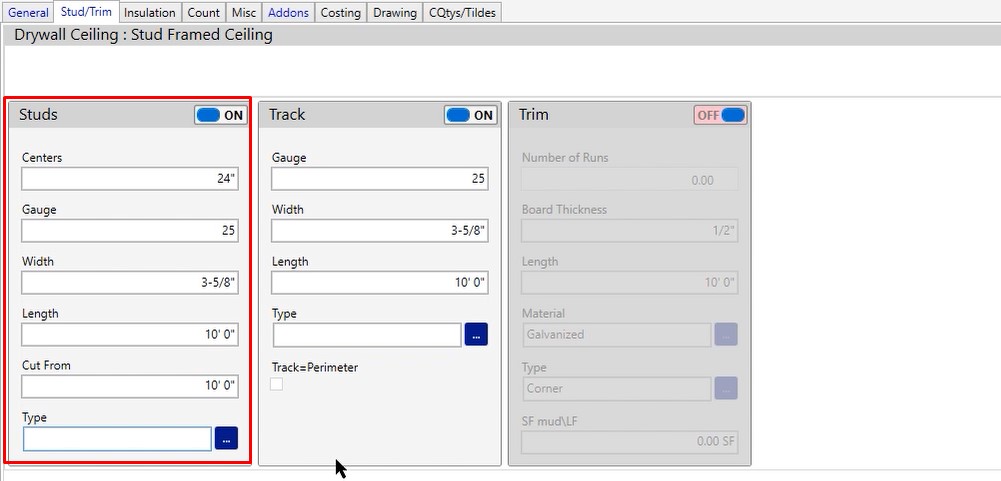
Stud/Trim – Studs
- Centers – The centers for these studs
- Gauge – Gauge of stud that you’re going to be using
- Width – Width that you’re going to be using for the stud
- Length – Length that you’re going to be using for the stud
- Cut From – If you wanted to buy a larger stud and cut it down, you would input that here
- Type – Typically the type is going to be the SSMA code, some type of nomenclature or the flange width
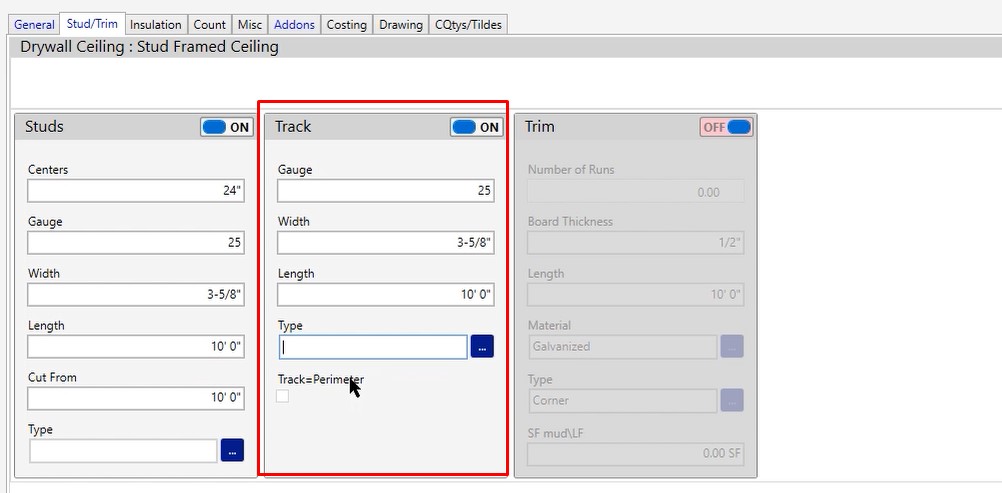
Stud/Trim – Track
- Gauge – Gauge of the track
- Width – Width of the track
- Length – Length of the track
- Type – If you wanted to have your type, you can choose that here
- Track=Perimeter – If you want to have track equal the perimeter of your take off, click this checkbox and it will automatically calculate track around the perimeter of the area.
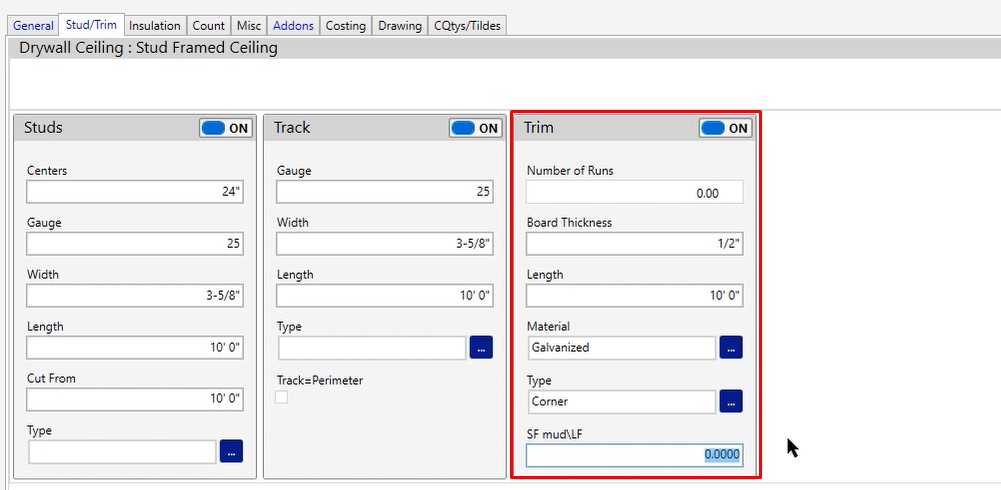
Stud/Trim – Trim
- Number of Runs – Number of runs of trim that you would like to produce
- Board Thickness – The thickness of the board you are going to use
- Length – Length of trim that you’re going to be ordering
- Material – The specific material for the trim you’re using
- Type – What the trim will be used as
- SF mud/LF – Square foot of mud per lineal foot
If you do have any additional questions or you run into any issues as you’re filling this information out, please feel free to reach out to our tech team and they’d be happy to assist you.