![]() Estimating Edge’s team of experienced construction professionals and software engineers have developed the industry’s smartest takeoff and estimating software solutions for competitive estimates.
Estimating Edge’s team of experienced construction professionals and software engineers have developed the industry’s smartest takeoff and estimating software solutions for competitive estimates.
Don’t just estimate faster. Estimate better.®
- /
- /
- /
- /
- /
Project Conditions – How to Use, v12
Project Conditions is a brand new feature for version 12 that dramatically speeds up the setup and takeoff time. This feature allows users to set up a condition once and use it anywhere inside of the section.
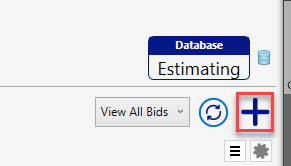
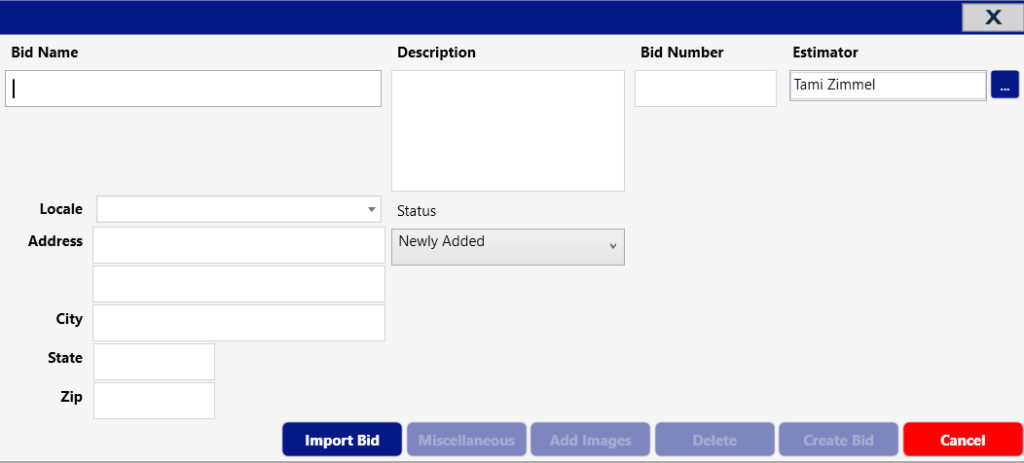
Step 1: Set up the Job. Click the PLUS button in the upper right corner. The project conditions dialog box appears, fill in the BID NAME; all other fields are optional.
- Add images (sheets). Click the ADD IMAGES button, which opens up file explorer. Navigate to your stored images and click the OPEN button.

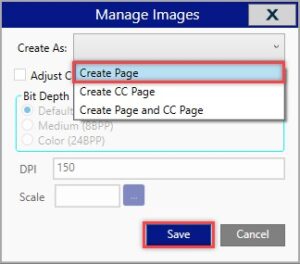
- Select the images (sheets) to use for takeoff. When the Manage Images dialog box appears, choose an option from CREATE AS. For this example, choose PAGE.
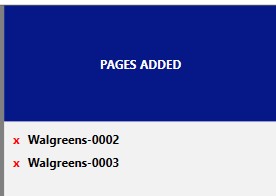
- On the right-hand side of the screen, all of the images being used for this takeoff are shown under “Pages Added”. Click the CONTINUE button.
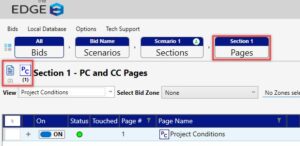
- All images are loaded in the “Scenario’s Breadcrumb”. Click the FORWARD ARROW button until you are at the “Page’s Breadcrumb”.
- You will now see two icons:
- The left icon is used to access your “Reference Page’s” and
- The right icon is used to access the “Source Page’s”/“Project Condition’s Page”.
- On the “Project Condition’s Page”, click the FORWARD ARROW button.

- You will now see two icons:
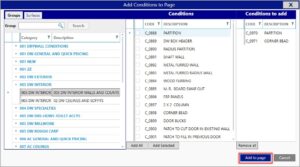
- Now you will be on your “Condition’s Breadcrumb”. Click the PLUS button in the upper right-hand corner to add your conditions to the “Project Conditions Page”.
- From here you will now add the conditions needed for your project. In the pop-up window, you will see three columns.

- In the far-left column, you have all the “Master’s” that have been saved back to the database for you to choose from. The middle column will display the conditions in the “Master” you are selected on. The right-hand column will display the conditions you want to add to your project.
- Click the ADD TO PAGE button at the bottom right-hand side of the window.
-
- Once you see the conditions in the list then you have now completed Step One.
Step 2: Taking off the Project – To get to the takeoff screen there are two ways of getting there:
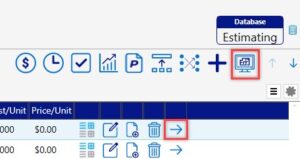
- The first way is to click the FORWARD ARROW on the condition you are wanting to go to the takeoff screen and start drawing with.
- The second way you are able to get to the takeoff screen is to click on the COMPUTER MONITOR icon located to the right of the PLUS button.
- The Grey bar on the left side of the takeoff contains all of your tools. If you hover over a tool with your mouse it will tell you the name of the tool.
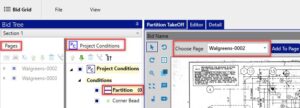
- When using project conditions, you will have two windows displayed on the left side of your takeoff window.
- One of these windows is your “Project Condition Page” (Source Page)
- The other window is the “Pages” (Reference Page)
- To draw with project conditions, you must first select the condition in which you would like to draw with by clicking on it under your “Project Conditions Page” window.
- In the drop-down box, select the PAGE you want to measure that condition on.
- Set the scale by clicking the SCALE HYPERLINK at the bottom of your screen. Once you click the hyperlink you will be able to measure a known distance on the background image.
- In the pop-up window, type out the dimension of the measurement of your tool. (Ex. 40’, 40’6”, 40’6-3/4”)
- Click OKAY to begin drawing.

- To measure with another condition but stay on the same “Page” – click on the condition that you would like to measure with next.
- To measure with the same condition on a different “Page” – click on the CONDITION NAME, click the CHOOSE PAGE dropdown and select the next PAGE you would like to measure on.
- Measure all of your conditions on the takeoff screen. Then measure all of your conditions on all of your “Pages”.
- Leave the takeoff screen. There are two ways this can be done:
- The first way is to click the BID GRID button in the upper left-hand corner to go back to your condition screen.
- The second way is to close the takeoff screen by clicking the X button in the upper right.
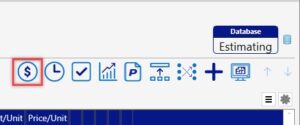
Step 3: Pricing Screen – Click on the PRICING icon: it is the dollar sign with a circle around it. From here you will be able to add in pricing to your material, equipment, subcontractors, and other items in your job.
- To add in pricing, go to the unit price column type in the price, then click ENTER.
- If you see some items that are ordered in a different unit than what the program is currently showing then you can run the “Wizard”. The “Wizard” is the WAND icon at the top of your screen.
- Mark all your items in the white check box in the pricing screen. After you mark them, click the ROUNDING icon and all the marked items round to the next full order qty. (In the status box they should all be green)

-
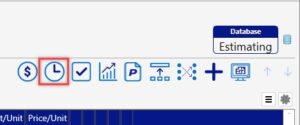
Step 4: Labor Screen – Click on the CLOCK icon to the right of the “Pricing screen” Icon. You will be able to put in the production rates for all of your labor on the job here.
- You have multiple columns that you can put information into; the most common columns used for entering your production rate are EU/Hr, EU/MDay, EU/CDay, and Cost/EU.
- EU – Estimated Unit
- MDay- Man Day
- CDay- Crew Day
- Enter your production into the column of your choice and check that your status boxes are green)
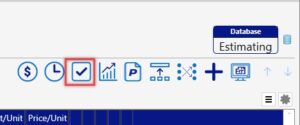
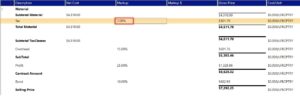
Step 5: Recap Screen – Click on the RECAP icon, which is the checkmark icon to the right of the “Labor Screen” icon. To adjust the markups, double click on the MARKUP then adjust the number and click SAVE.
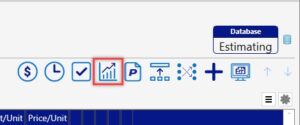
Step 6: Reports – Click on the BAR GRAPH icon to the right of the RECAP icon.
- View a report: click the PLAY button on the right-hand side of the report.
- Printable list of reports: click the STAR and they will move over the left-hand window.
- Print all of your reports into one PDF: mark the reports in the order that you want them printed, check the generate PDF check box, then print.
- Click on the SCENARIOS BREADCRUMB and check-in the scenario you were working on. This will save all of your information to the cloud and provide a backup file for you in the cloud.