![]() Estimating Edge’s team of experienced construction professionals and software engineers have developed the industry’s smartest takeoff and estimating software solutions for competitive estimates.
Estimating Edge’s team of experienced construction professionals and software engineers have developed the industry’s smartest takeoff and estimating software solutions for competitive estimates.
Don’t just estimate faster. Estimate better.®
- /
- /
- /
Creating and Using Tasks
How to create tasks in the task manager portion of the administration portal, so that they can be viewed and marked inside of the application; as well as helping you understand the two-way communication between this feature.
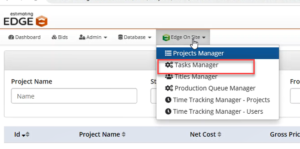
- On the Administration Portal.
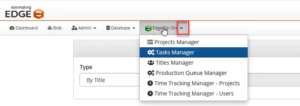
- Click EDGE On Site drop-down.
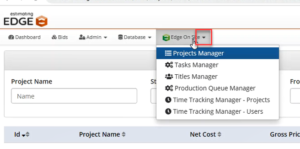
- Click on Tasks Manager. This is where the tasks are created.
Note: There are three different types of task lists.

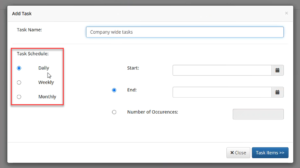
- Company Wide Task: This means that this task list will be automatically assigned to every project inside of EDGE On Site. This task list should represent a list of activities that need to be completed on every job.
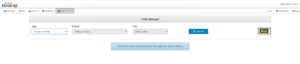
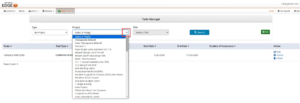
- Click the drop-down for Type.

- Click Company Wide.

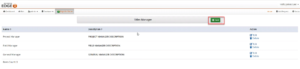
- Click Add.
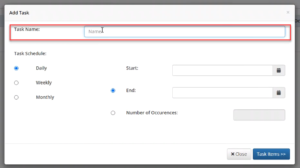
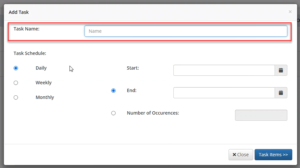
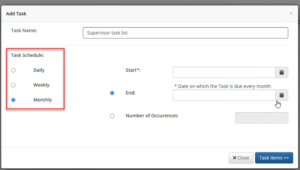
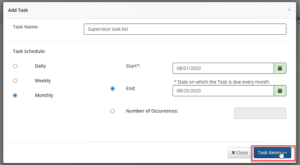
- Type in a Task Name.
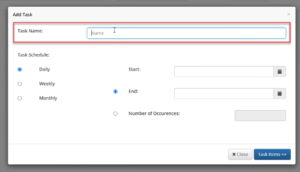
- Select a Task Schedule.
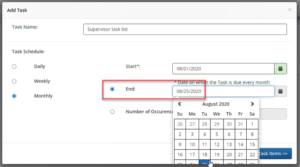
- Input Start Date.

- Input End Date or input Number of Occurrences.
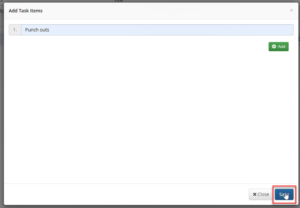
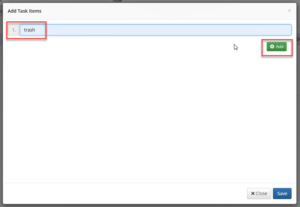
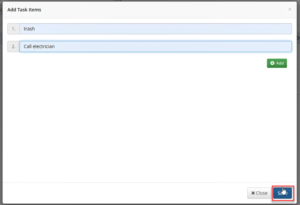
- Click Task Items >>.
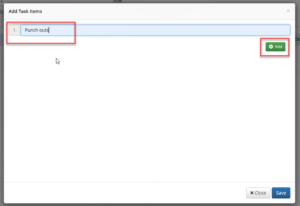
- Type in Task Item.
Note: If you want to enter more than one task item, click Add.
- Click the drop-down for Type.
10. When finished adding in the tasks, click Save.
![]()
Project Task: This means that this task will only be assigned to the selected project.
a. Click the drop-down for Type.
![]()
b. Click By Title.
![]()
c. Click the drop-down for Project.
d. Select the project title.
e. Click Add
![]()
f. Type in a Task Name.
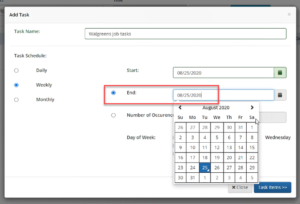
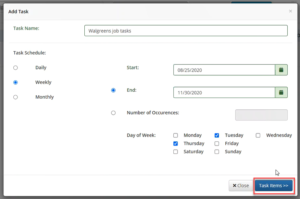
g. Select a Task Schedule.
Note: If Weekly is selected, you have to select the Day of Week.
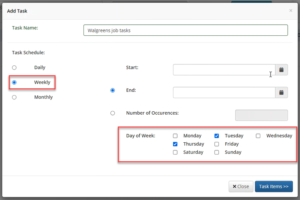
h. Input Start Date.
i. Input End Date or Input Number of Occurrences.
j. Click Task Items >>>.
k. Type in Task Items.
Note: If you want to enter more than one item, click Add.
l. When finished adding in the tasks, click Save.
Title Task: This means that the tasks will only be assigned to that title.
- Note: To create a By Title Task list you have to have some titles added to your company.
- How to add titles in EDGE On Site:
i. Click the EDGE On Site drop-down
ii. Click on Titles Manager.

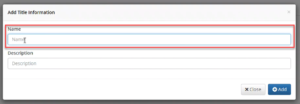
iii. Click Add.
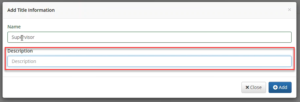
iv. Type in the Name of the title.
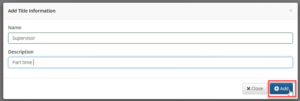
v. Type in the Description for the title.
vi. Click Add.
Adding a By Title Task will be done on the Tasks Manager drop-down for EDGE On Site.
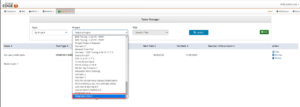
a. Click the drop-down for Type.
![]()
b. Click By Title.

c. Click the drop-down for Title.

d. Select the title.
 e. Click Add.
![]()
f. Type in a Task Name.
g. Select a Task Schedule.
h. Input Start Date.

i. Input End Date or input Number of Occurrences.
j. Click Task Items >>.
k. Type in Task Items.
Note: If you want to enter more than one task item, click Add.
l. When finished adding in the tasks, click Save.
The user can Edit a task and Delete a Task on the Administration Portal.
Let’s take a look at what it looks like the EDGE On Site application.
-
-
-
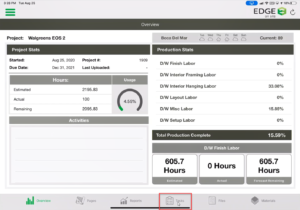
- Open the EDGE On Site application on your device.
- Load your project.
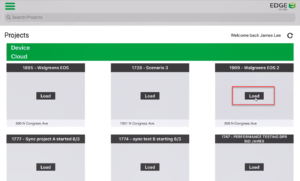
- Click Open.
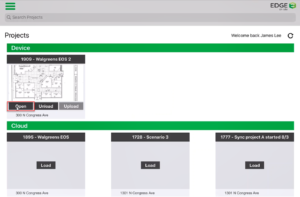
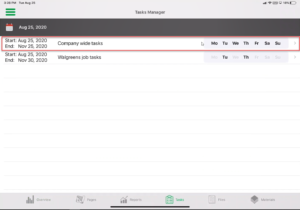
- Click on the Tasks tab at the bottom of the screen.
- Click on the Company Wide task.
Note: The days of the week which are bold are the days you can enter into this task.
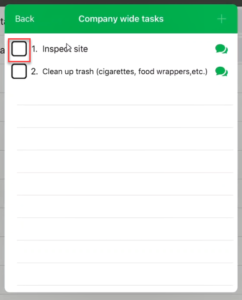
- Check the box of what has been completed.
-
-
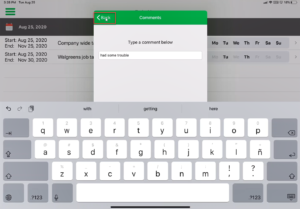
Add comments to notify the office.
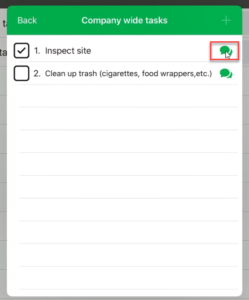 Note: When adding a comment, as soon as you are done typing and hit back the comment successfully adds those items. This called Add Hawk Task.
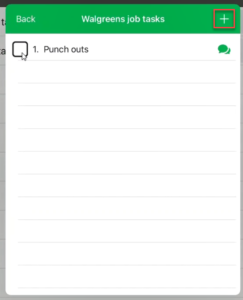
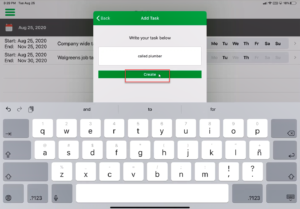
Note: Using By Project Tasks and By Title Task, you have the availability to add a task to this list that is not available for Company Wide Tasks. Click on the + in the top right-hand corner. An example would be if something came up on the job site you didn’t anticipate, you can click create “+.” Once you have created the tasks give it a check. The information will be sent back to the Admin Portal to notify the office personnel.
Once finished, there is no need to upload all communication that has been pushed through the cloud.
-
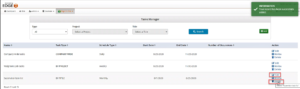
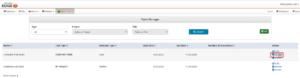
- Let’s take a look back at the Administration Portal.
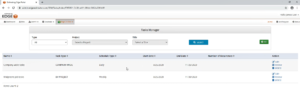
- Click Refresh
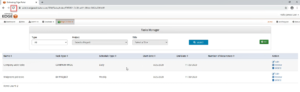
- Click Review
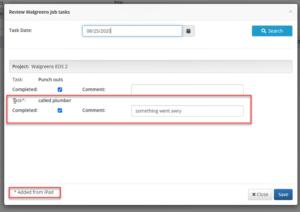
- One will notice the check-box is checked with the comment.
Note: New tasks that are added by the iPad have an * next to it.
Note: Any comments you input from the Administration Portal will be sent back to the iPad.
- Let’s take a look back at the Administration Portal.