![]() Estimating Edge’s team of experienced construction professionals and software engineers have developed the industry’s smartest takeoff and estimating software solutions for competitive estimates.
Estimating Edge’s team of experienced construction professionals and software engineers have developed the industry’s smartest takeoff and estimating software solutions for competitive estimates.
Don’t just estimate faster. Estimate better.®
- /
- /
- /
Align
How To Use – Align
Align:
![]()
Another special feature for those contractor’s estimating from electronic images. Many times after completing an estimate a revised set of drawings comes out. Upon loading the revised set of drawings you find that the revised images do not line up with your original digitized lines. The EDGE has a feature called Align, this feature allows you to align the revised image with your original drawn images. The steps below will show you how to align the images.
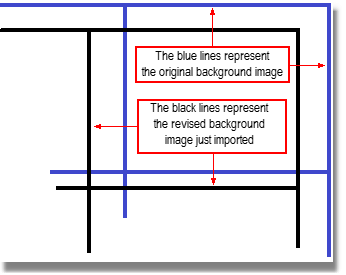
Assume you load a revised image over an existing and you wind up with something like the figure below. The images do not line up like they should there can be several reasons for this but the EDGE Align feature should fix the problem for you.
Follow the steps below to fix the problem. The miss matches corners have been enlarged, so you can easily see the misalignment.
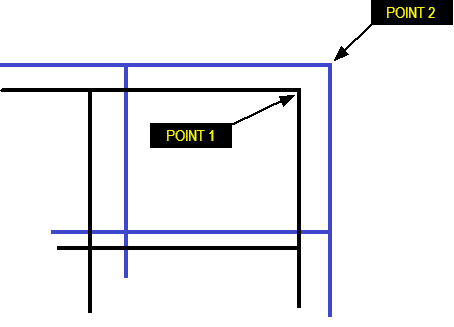
1.In the Drawing screen, click the Align Drawing icon.
2.Now take your mouse and click on Point 1, which is the background image.
3.Then take your mouse and click on Point 2, which is the drawing.
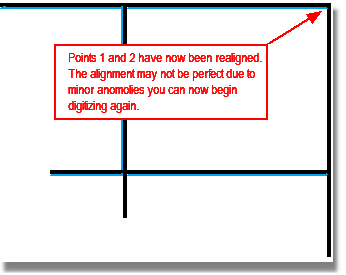
The drawings should now be aligned. You may see a little bleed through, this is not uncommon.