![]() Estimating Edge’s team of experienced construction professionals and software engineers have developed the industry’s smartest takeoff and estimating software solutions for competitive estimates.
Estimating Edge’s team of experienced construction professionals and software engineers have developed the industry’s smartest takeoff and estimating software solutions for competitive estimates.
Don’t just estimate faster. Estimate better.®
- /
- /
- /
- /
Acoustic Area Condition Properties – Insulation, Increment, Seismic, and Count Tabs
This video covers the acoustic area condition properties for the insulation, increment, seismic and count tabs in v12.
Insulation Tab
Batts Insulation
To activate, toggle to the on position
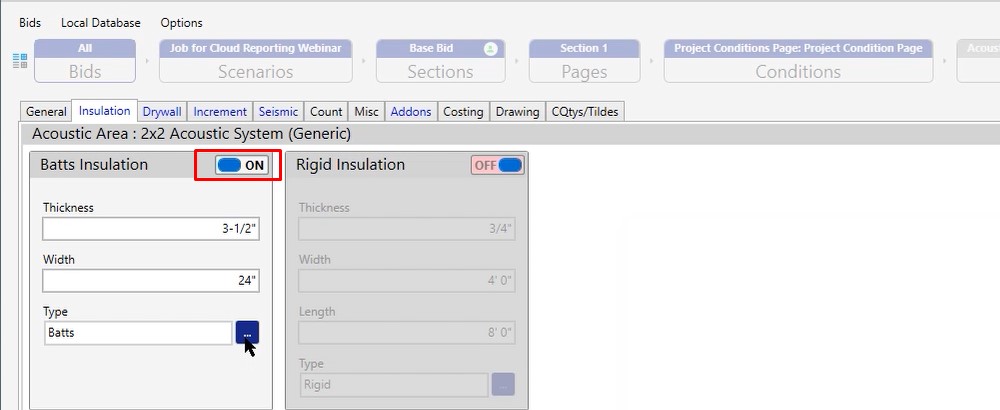
Populate Thickness & Width
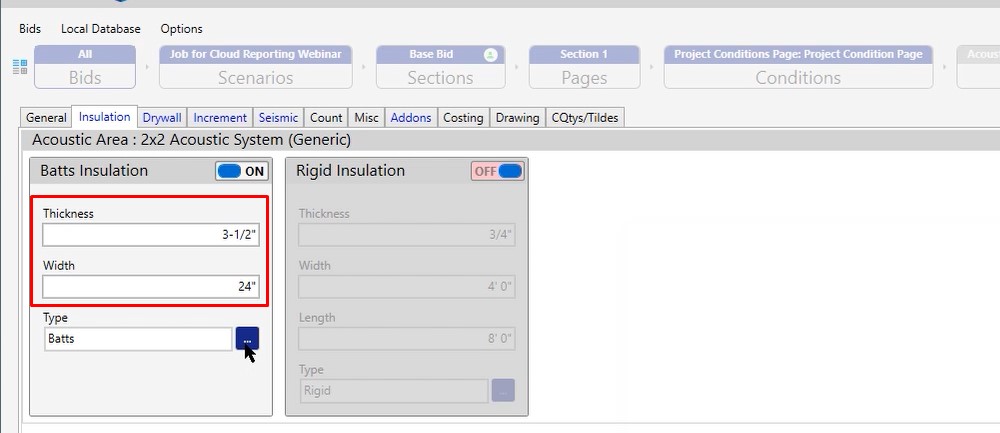
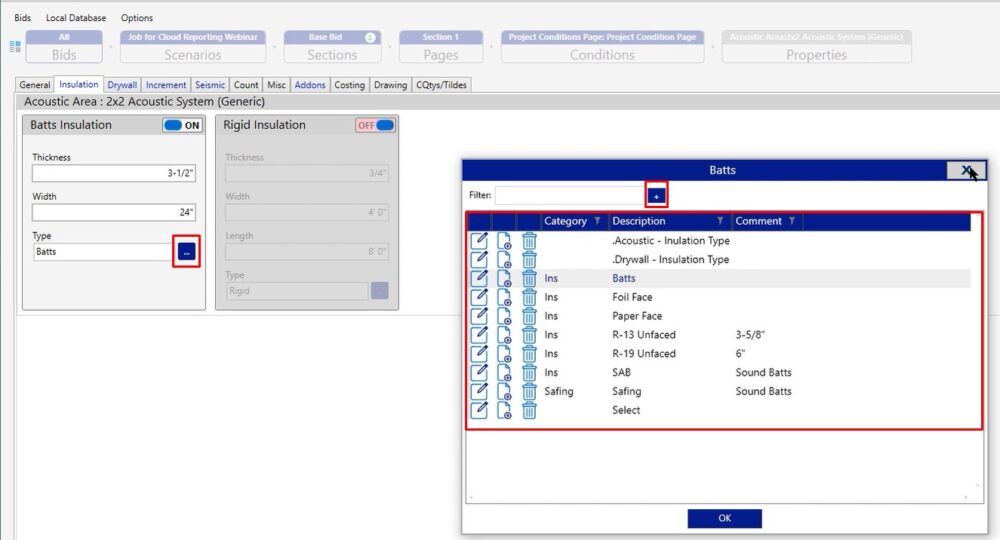
Choose your Type by clicking the 3 dotted button and selecting a predefined type. If the predefined list does not have the option you need, you can add your own by clicking the plus (+) sign.
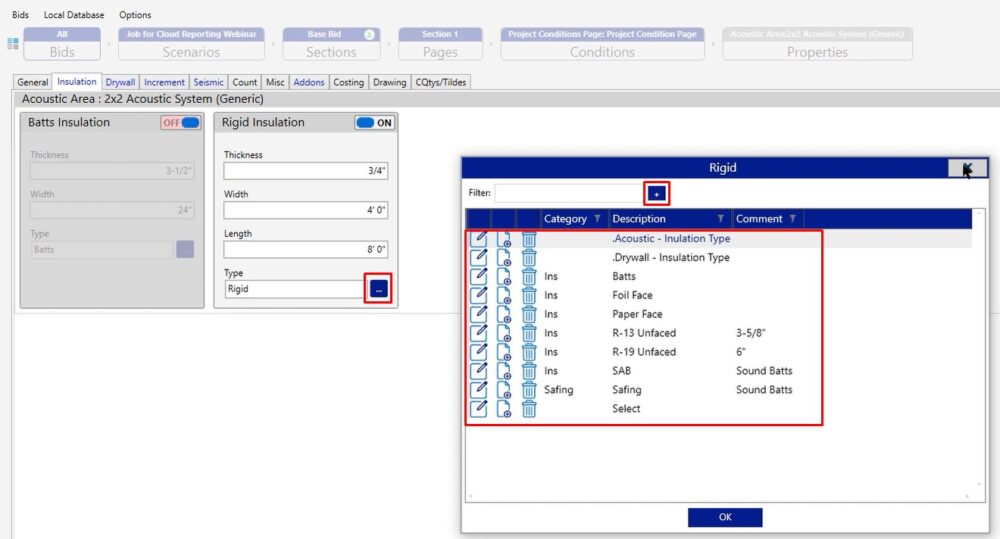
Rigid Insulation
- Thickness – Change if needed
- Width & Length – Board size you are ordering
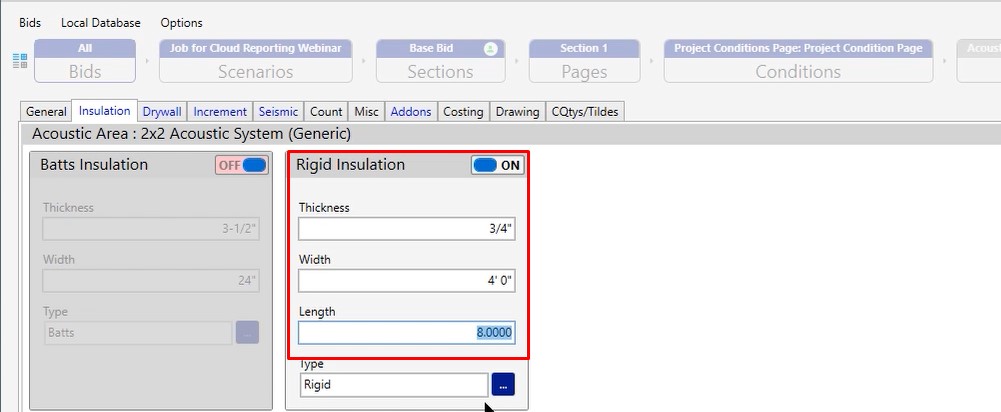
Choose your Type by clicking the 3 dotted button and selecting a predefined type. If the predefined list does not have the option you need, you can add your own by clicking the plus (+) sign.
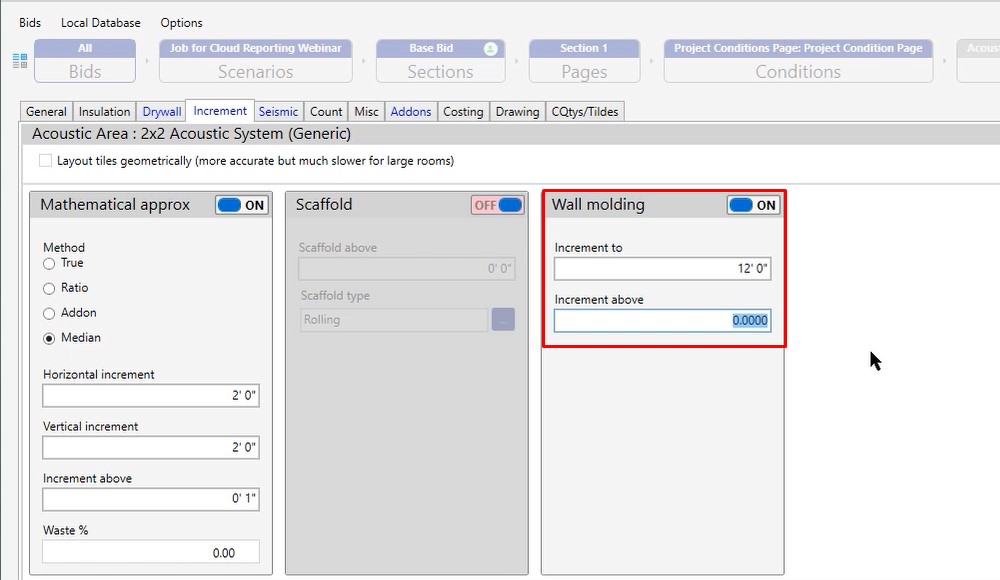
Increment Tab
Mathematical Approx – Congruent Shapes
The increment tab has four different methods for you. The different methods come into play when you’re looking at congruent shapes versus non congruent shapes. However with congruent shapes, there is a little bit of a difference between true, ratio, addon, & median.
True – True is ignoring all of the increment information that you’re filling out down at the bottom of the window. True basically means that whatever you draw on the takeoff screen is what you want to see when you access your pricing and labor.
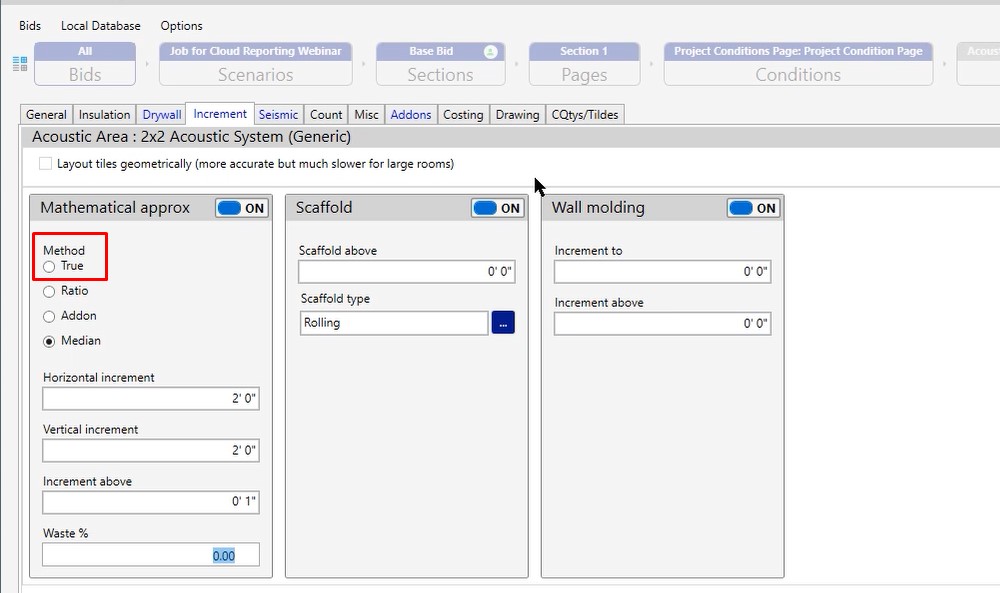
Ratio, Addon & Median – Will be using the increments that you input at the bottom of the window, so make sure to have the correct information in these to get what you want on the takeoff screen.

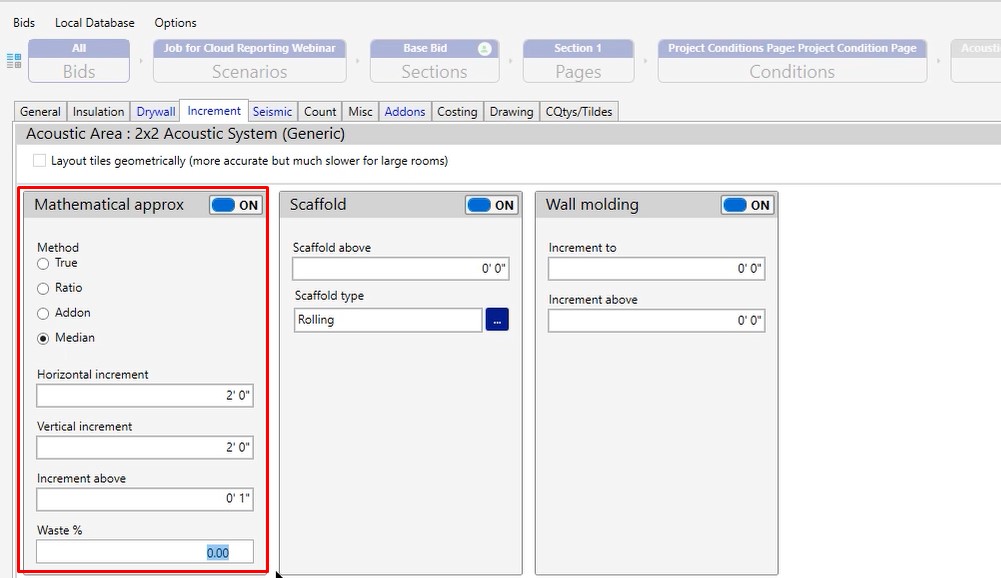
Mathematical Approx – Non-Congruent Shapes
If you’re dealing with non-congruent shapes, the difference between ratio and addon is that one is going to be a little bit more and one is going to be a little bit lower. Median is going to be right in the middle, giving you basically the average.
- Horizontal increment & Vertical increment – Whenever you hit your increment, you want it to round to the next increment you have chosen
- Increment Above – In this case, our increment above is one inch so if you were to measure 10’1″, it would give you that additional two foot that you’re telling it to increment.
- Waist percentage – A percentage of the waisted area when you’re looking at those non congruent shapes
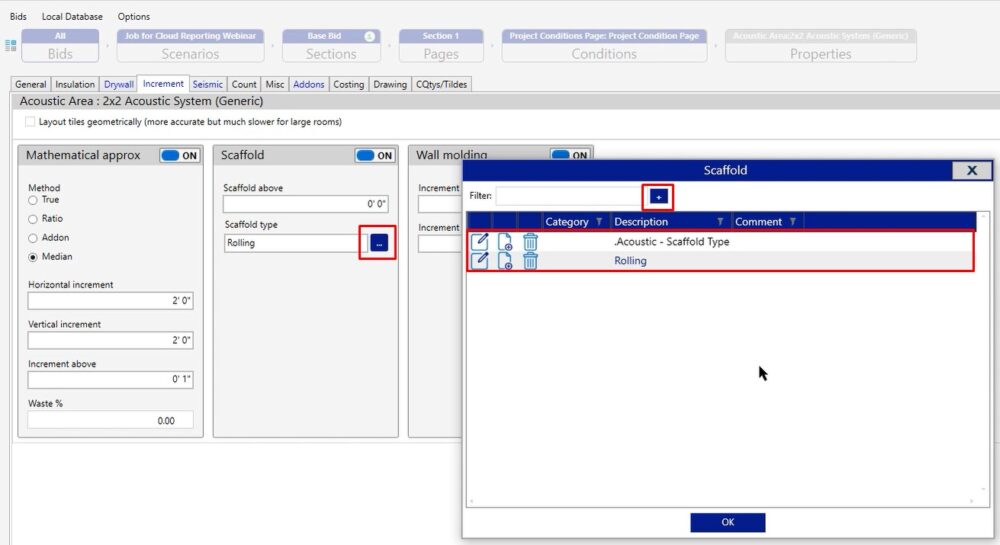
Scaffold
The scaffold is for incrementing. It will turn on the scaffold for you so that way you can calculate a little extra money.
This is all going to be based on the ceiling height. It’s going to look at the ceiling height field on the general tab, and use that to determine whether you need that scaffold line turned on in your project or not.
Scaffold Type – Choose your type by clicking the 3 dotted button and selecting a predefined type. If the predefined list does not have the option you need, you can add your own by clicking the plus (+) sign.
Wall Molding
This is an increment for your wall molding. Let’s say you had a 10 foot room, by using the increment, you’re not cutting off two feet of wall molding in the program thinking that you’re going to use that two feet somewhere else. If you get to your last room, you want to make sure that you have full sticks of walls.
Increment to & Increment above – These are to make sure that as you’re drawing these rooms, if you had a certain measurement, it’s going to drop that additional extra lineal footage off of that wall molding and start to produce a new stick so you’re not piecemealing the very last room.
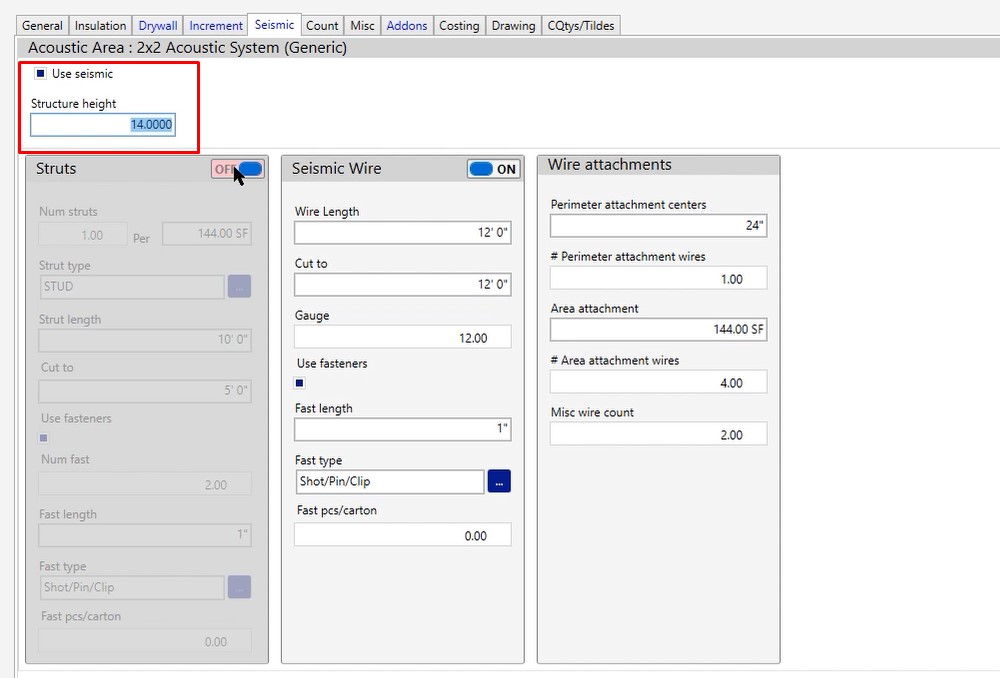
Seismic Tab
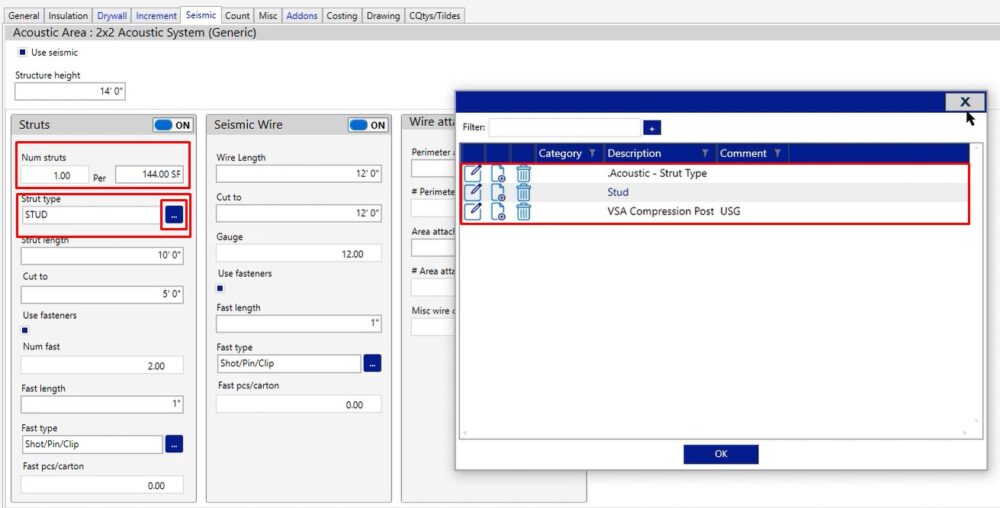
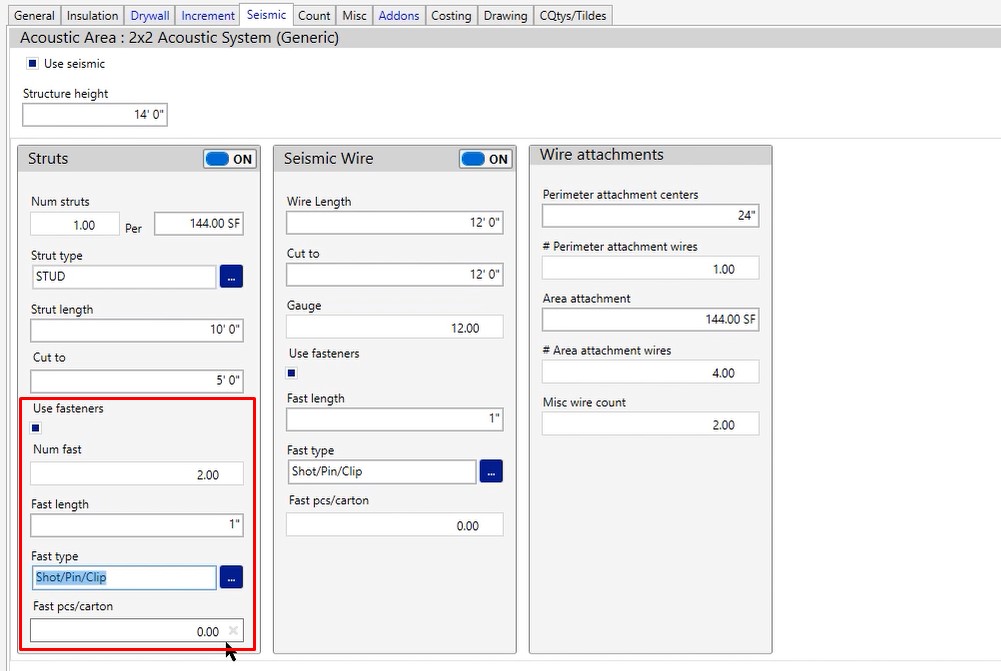
Struts
If you want to use seismic, click the checkbox then verify your structure height is accurate
- Num struts – Number of struts per the square footage is an industry standard that we have set up in the program. If you needed to change it, feel free to change the number of struts per square footage that you’re measuring.
- Strut type – Click the three dotted button and choose from the predefined list.
- Strut Length – Length of strut
- Cut to – If you’re going to cut that strut down, feel free to go ahead and tell us where you’re going to cut that to so we can give you the correct count out on your pricing screen.
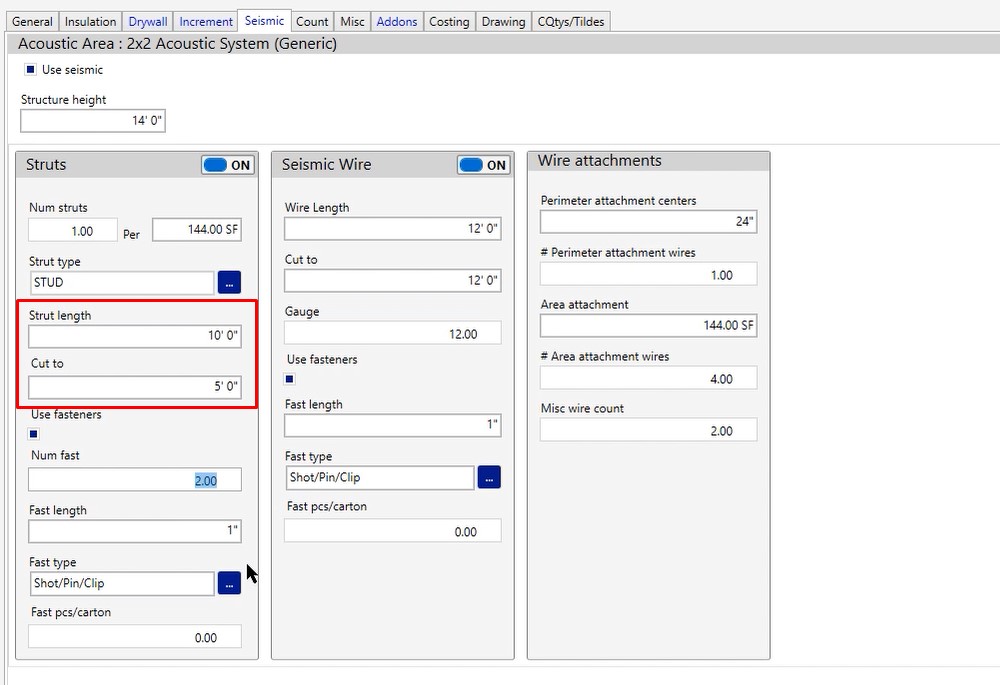
- Use fasteners – If you need fasteners for the strap, select the checkbox.
- Num fast – Number of fasteners you’d like to produce
- Fast Length – Length of the fastener
- Fast Type – Type of fastener
- Fast pcs/carton – If it comes in a box, how many come in a box. If you don’t fill out your pieces per carton, you will get individual piece pricing out on the pricing screen.
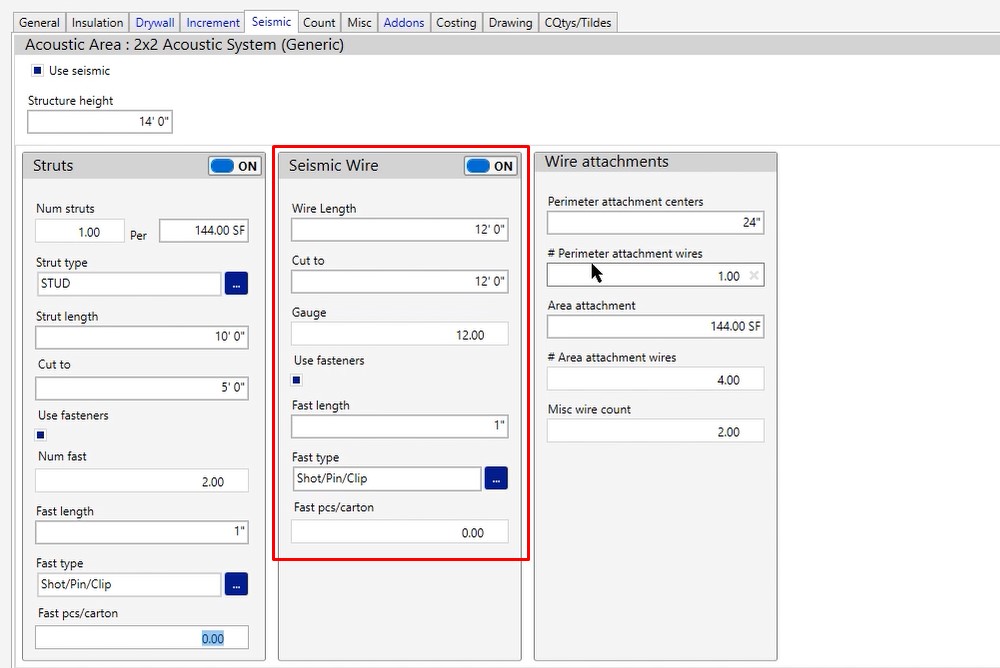
Seismic Wire
- Wire Length – Length of wire
- Cut to – What length you are cutting to
- Gauge – Gauge of the wire you’re using
- Use fasteners – If you need fasteners for the wires, select the checkbox.
- Fast length – Length of fastener
- Fast type – Type of fastener
- Fast pcs/carton – If it comes in a box, how many come in a box. If you don’t fill out your pieces per carton, you will get individual piece pricing out on the pricing screen
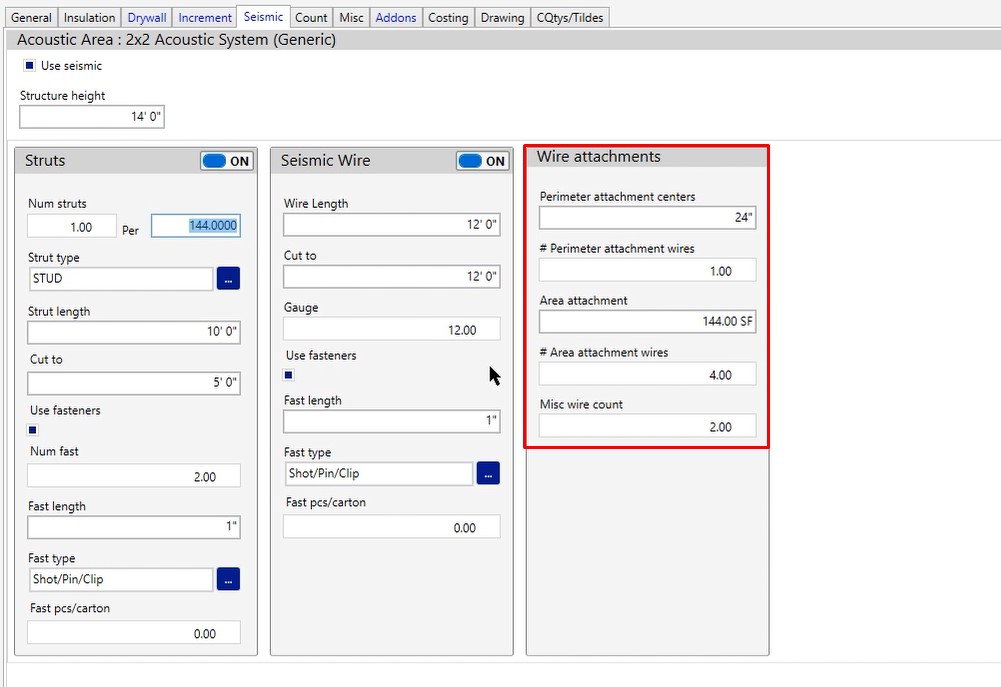
Wire Attachments
- Perimeter attachment centers – What your centers are
- # Perimeter attachment wires – How many wires you would like to drop per center
- Area attachment – How much square footage your producing
- # Area attachment wires – How many wires would you like to drop per area
- Misc wire count – If you do want to have some additional wires available you can fill out the miscellaneous wire count. This will give you an additional drawing tool on the takeoff screen for you to be able to go add those additional miscellaneous wires for your seismic setup.
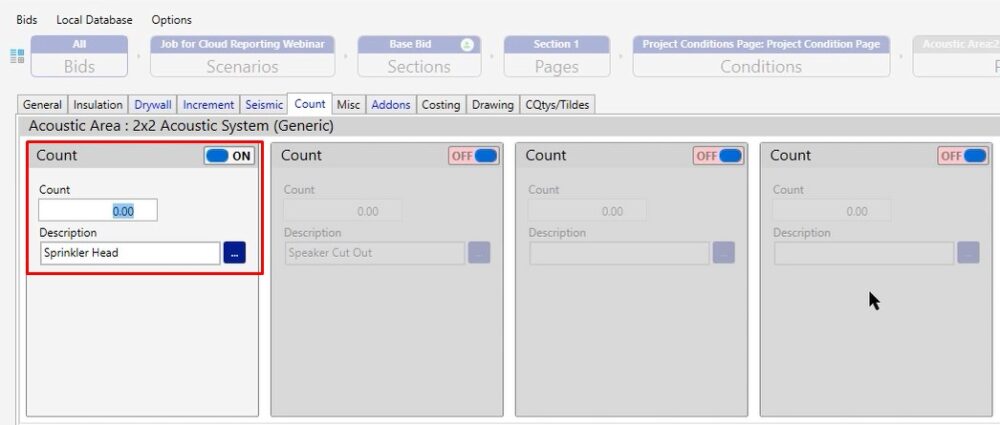
Count Tab
The count tab is an additional labor tab.
- Count – Number per count. If you were to go into your drawing screen, we will give you a new tool depending on which count icon you turn on.
- Description – Extra line description type
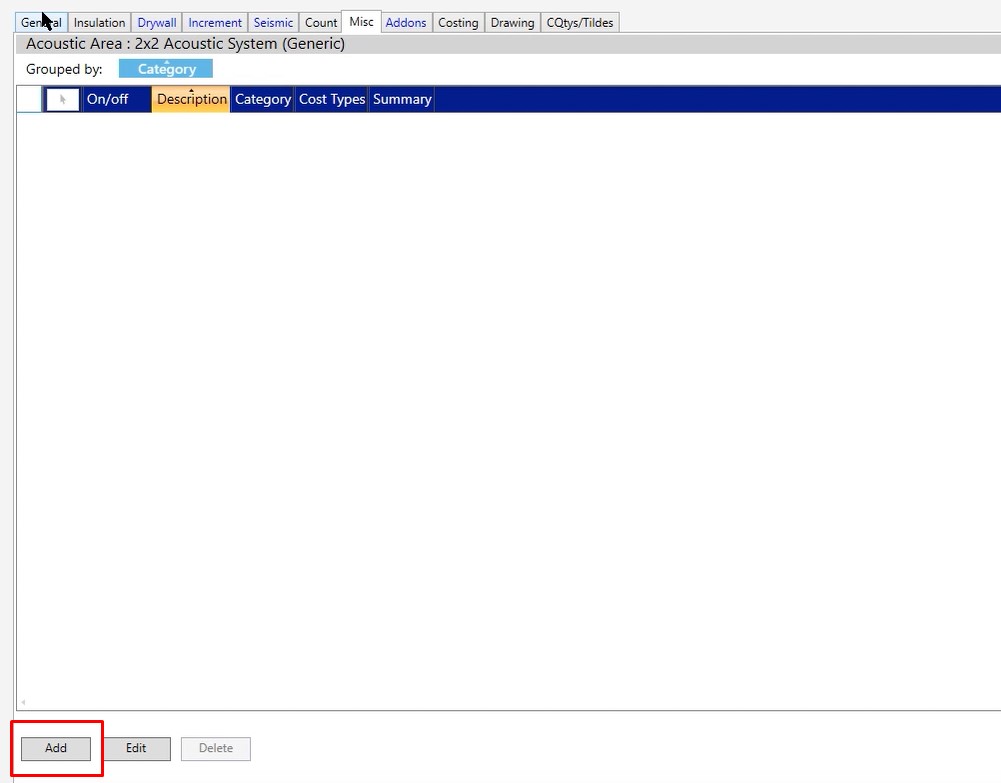
Misc Tab
Just like all of the other condition properties, this is catch-all. Anything you haven’t calculated somewhere else, goes here.
Click the Add button in the bottom left hand corner
Fill out the information as a ratio setup.
- Quantity – Quantity needed
- Estimated Unit – Your product is going to be based on the estimated units, so make sure that the estimated unit is specific to the item that you’re wanting to build or look at. If the estimated unit is incorrect, you will not see the item out there because we’re pulling in the items specifically based on the estimated unit that they’re created under.
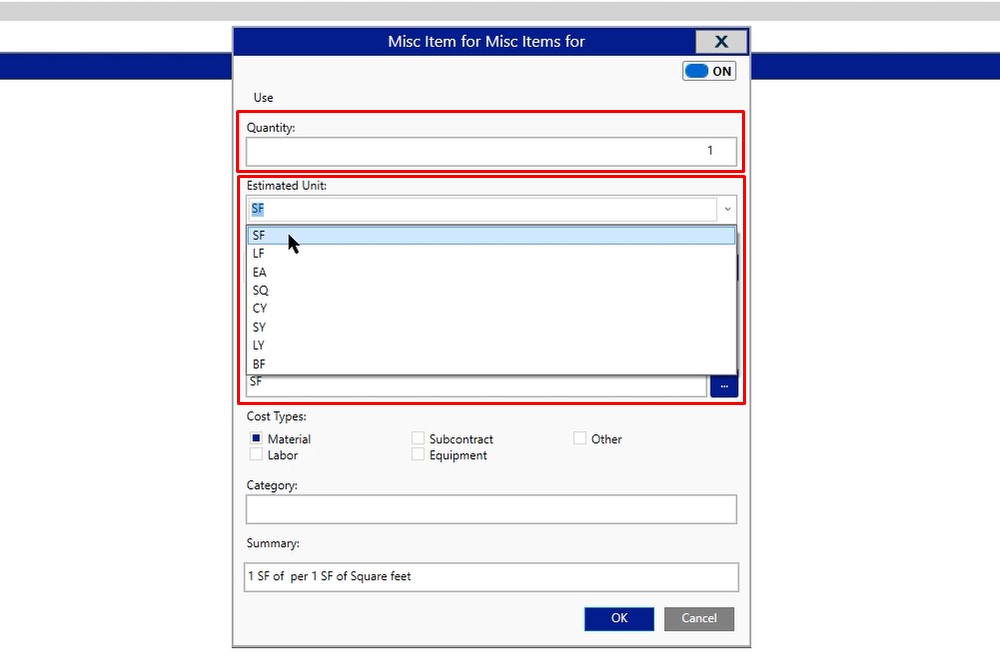
- Description – Click the three dotted button and choose from the predefined choices
- Per & CQty – Fill out based on your needs
- Cost types – This is where you’re going to see that line item appear, either on your pricing or labor screen.

If you have any additional questions as it pertains to filling out your acoustic area and condition properties, please feel free to reach out to us on the tech line and we’d be happy to assist you in any way we can.