![]() Estimating Edge’s team of experienced construction professionals and software engineers have developed the industry’s smartest takeoff and estimating software solutions for competitive estimates.
Estimating Edge’s team of experienced construction professionals and software engineers have developed the industry’s smartest takeoff and estimating software solutions for competitive estimates.
Don’t just estimate faster. Estimate better.®
- /
- /
- /
- /
Acoustic Area Condition Properties – General Tab
This video covers the acoustic area condition properties in v12.
General Tab
- Condition Description – Feel free to go ahead and change this to what you would like it to be displayed as.
- Ceiling Height – We’re going to use the ceiling height for informational purposes and descriptions as you look at labor and some other items inside of this condition.
- Drop Height – Fill this information out for the drop height if you are going to have a drop in your ceiling. We do give you a new drawing tool for you to be able to draw where that drop is going to be located so you can calculate the labor and the material that you’re going to need.
- C Fields – User definable fields and in most cases, they’re not used. However, we can use them for words, descriptions, numbers and formulas.

Tile
Type – Click on the 3 dotted button and fill this information out as needed. You also have the ability to send to database so that the program will remember it and every time that you pull that tile in, it will retain that information for you.
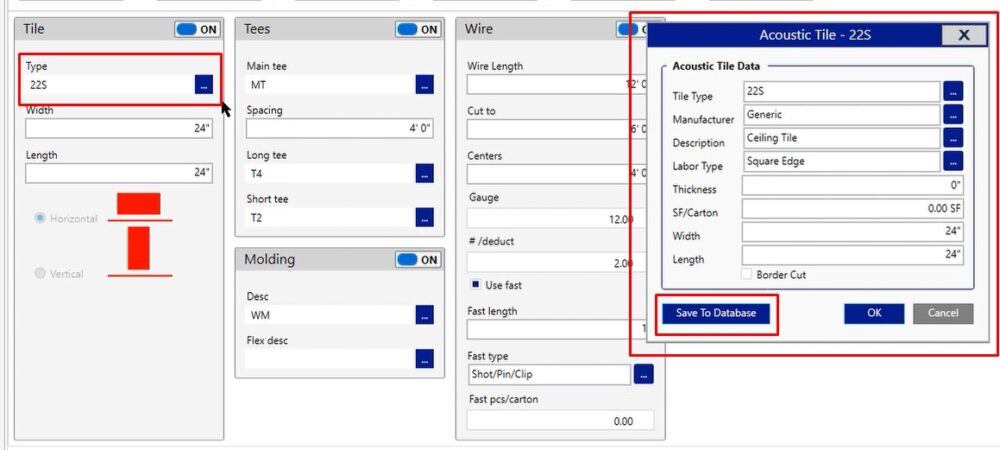
Width & Length – These are pulled from your drywall tab. (see video for demonstration)

Tees
Main Tee – Click the three dotted button to change the information as needed for your main tees, long tees and short tees. Fill out all information as needed and click the save to database button. This way, it retains that information and we’ll pull that in for you every time you choose that same main tee.
- Type
- Manufacturer
- Length
- Pcs/carton – Type in how many pieces are going to come in a carton so that on the pricing screen, we can provide you with the correct item. If you leave your pieces per carton zero, we are going to price this by the individual piece.

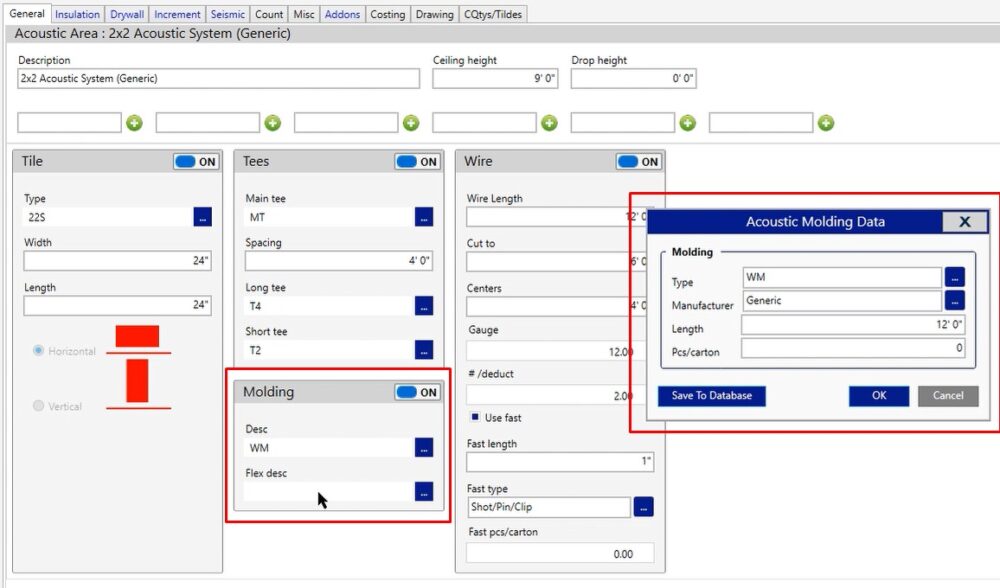
Wall Molding
Desc – Click the 3 dotted button to fill out your type, manufacturer, length and pcs/carton. Again, you can choose to save that to the database so that way, moving forward, this will always pull that same information.
Flex Desc – Complete the same steps as above and fill it out as needed. If you don’t need it, you can leave it blank.
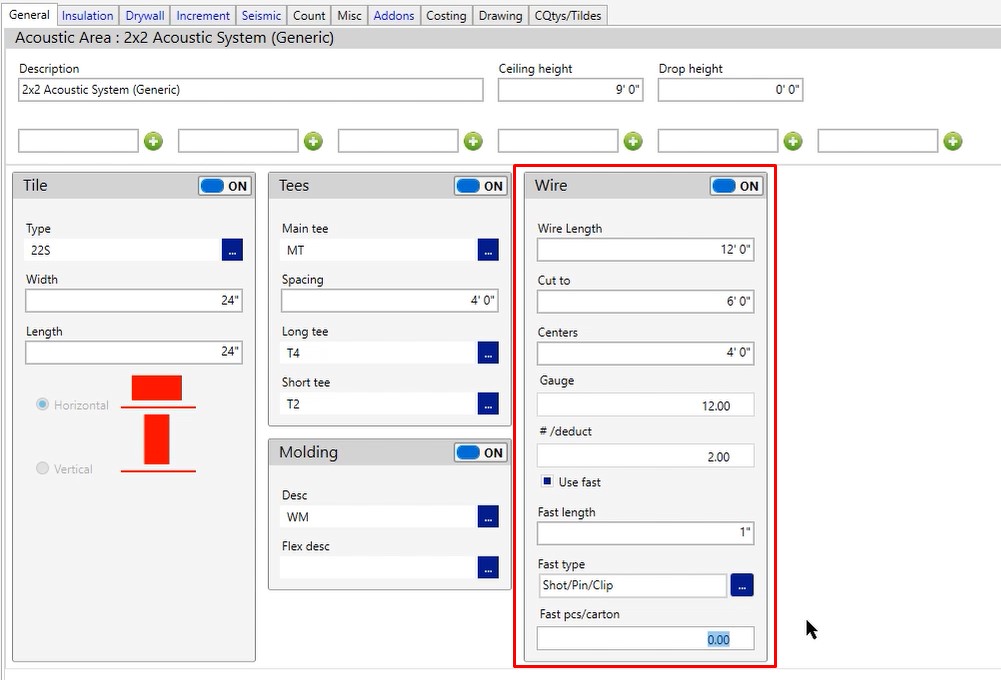
Wire
- Wire Length – Length of the wire you are using
- Cut to – In this case, we are cutting that wire down to six foot, so out of that one wire we order, we’re technically going to get two drops.
- Centers – Those drops are going to be four foot on center as you’re laying out your grid.
- Gauge – Gauge of the wire being used.
- # / deduct – Referencing if you were to go use the larger small deduct, how many additional wire drops would you like to calculate? If you don’t need to calculate any, go ahead and put a zero in there.
- Use Fast – If you don’t have the Use Fastener checkbox selected, you’re not going to get any fasteners to secure the wire. If you are going to need fasteners to secure that wire, go ahead and turn those fasteners on.
- Fast Length – Length of fastener needed.
- Fast type – Type of fastener needed.
- Fast pcs/carton – If you know how many come in a box, feel free to fill those out so you can get the box pricing. If you leave it at zero, you’ll get pricing by the piece.
If you have any additional questions feel free to reach out to our tech team and they’d be happy to assist you in any way they can.