![]() Estimating Edge’s team of experienced construction professionals and software engineers have developed the industry’s smartest takeoff and estimating software solutions for competitive estimates.
Estimating Edge’s team of experienced construction professionals and software engineers have developed the industry’s smartest takeoff and estimating software solutions for competitive estimates.
Don’t just estimate faster. Estimate better.®
- /
- /
- /
Insert Label
How to Insert A Label
Label:
Within the 18 different databases, some of the databases allow you to create Labels. Labels are the red / purple / fuchsia colored lines you see in several of the EDGE databases. They are used to create labels or blank lines in the database or as separators between different categories in the database. To insert a new label, click Edit | Insert Label from the menu bar.
You may create Labels, in the database listed below:
DETAIL, FIRE TEST, GROUPS, ITEMS, LOCALE, LOOKUP and SURFACES
The following steps will help you to insert a new label into a database
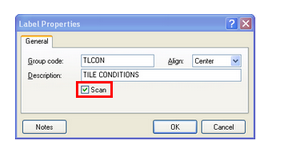
1.Click Edit | Insert Label, the insert label dialog opens.
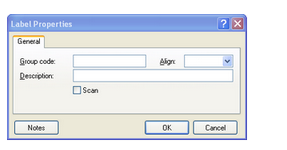
NOTE:
We used the label dialog from the Groups Database for this example. The only difference between this dialog and the other databases that instead of asking for a Group Code the dialog will ask for an Item Code or a Lookup Code or a Fire Test Code. The rest of the fields are standard.
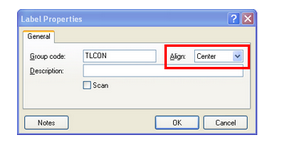
2.Create a “Code” for the new label (a code is a made up descriptor that is unique to each line), no duplicates are allowed

3.Align you are given three choices where you would like the Label description to appear on the screen, Left, Center or Right. Click the drop and select one.
4.Create a New Description (Name) for your selection.
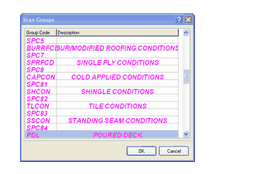
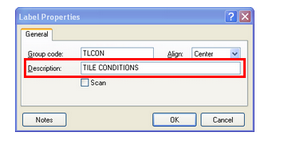 5.Scan, is used to shorten long lists of database lines. The only lines than appear in Scan view are those that have been checked here. For example, below is a Scan View in the Current Roofing Database.
6.All you see in this case are the purple/fuchsia label lines which in this case are used to divide the Roofing database into workable sections. If you want this label to appear on the Scan list check the box.
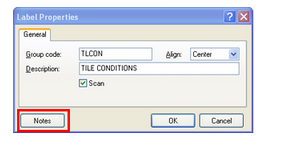
7.You can also include notes by pressing the Notes button or selecting Edit | Notes from the menu bar. Doing so will open a word processor in which you can type your notes.