![]() Estimating Edge’s team of experienced construction professionals and software engineers have developed the industry’s smartest takeoff and estimating software solutions for competitive estimates.
Estimating Edge’s team of experienced construction professionals and software engineers have developed the industry’s smartest takeoff and estimating software solutions for competitive estimates.
Don’t just estimate faster. Estimate better.®
- /
- /
- /
- /
How to Fix a Default Subdivision
This video covers how to Fix a Default Subdivision in v12.
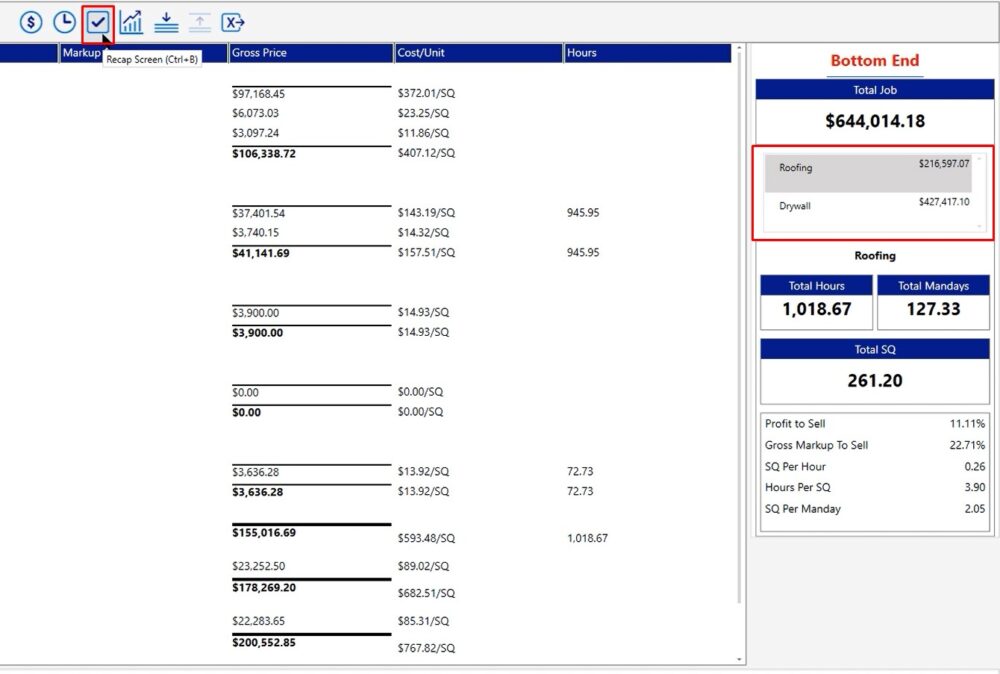
Recap Screen
On the right-hand side of the recap screen, you’ll see the breakout for the different subdivisions that we have inside of this project; the first one being the default subdivision.
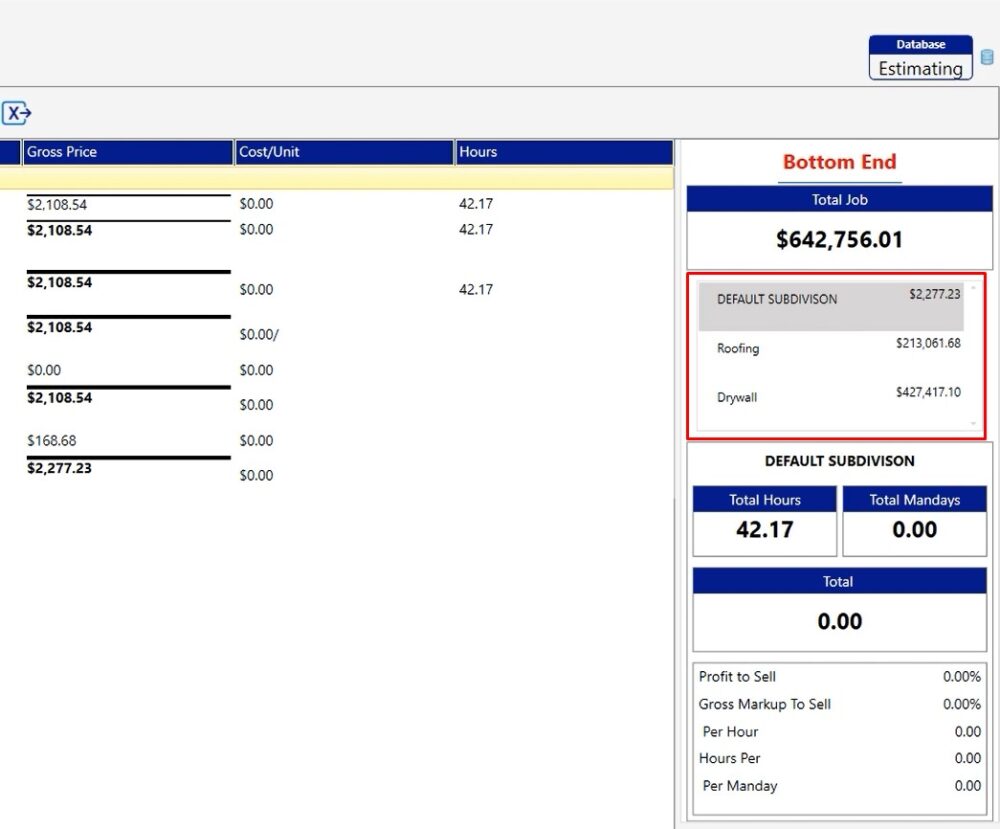
In this example, we can see that it’s coming from the tax class or cost type of labor.
To find the specific items that are flagged and causing the issue, click on labor, then click on the clock
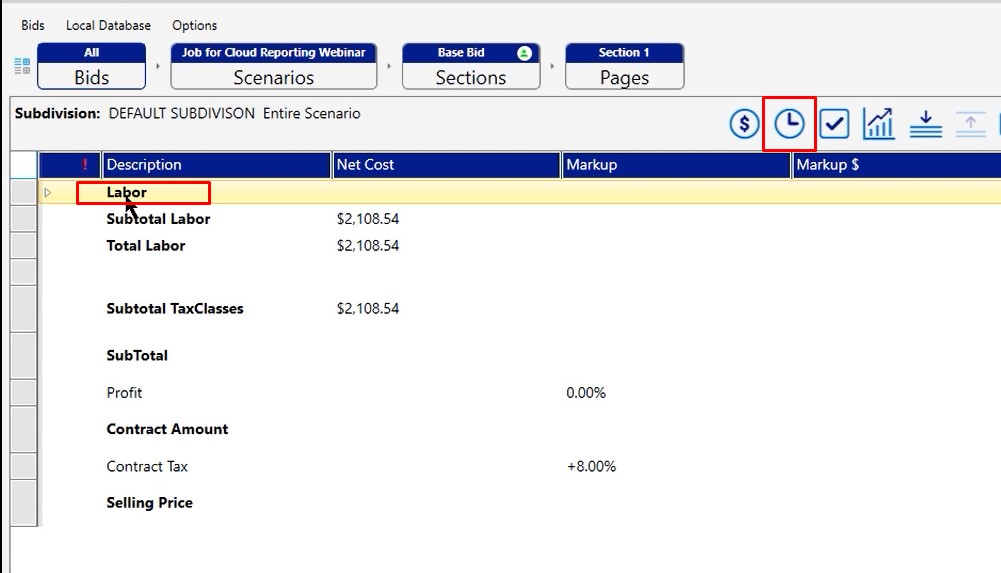
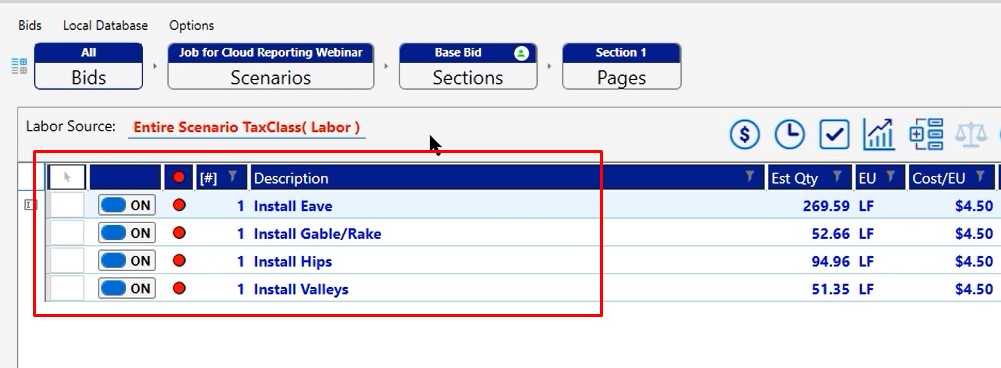
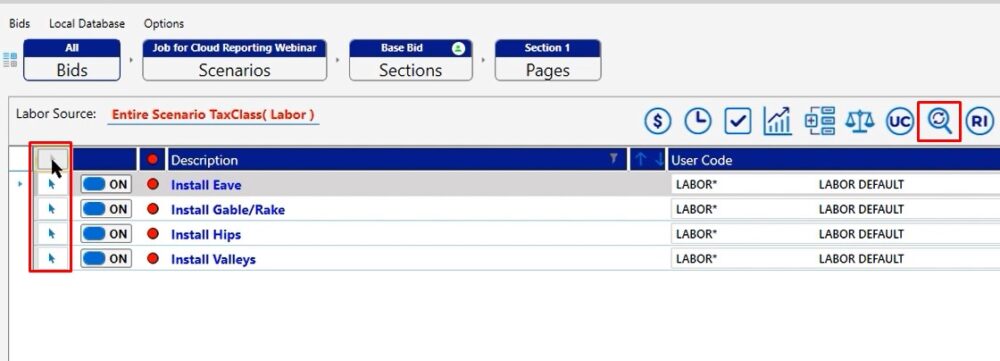
Labor Source Screen
In this case, there are four items that are being brought into question and there is a couple of ways that we can fix these
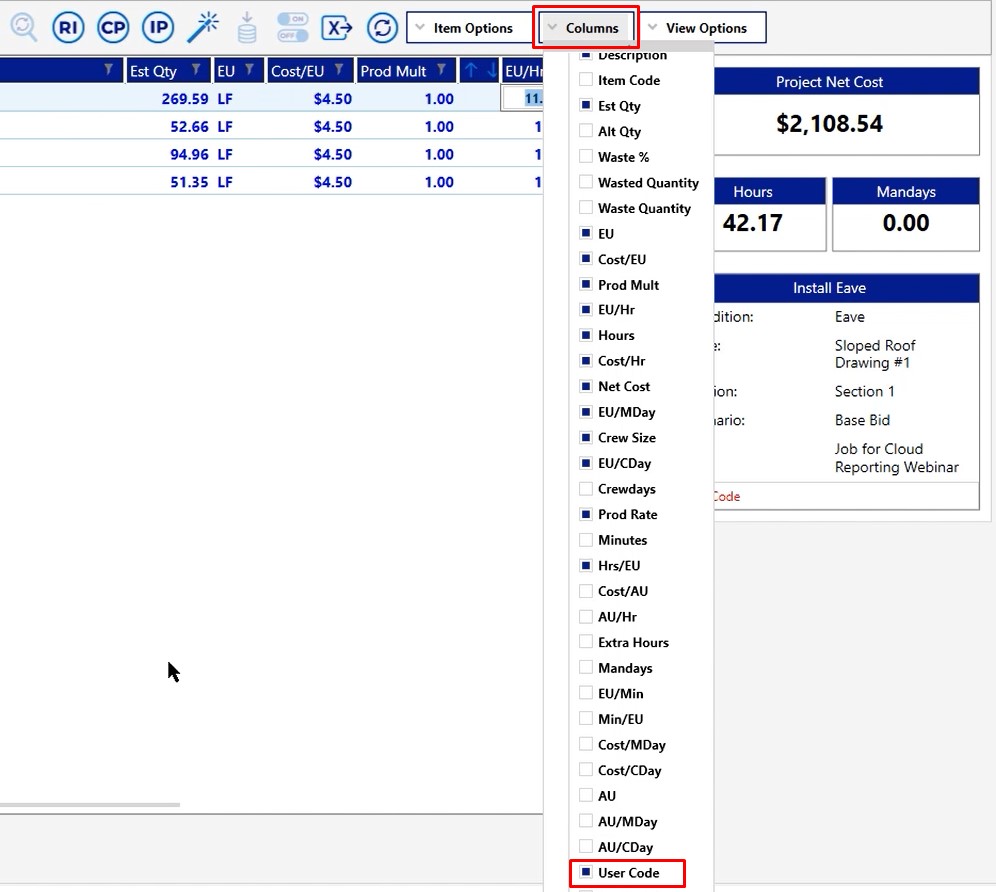
Fix #1
- Click the columns dropdown
- Scroll down to the user code option and click inside the box to turn it on
- Then make the changes here as needed
Fix #2
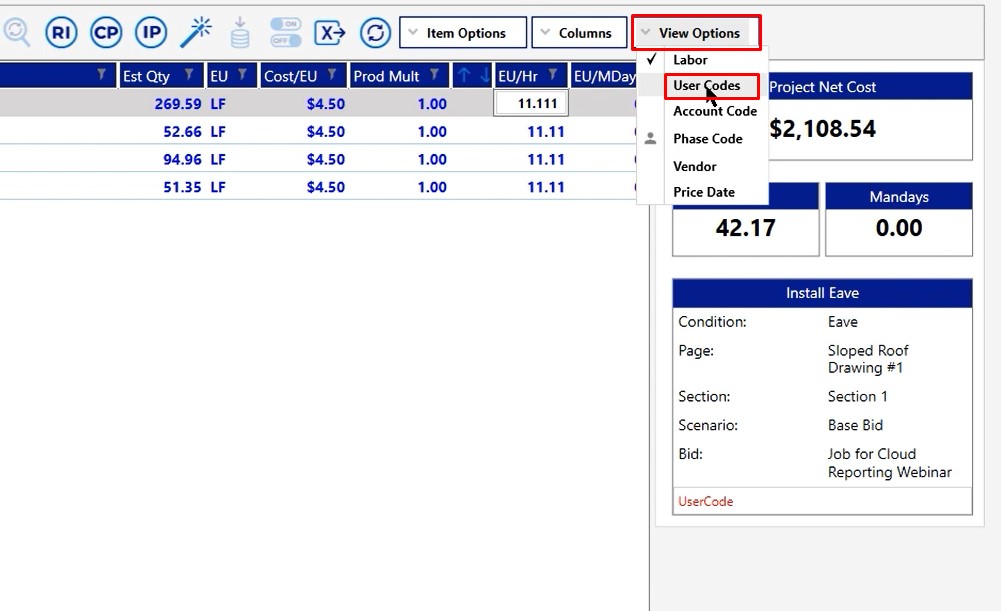
- Click the view options dropdown
- Select user codes
- Make modifications as needed
For this example, we will make the modifications this way because we can mark all four of these and adjust them all at the same time.
- Mark all of the items
- Click the adjust mark lines tool
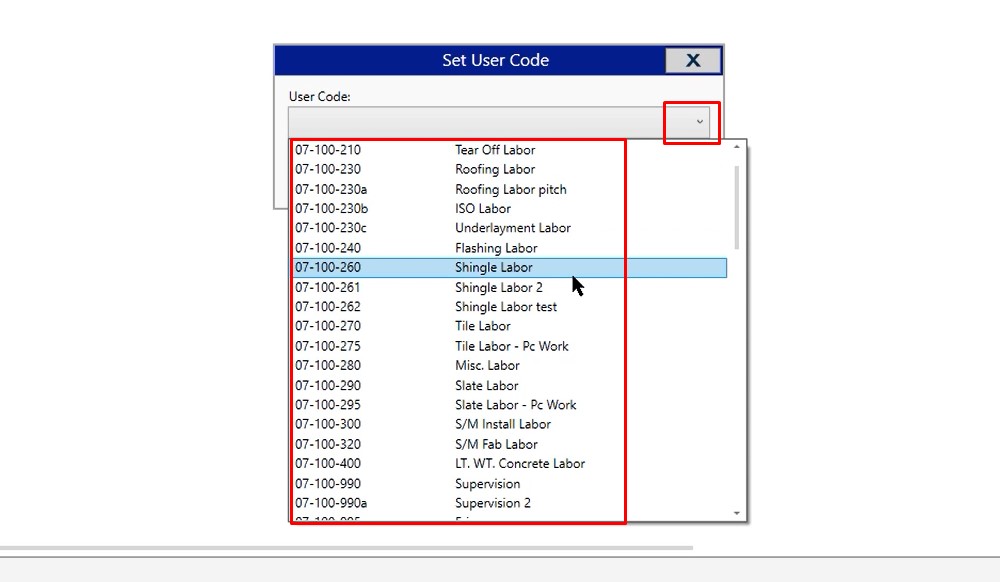
Set User Code Window
- Click the dropdown
- Select the user code
- Click OK
Now all four have been set as shingle labor (our selection) and when we click on the recap screen, there’s no longer a default subdivision. We have just the two subdivisions that we care to see on this project, which are roofing and drywall.
If you have any additional questions or you run into any problems while you’re trying to fix the default subdivision on your own, please feel free to give us a call on our tech line. We’d be happy to assist you in any way we can.