![]() Estimating Edge’s team of experienced construction professionals and software engineers have developed the industry’s smartest takeoff and estimating software solutions for competitive estimates.
Estimating Edge’s team of experienced construction professionals and software engineers have developed the industry’s smartest takeoff and estimating software solutions for competitive estimates.
Don’t just estimate faster. Estimate better.®
- /
- /
- /
- /
How to Create a Misc Item
This video covers how to Create a Miscellaneous Item inside of The EDGE through v12.
Regardless of our example, you can use this format in this method to build any miscellaneous item that you need in any trade that you’re working in inside of The EDGE.
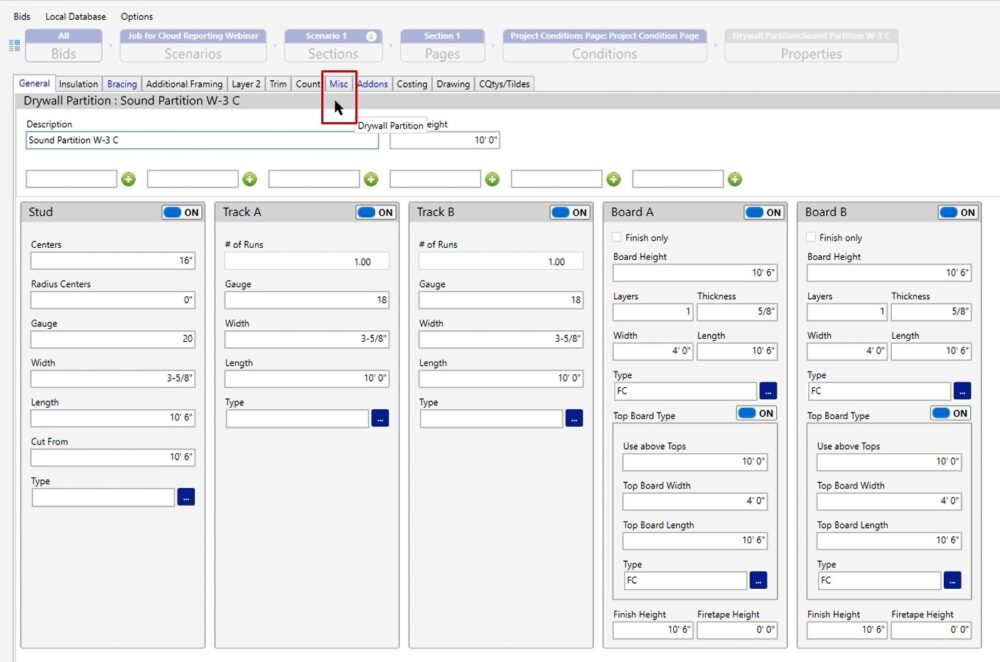
Condition Properties Tab
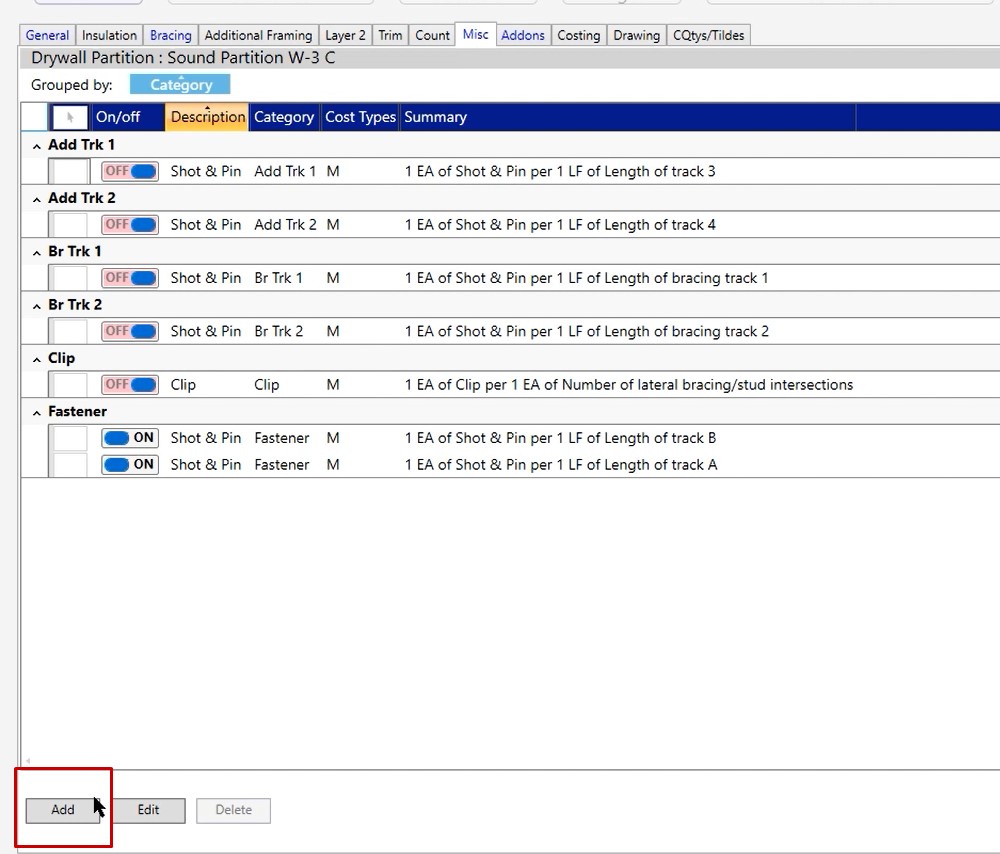
Navigate to the Condition Properties tab by double clicking on the condition. Once in the condition properties, select the miscellaneous (misc) tab.
On the miscellaneous tab, you’ll notice that we have a couple of items already out here. In the bottom left corner we have an add, edit and a delete option.
For this example, we’re going to be using the ADD option because we want to create a miscellaneous item that’s not already out there. So we click ADD.
Ratios
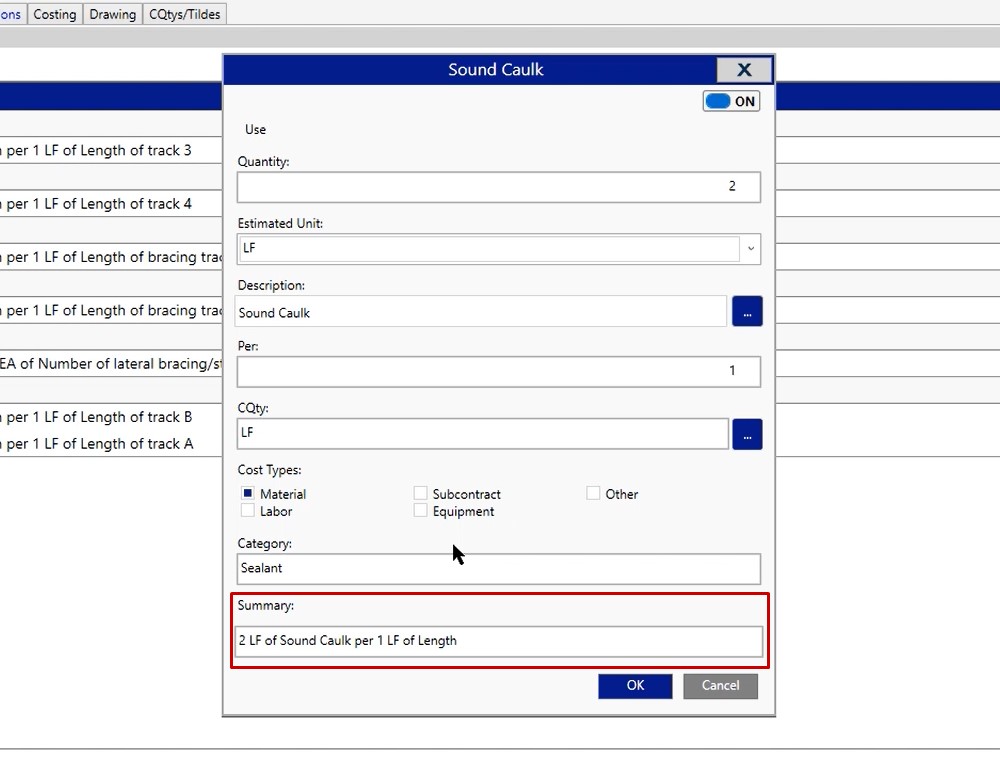
Once we click on ADD, you’re going to be presented with a dialog box. It’s easiest to work your way from top down when working inside of this miscellaneous item dialog box. What you need to know when building a miscellaneous item is that you’re actually building a ratio.
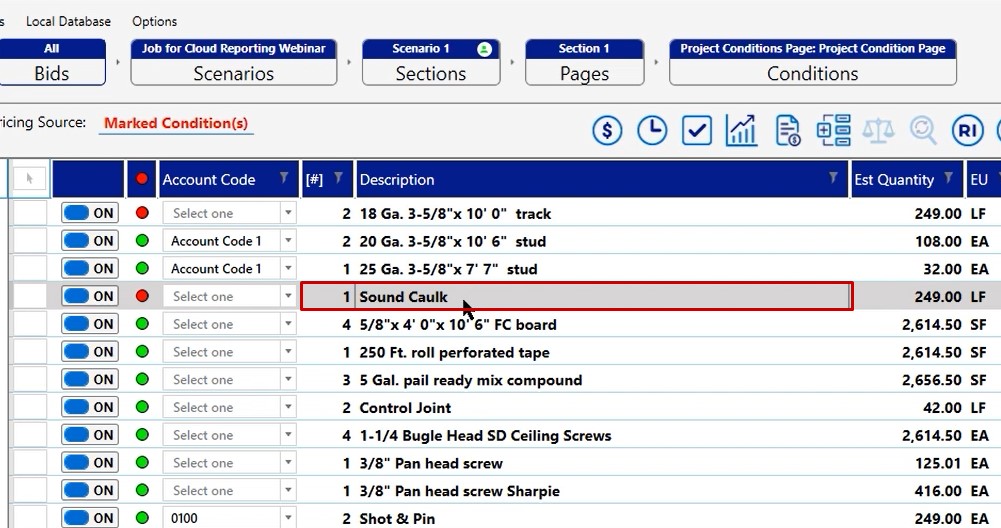
For this example, we want to know if we were to measure 100 lineal footage of wall, how much lineal footage of sound caulking would we need? This will depend on your specs.
In this case, if we want to say for every one lineal foot that we measure, we have two sides of the wall that we’re going to be sealing. In that case, we would just change our quantity to two. Now you’re getting a two to one ratio. So for every one lineal footage that you measure on your take off screen, you’re going to be producing two lineal footage of sound caulking. This is for side A and side B.
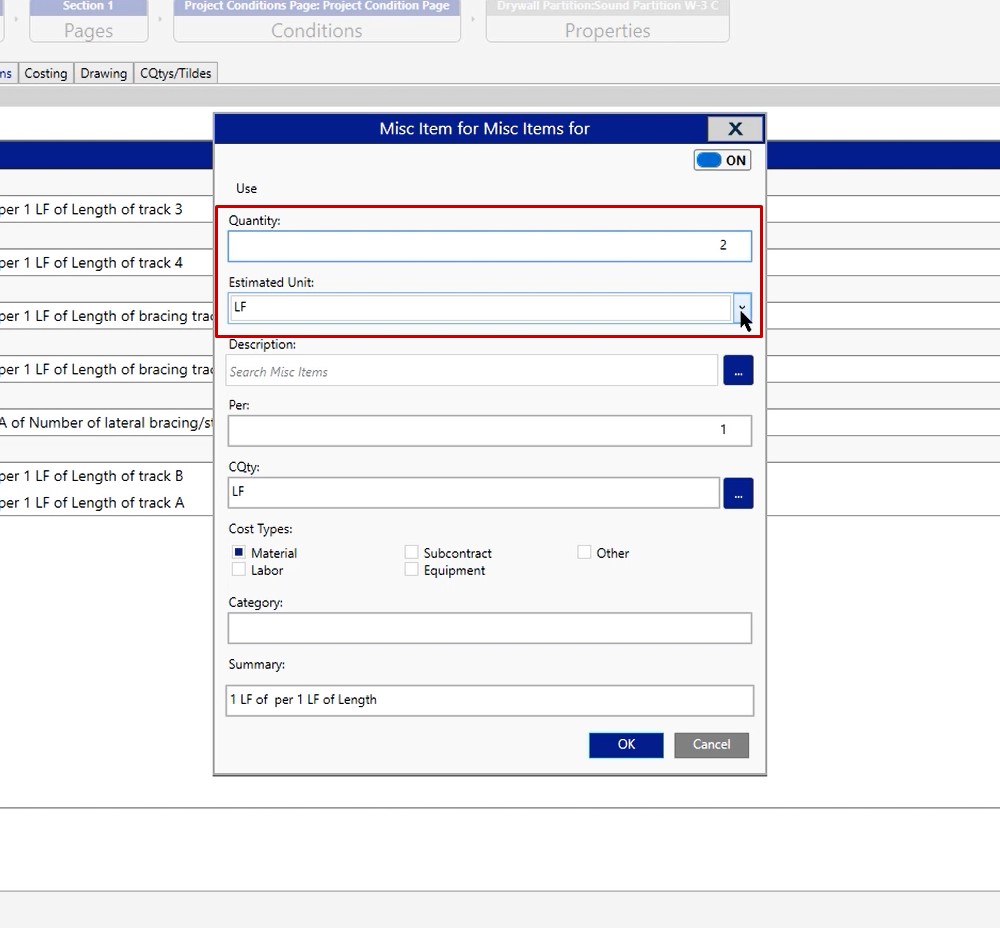
Estimated Unit
Lineal footage is the correct estimated unit, we don’t need to make any changes. However, if you were working with an adhesive or if you were working with any other item that would be calculated in a different unit of measure, simply click the dropdown, and change the unit of measure to be accurate to the product you’re working with.
It’s important to be accurate with the product you’re working with because the estimated unit is going to control all of your options for material and labor that are created in the database.
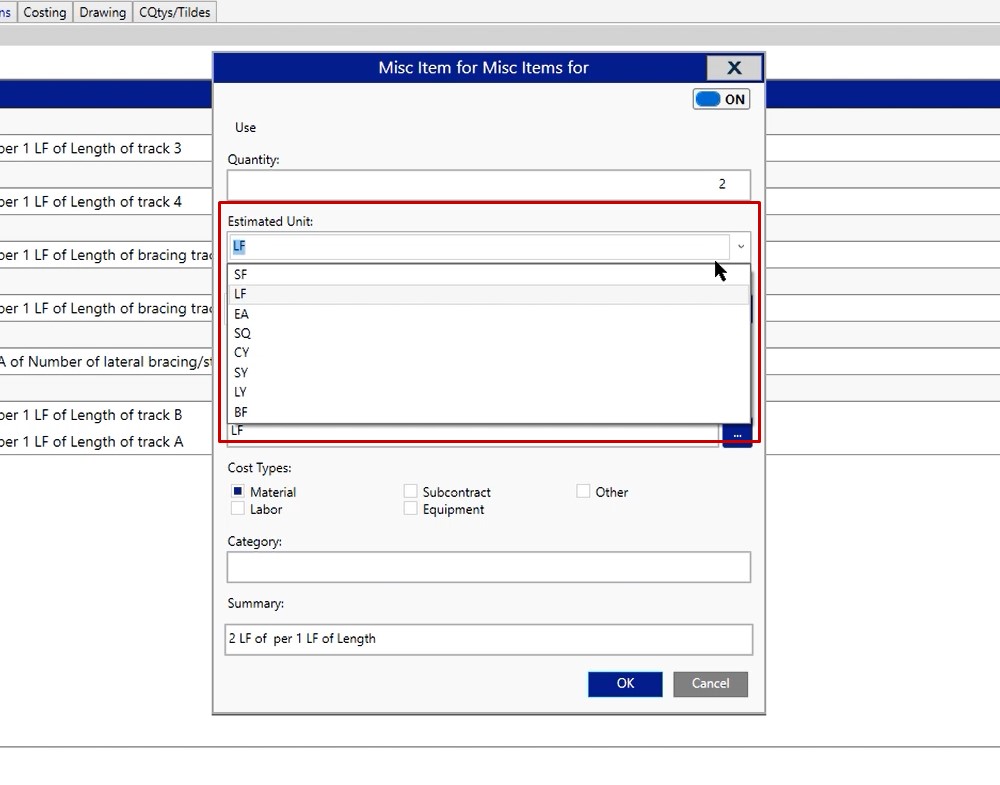
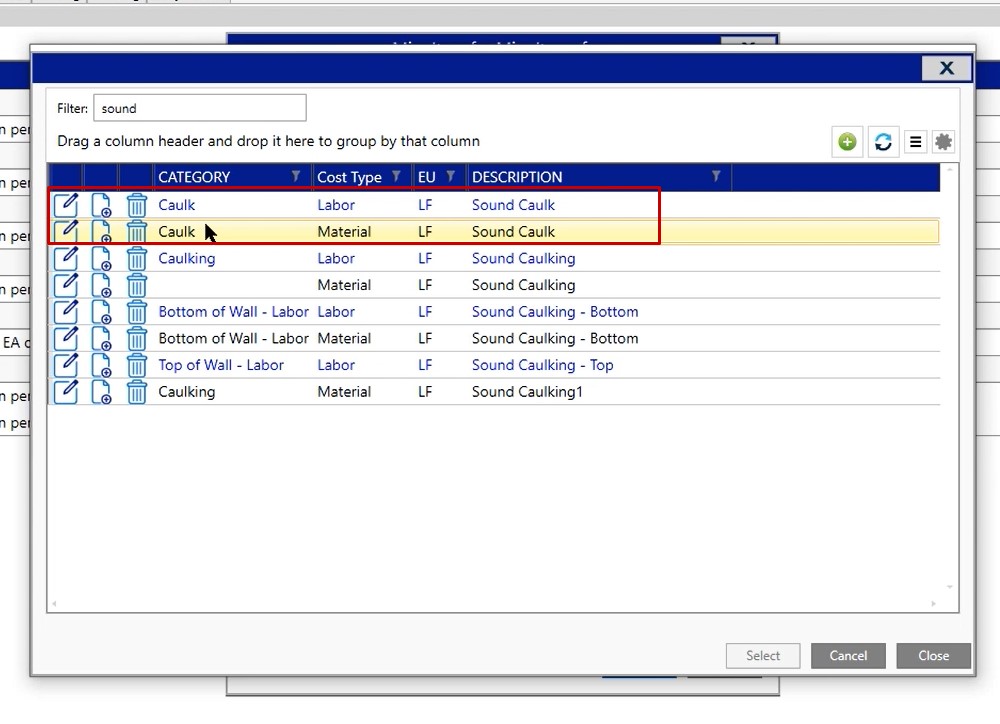
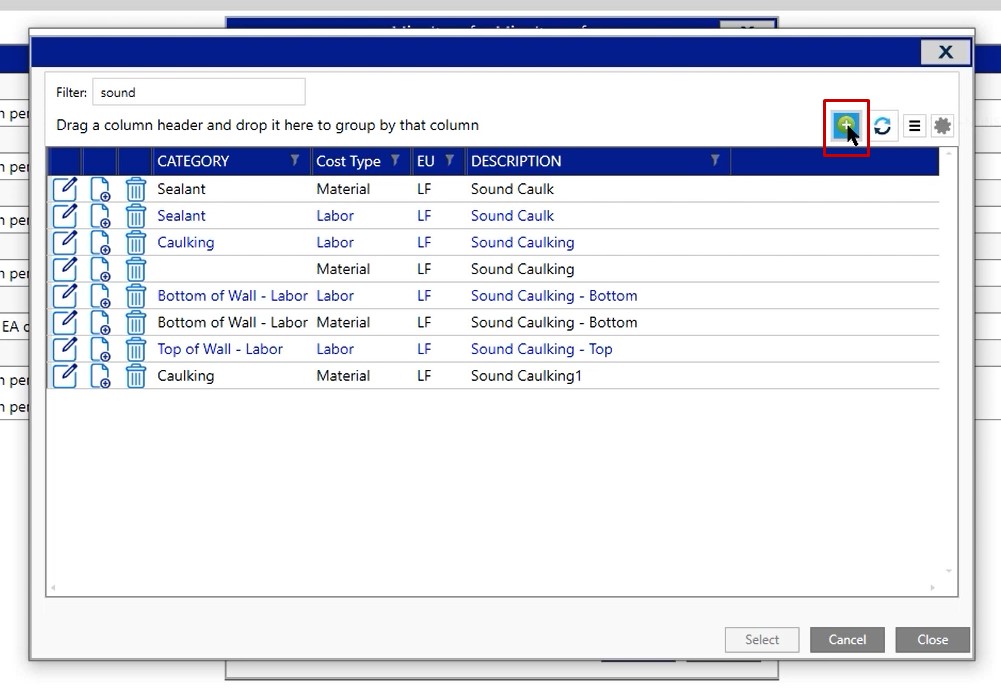
In this example, when we click our three dotted button for the estimated unit of lineal footage, you’re going to see quite a few products. These are products that have already been created by The EDGE or by somebody at your company.
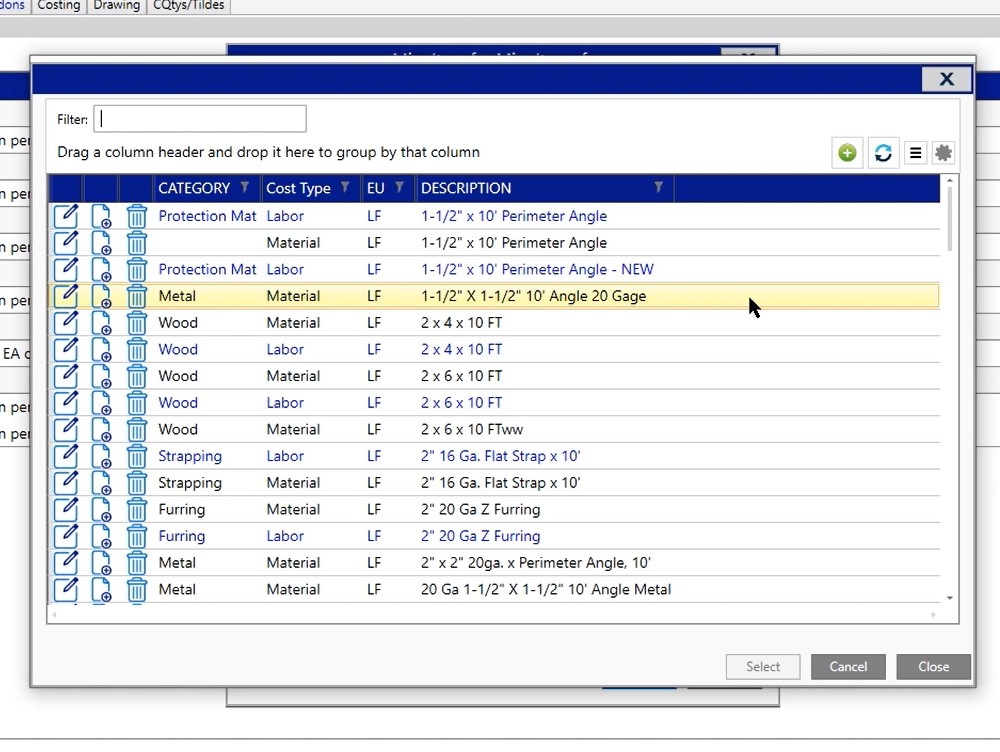
In this example, if you search “sound caulk”, there are quite a few options out there. Here, you’ll notice that there are two different colors for these results; blue & black. The difference is material versus labor. If you had any subcontractors, equipment or others for your cost type classifications, those would come in in their own respective colors as well.
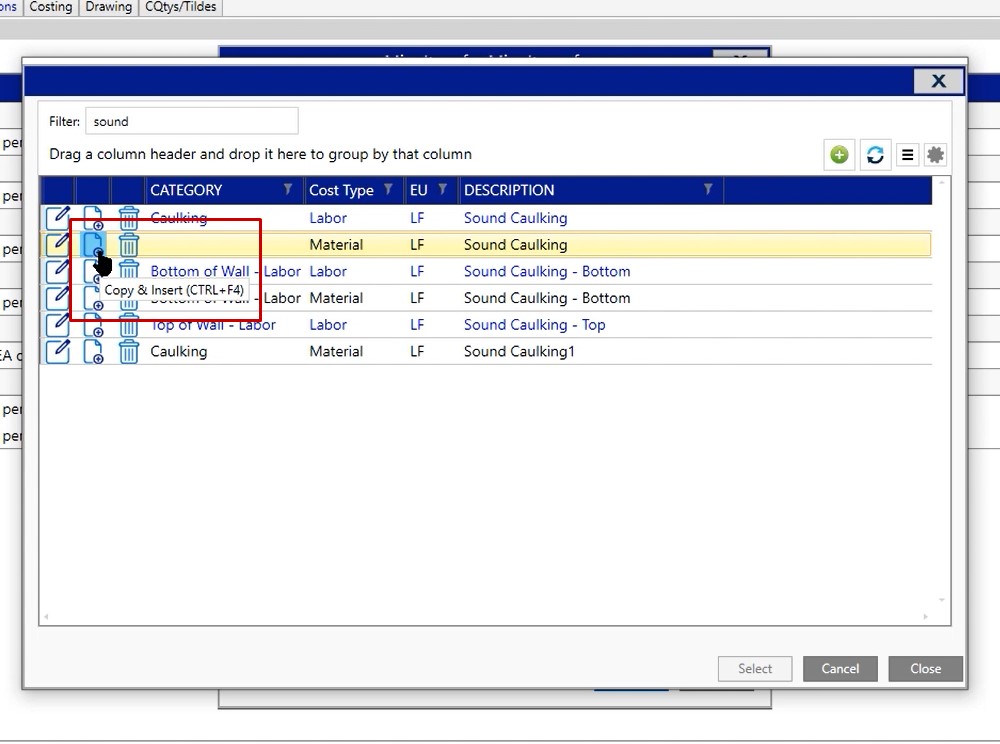
Create a New Item – Option 1
If you have something similar, you can click the copy and insert tool.
Create a New Item – Option 2
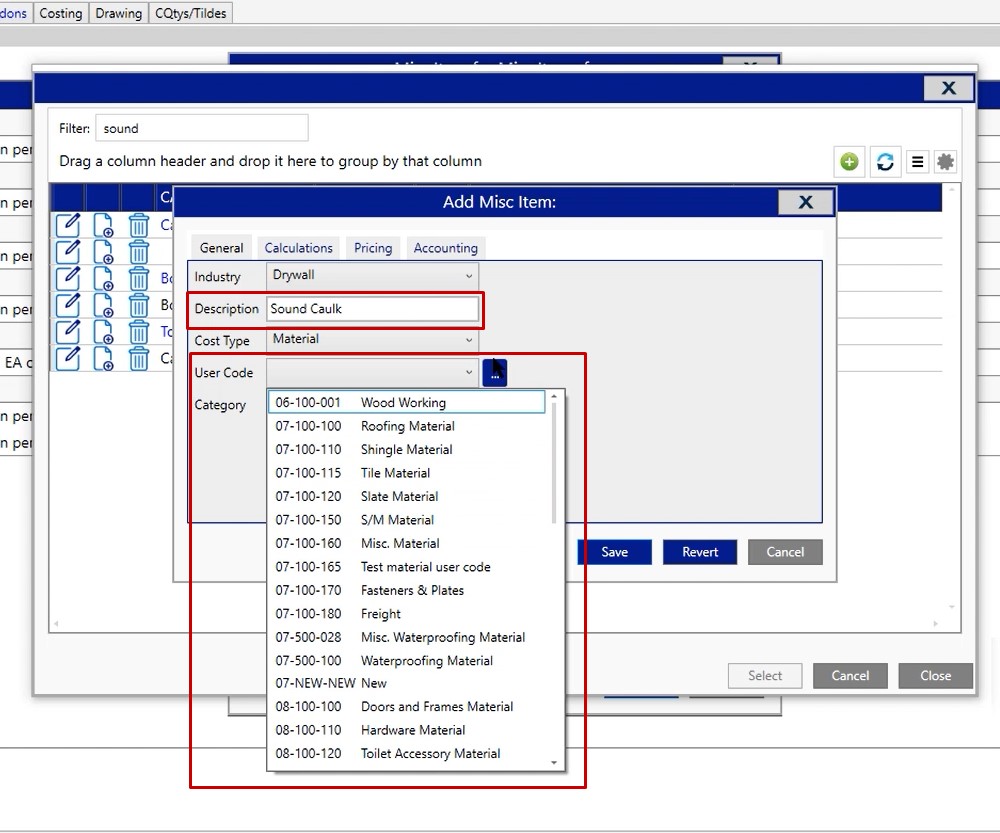
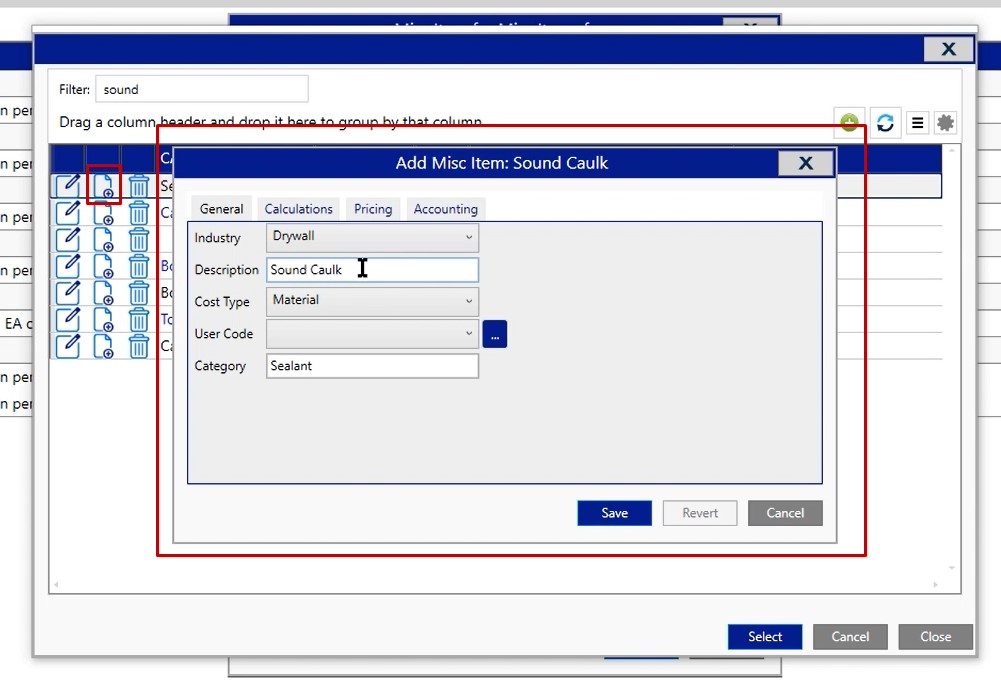
However, if you don’t have anything similar, you can simply click the green plus icon in the upper right hand corner.
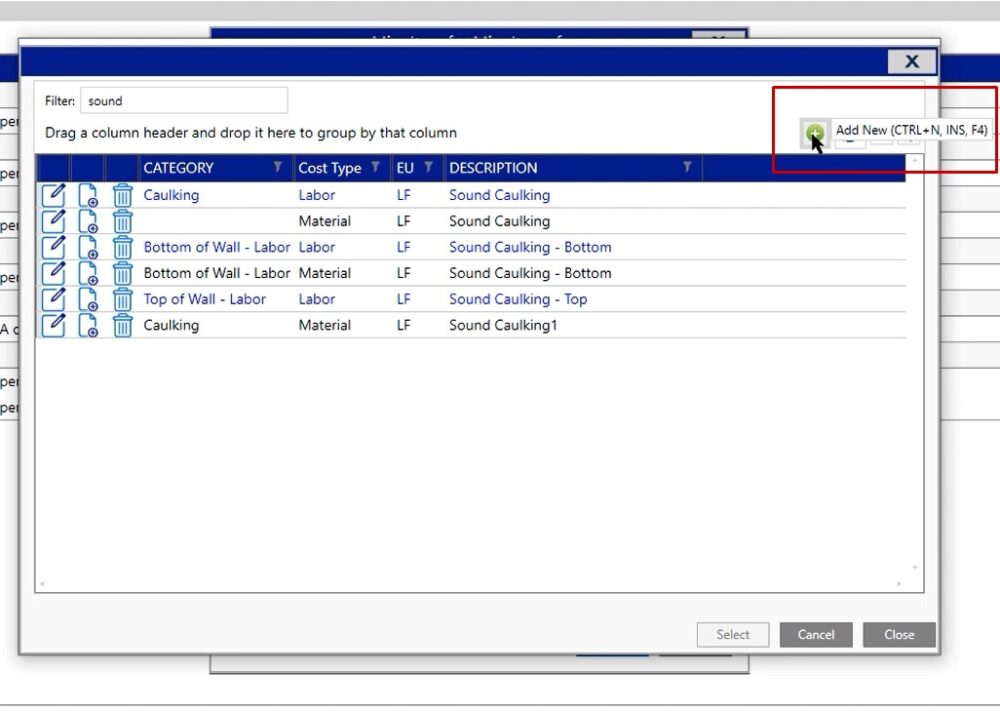
Once you click on the plus sign, you will get a dialog box. You don’t need to change the industry.
The description, cost type and the user code are the three fields that you really care about when creating this miscellaneous item.
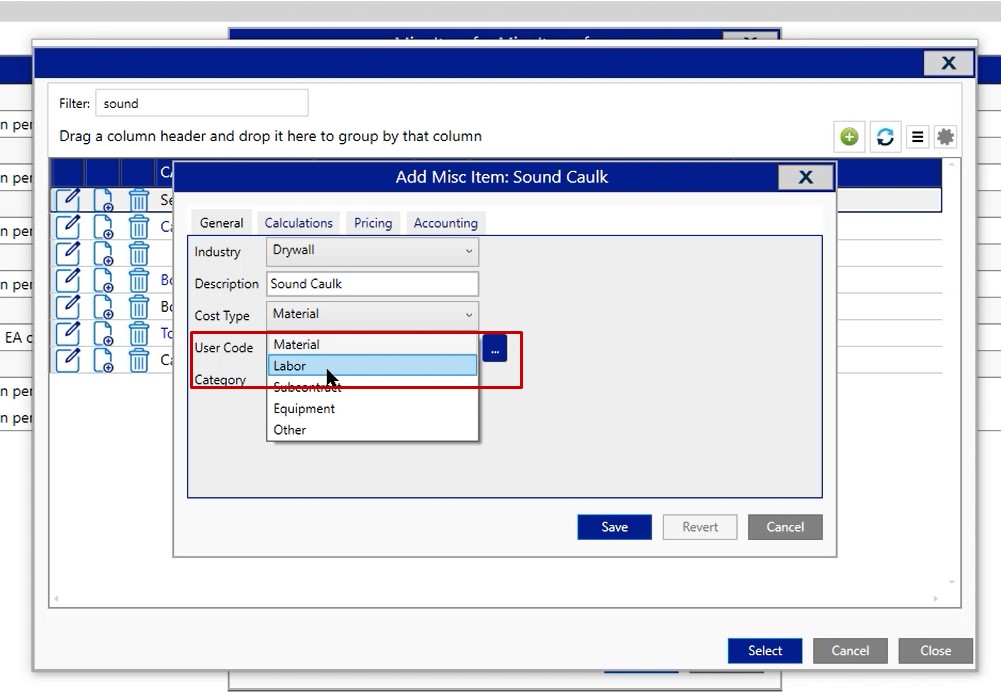
After we’ve put in the description, we have to decide if this is a material or is this a labor? In this case, we’re going to build this as a material.
Next, select your user code by clicking the dropdown. This way, you’re only looking at material information. If you were to click the blue dotted square, it is going to show you everything that has been added into the database, whether it’s material, labor, subcontractors, equipment or other.
Choose your material, then select a category. When you are finished, click save.
No other tabs were modified because we are going to run the wizard on this item when we get out to the pricing screen. That is going to allow you to customize how that product is ordered, as well as how that product is priced.
Labor Line – Option 1
You’ll notice that we only have the material item. So we want to create the labor line.
- Click the copy and insert button.
Once you click copy and insert, you’ll notice that your description is the same.
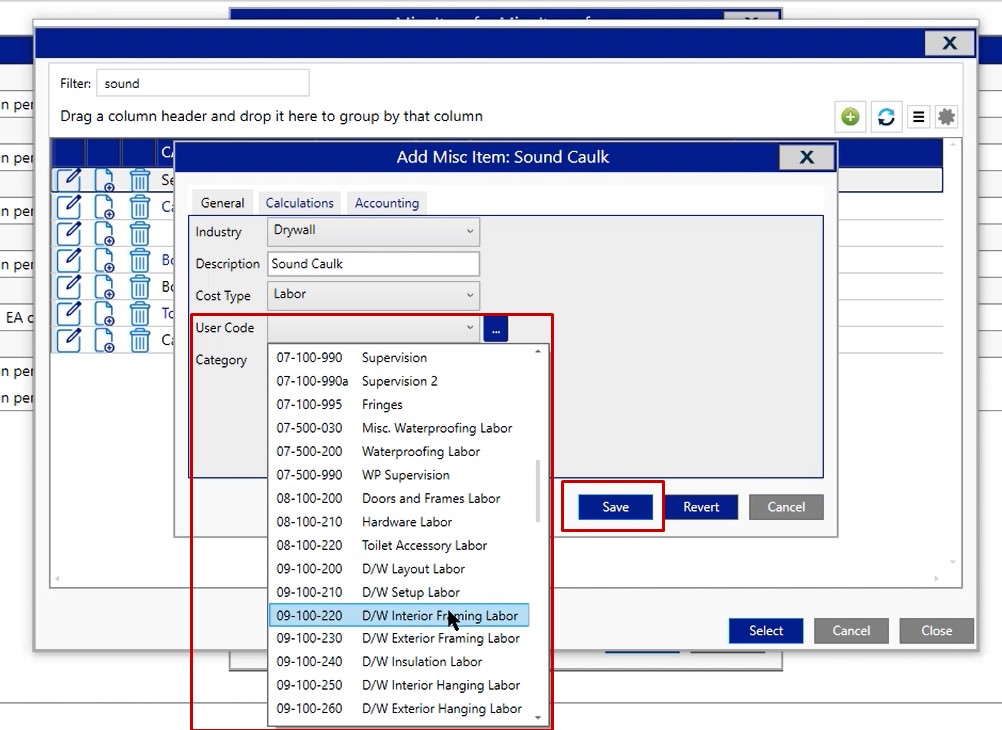
- Click the cost type dropdown, choose labor
- Click your user code drop down and assign this to wherever you need it to go. In this case, we’re going to scroll all the way down and we’re going to select framing labor, then click save
Labor Line – Option 2
Click the green plus and create from scratch like we did above for material
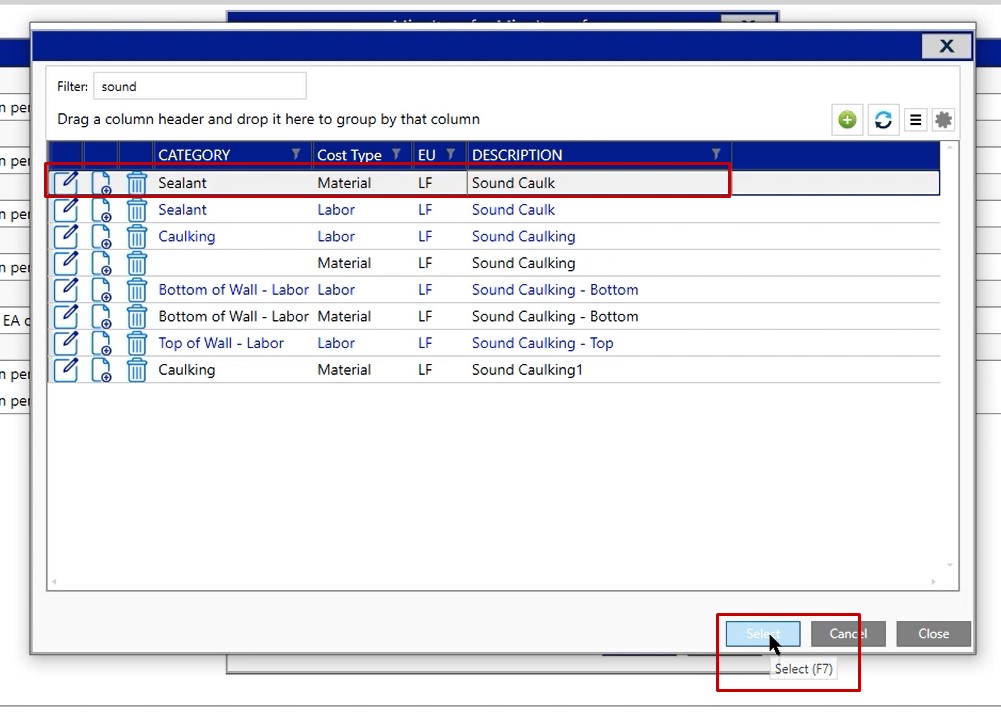
Now that you’ve created your item, left click, choose select, and that will pull your item into the miscellaneous description category.
Once the miscellaneous descriptions have been filled out, you can check the summary to verify that you’ve added in everything that you need this to have.
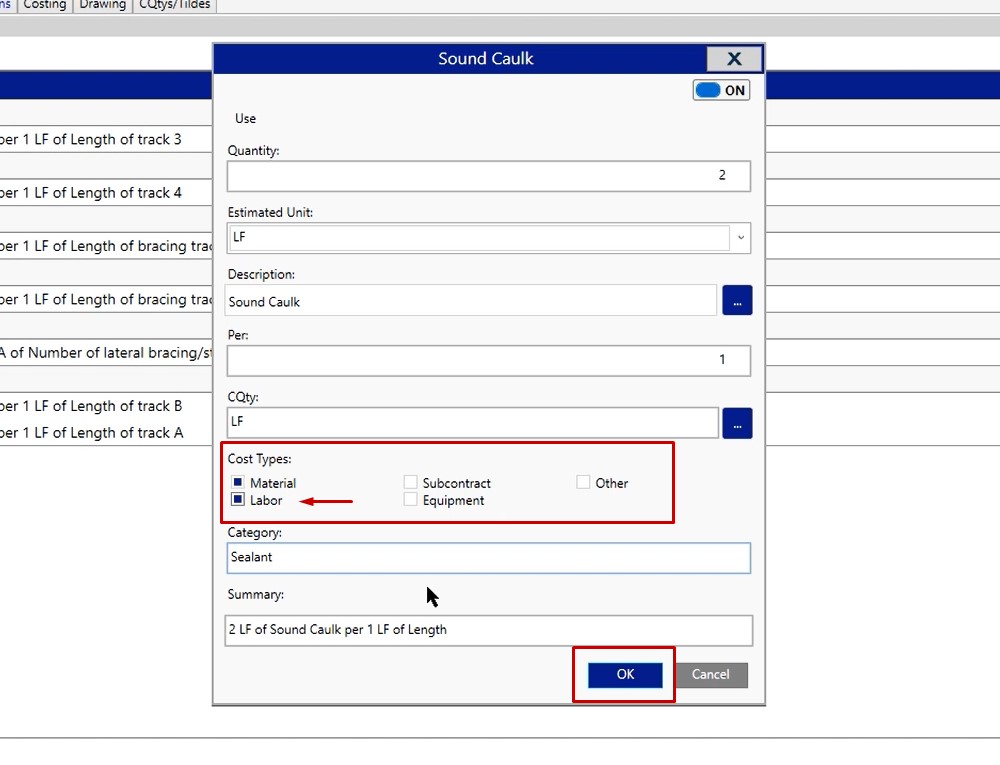
In this example, you’ll notice that we have a cost types option. Whatever cost type you have selected is what you’re going to currently be providing inside of this condition.
In this case, we only have material selected. However, we created a material and a labor line. Click the labor checkbox to assign that labor as well. Once you have all of your cost types selected, click OK.
If you view this on the pricing screen, you’ll now see your material line of sound caulk.
On the labor screen, you’ll also see that labor line for sound caulking as well.

If you have any additional questions or you get stuck in any way while you’re trying to build your miscellaneous item, please feel free to give us a call on the tech line. We’d be happy to help you out and assist you in any way we can.