![]() Estimating Edge’s team of experienced construction professionals and software engineers have developed the industry’s smartest takeoff and estimating software solutions for competitive estimates.
Estimating Edge’s team of experienced construction professionals and software engineers have developed the industry’s smartest takeoff and estimating software solutions for competitive estimates.
Don’t just estimate faster. Estimate better.®
- /
- /
- /
File Save As Template
Overview:
In construction parlance a template is a pattern we use as a guide, the same is true when discussing EDGE Templates. We take a typical job and set it up to match a manufacturers criteria. After we have thoroughly tested this test job we then Save it as a job template. Why? So we don’t have to keep rebuilding the same job over and over again.
If we have done our job and thoroughly tested the job Template we do not have to spend a lot of time building the job and we can spend a lot of time analyzing and value engineering the job.
Job Templates lend themselves to contractors that have to do a lot of work according to manufacture specifications. The vast majority of Job Templates are used by the Roofing Industry. At first blush Templates may seem like they are for every contractor, they are not. Interior, Painting, Fireproofing, etc. will generally use what is called Master Groups as opposed to Job Templates.
Job Templates are an asset for Roofing contractors who have to build Groups to meet manufacturer specifications. No other contractor has to follow these types of guidelines to meet warranty specs.
To save a job as a Template, you first need to create and test a job that you would like to keep as a Template job. This includes creating a scenario, section, page and then building all of the conditions that you wish to be included in this template. Once all of the conditions are built and you have tested to make sure that all of the materials and labors are correct, you’re now ready to Save as Template.
Before you save this job as a template, you need to first make sure that you do not have any quantities left or stored in the test job. If you leave quantities in the test job and click save as a template, then those quantities will always appear when you go to use this template in the future. The easiest way to remove is to follow the steps below:
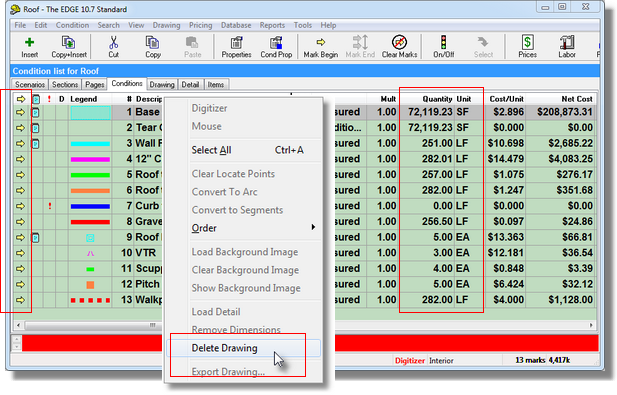
1. Mark all of the Conditions. Click on the Drawing menu. Click on Delete Drawing, this will delete all quantities from the job.
2.If you have manually entered or have overridden quantities that should not be in the template, you will need to go into the quantities button of the condition properties and make sure that you zero these quantities out as well.
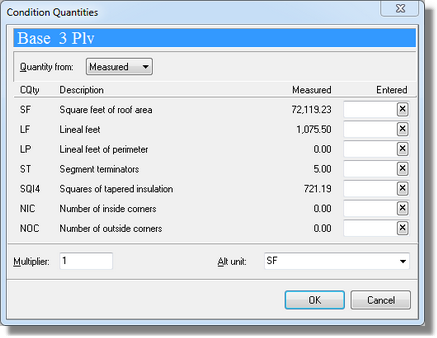
If you press the F2 key on your keyboard the Condition Quantities windows opens. When clearing quantities from this window click on the X inside the box two things happen, first, the quantity is zeroed out and second, the From column on the Condition List screen changes from Overwritten to Measured.
Click OK when finished.
3.To now save the job as a template, you need to:
a)From the Condition List screen click File | Close, this will return you to the Bid Grid screen.
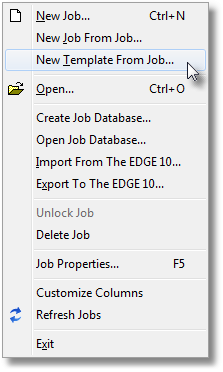
b)Click File | New Template From Job …
4. The Template Properties dialog will now open up asking you to name the template. The only required field to be filled in is the Bid Name field. Once named click OK to close and save the new Template.

5.The template has now been created and added to the Bid Grid Job Templates grid as you can see in the example to the right. Notice the Show field is to Job Templates.
