![]() Estimating Edge’s team of experienced construction professionals and software engineers have developed the industry’s smartest takeoff and estimating software solutions for competitive estimates.
Estimating Edge’s team of experienced construction professionals and software engineers have developed the industry’s smartest takeoff and estimating software solutions for competitive estimates.
Don’t just estimate faster. Estimate better.®
- /
- /
- /
- /
EDGE 10.7.7 Network Job Database Install
Prerequisites
- Have admin access to server where the database will be located.
- Download Microsoft SQL Express 2012 with advanced services
- Install SQL Express and SQL Management studio
Best Practices
- You will need to have a folder location on your network for your EDGE Job files.
- This must be a location that is mapped the same for all users and has full read/write access for
all users. - Do not put network job files on a local C drive or they will not be accessible to others.
- Backup the job folder on a regular basis.
- When naming your network job database include the word “jobs” in the name. This will avoid confusion between the estimating database and the jobs database.
- A dedicated SQL instance is recommended for EDGE Databases. Name the instance so that it is clear what it is for (example; EDGENETWORK)
Installing SQL Express on a server
- Double click setup.exe from the download
- Click on the “New SQL Server stand-alone installation”
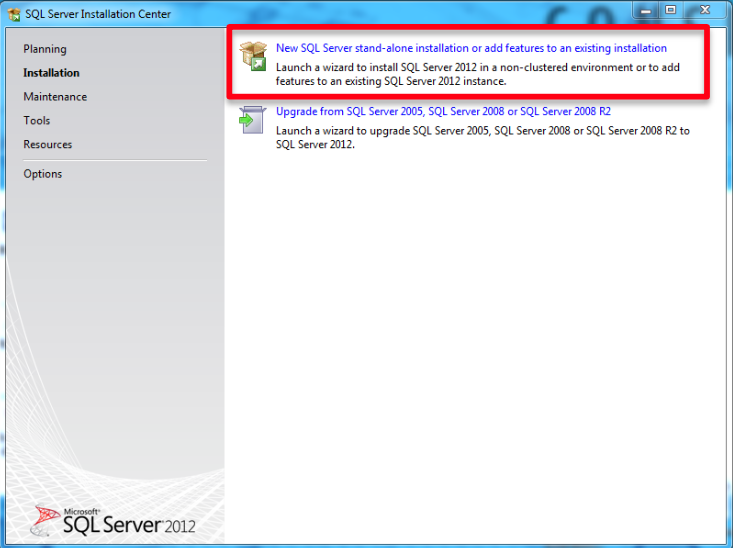
- Click next
- Click Install
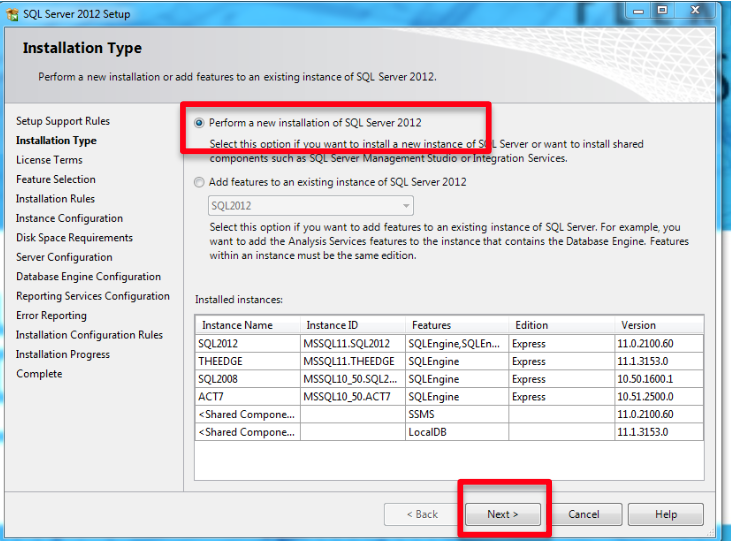
- Check “Perform a new installation of SQL Server 2012” and then click Next.
- Accept the license terms and click Next.
- Everything will be checked by default, click on the “Unselect All” button.
- Check “Database Engine Services”
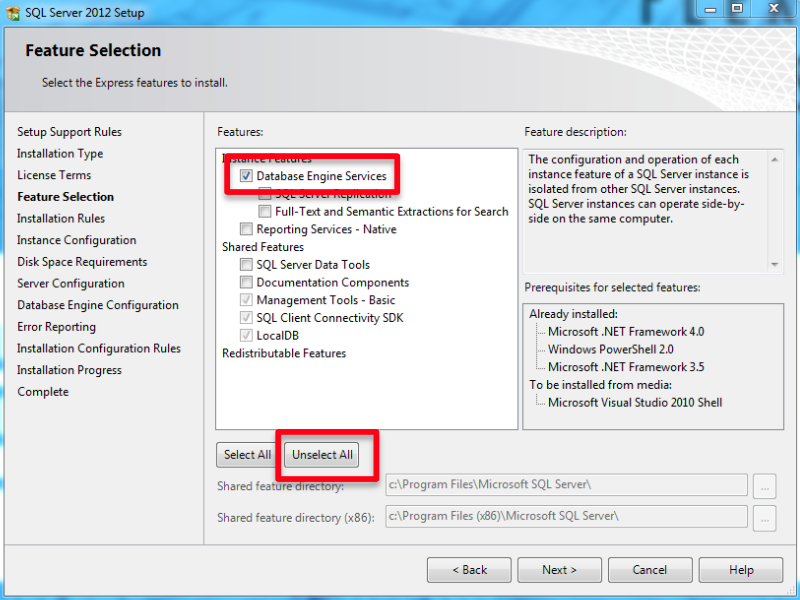
- Click Next
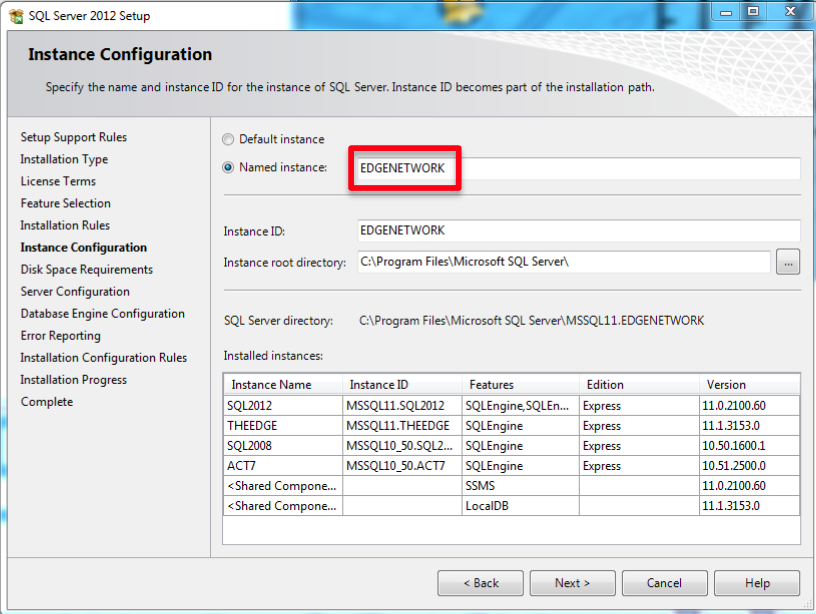
- Check the “Named Instance” box.
- Delete the name “SQLExpress” and type a new name (it is recommended that you name the
instance “EDGENETWORK”)
- Make sure both services are set to “Automatic”
- Click Next
- If this is a domain network, select “Windows authentication mode”. If it is a peer to peer network, select “Mixed Mode” and create a password. make sure document the password
- Under “Specify SQL Server administrators, click Add
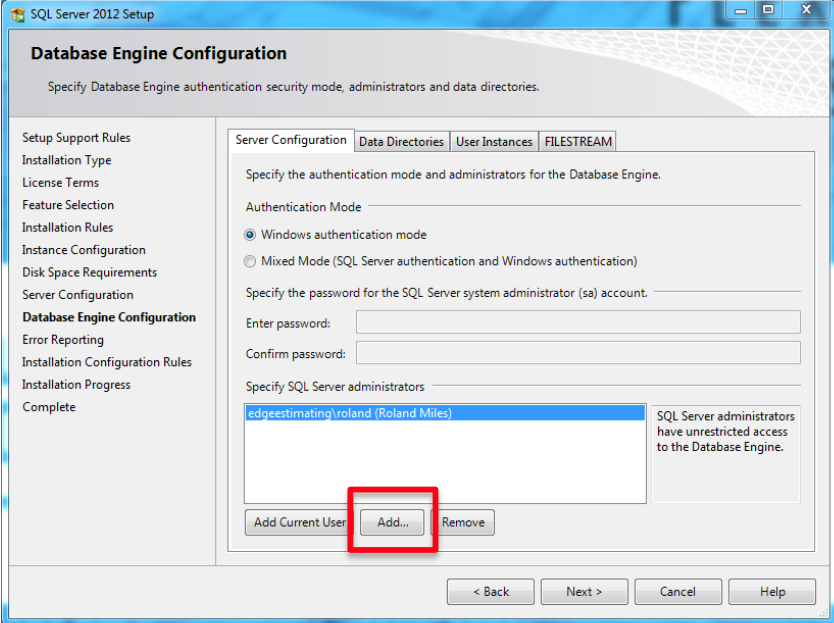
- Type in “everyone”
- Click OK
- Leave everything else default and click Next.
- Click Next again.
- The installation should now begin, this may take several minutes to complete.
- Click Close.
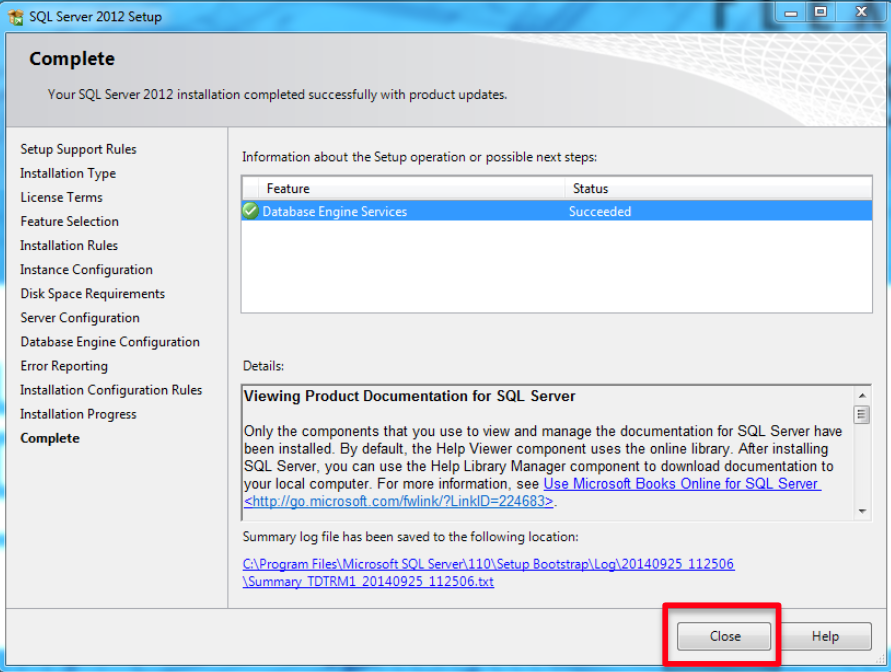
- Close the SQL Server Installation Center window.
Configuring SQL
- Click Programs\Microsoft SQL Server 2012\Configuration tools\SQL Server Configuration Manager.
- Click SQL Server Network Configuration.
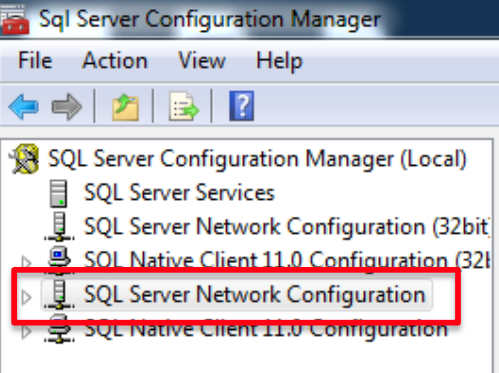
- Double click on “Protocols for EDGENETWORK” (or the name you gave your instance)
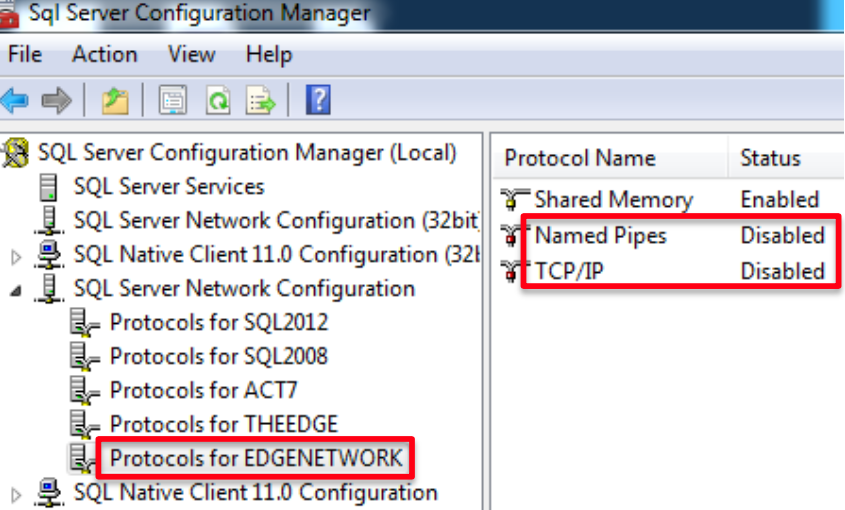
- Right Click on “Named Pipes” and choose “Enable”
- Right Click on “TCP\IP” and choose “Enable”
- Click “SQL Server Services”
- Right Click on SQL Server (EDGEJOBS)
- Click “Restart”
- Click on “Protocols for EDGEJOBS”
- Right Click on TCP\IP
- Click Properties
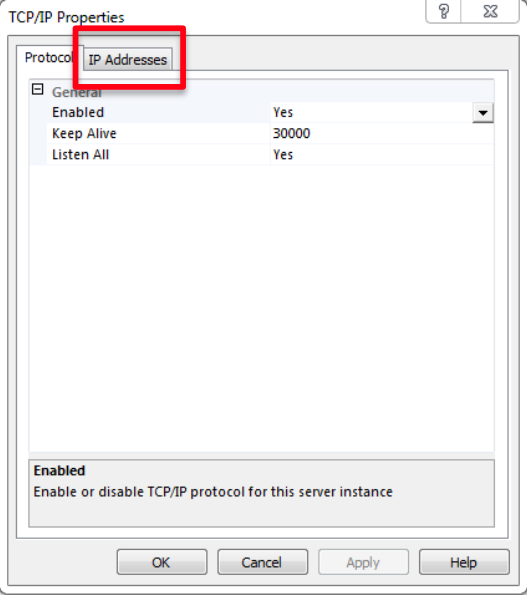
- Click the “IP Addresses” Tab
- Scroll to the bottom of the list and make a note of the TCP Dynamic Ports number.
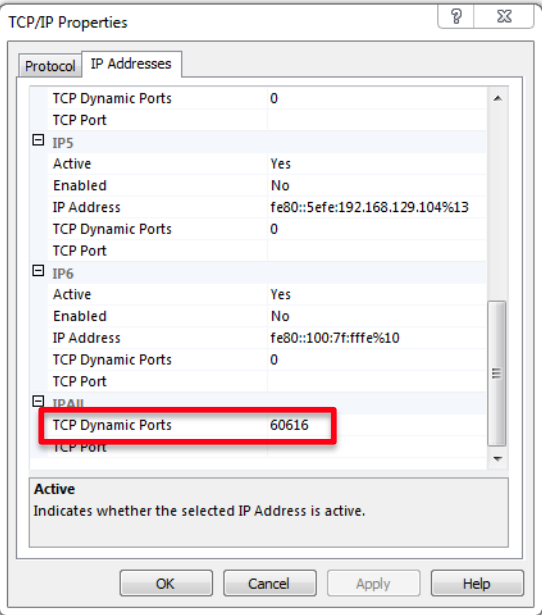
- Open the server firewall and put an exception for the port number noted in step 13.
Creating the Job Database
- Copy the Utility folder from The EDGE installation package onto the server desktop.
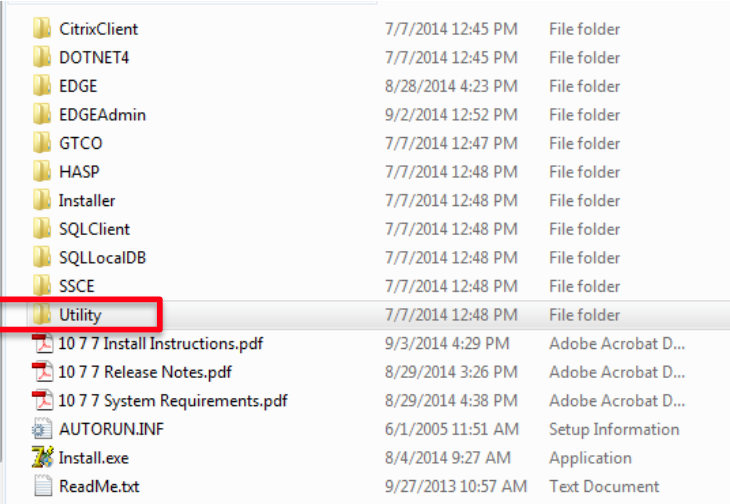
- Open the Utility folder and double click CreateJobDatabase.
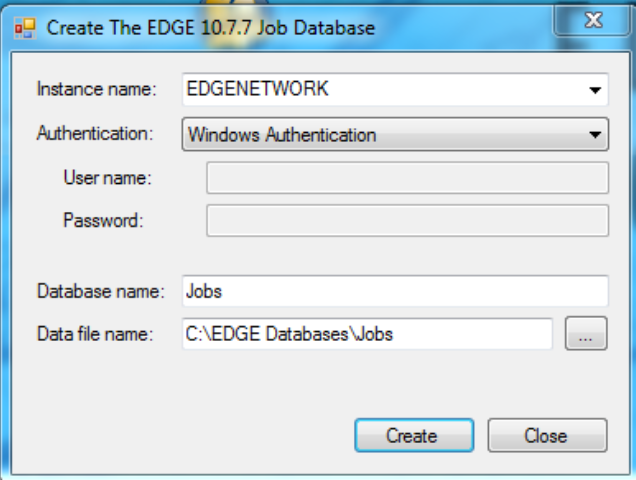
- Click on the dropdown for Instance name and select the EDGEJOBS instance.
- Choose Authentication based on how you installed the SQL instance.
- Click the ellipsis button (three dotted button) for Data file name
- Choose the folder you want your jobs database in (it is recommended to create an EDGE Jobs
database folder). In the File name box enter the database name and click Save. - In the Database name box enter the database name.
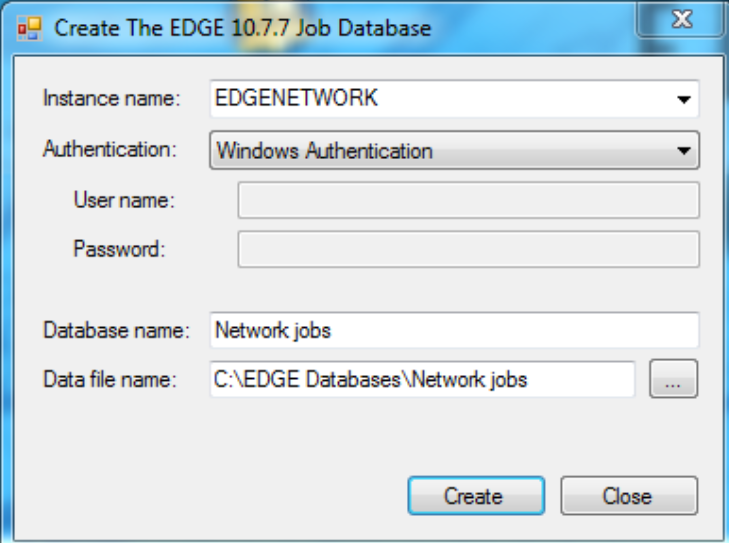
- Click Create.
You are now ready to open your network jobs database on the workstation.