 Estimating Edge’s team of experienced construction professionals and software engineers have developed the industry’s smartest takeoff and estimating software solutions for competitive estimates.
Don’t just estimate faster. Estimate better.®
- /
- /
- /
Area
How to Digitize – Area
Area:
![]()
The great thing about using The EDGE is that the program does not care what the shape is or how complex it is, you will instantly get an answer as soon as you click Enter, ceilings, walls, slab, roofs, decks are all quantified using Area, to measure area. You can start drawing (also know as digitizing) at any point on the drawing. You can digitize in a clockwise or counter clockwise direction, it makes no difference. Area is the only drawing function in The EDGE that will close itself, it has to or else it could not calculate an area.
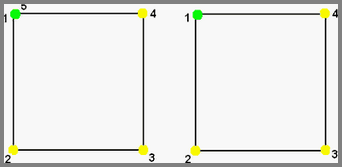
Below are two identical examples. For the one on the left the estimator started at point 1 (Green handle) and then digitized (touched) points 2, 3, 4 and 5. He then pressed the Enter key. The EDGE calculated the Area of the square. For the one on the right the estimator started at point 1 and then digitized points 2, 3 and 4 and then pressed the Enter key.

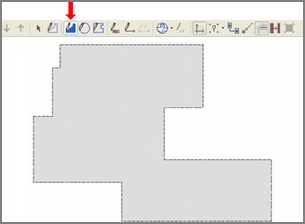
To draw using Area, click on the Area icon:

Above, is an Area that was digitized using The EDGE. The Digitizer pen or Stylus touched all of the corners one at a time. The estimator pressed Enter and the Area closed itself, the legend of diagonal hash marks was added to the digitized area producing the drawing you see above,
Note:
There are two modes in which lines can be drawn in The EDGE, they are Ortho Mode and Non-Ortho Mode. Ortho is a CAD type drawing function included with The EDGE.
When Ortho Mode is turned on the Ortho icon will look like this when is it turned off it will not have a border around it. When Ortho Mode is turned ON the program will only draw Vertical and Horizontal lines that are 90° to each other. It will not draw angles or curves. Ortho operates on a toggle switch click on it once and it turn on, click on it again and it turns off. You can also turn Ortho on and off by pressing the 3 key on your keyboard. If you are drawing in Ortho Mode you can temporarily tun it off by pressing and holding down the Control (Ctrl) key.
See also:
Deducting An Area

